|
British Army: 2300AD
Introduction The British were latecomers to the practise of integrating combat walkers into their combat units. Initial scepticism about reliability and efficiency were the main reasons, although knee jerk conservatism was also a factor in some quarters. However by equipping with the excellent Bowman, undoubtedly the best combat walker in service, their experience with these systems against the Kafers has been very favourable. Consequently the British have now whole-heartedly embraced the CW concept, and are pushing on with further developments.
From inside the shell of a shattered building Colour Sergeant Davidson of the Green Howards' Combat Walker Platoon waited nervously for the arrival of the leading crapauds. The small New African town of Chilthwaite dominated the mouth of the valley through which the crapaud advance was passing towards the regional capital of Carmody. Major-General Fredericks had deployed most of the 2 YORKS battle group, universally known as the Green Howards, to delay the aliens as long as they could. Now four days later the Yorkshiremen had nearly been forced out of the town. But they had taken a fearful toll on the crapauds. Davidson waited, warm inside the armoured shell of his Bowman combat walker, covering the withdrawal of the forward outposts. The infantrymen were falling back from the rubble that had sheltered them. Across open ground towards the next line of defence, the sun glinting off the bayonets of the riflemen. Scattered mortar rounds fell on the abandoned positions. Suddenly a wave of crapauds swept over the rubble trying to catch the retreating troops. Machine gun fire chattered in short bursts, chopping down the leading crapauds. Then the riflemen joined in, and the plasma gunners, their fire disciple and marksmanship stopped the alien rush in its tracks. Their carapaces made it difficult for the crapauds to fire from the prone position, so they stood or kneeled, and became easy targets. Few made it back to the rubble. "Hello X-ray Two Zero Bravo." A voice
panted over the radio. "This is Golf Three Zero
Alpha." It was the platoon commander of the
retreating troops caught in the open. "We're pulling
back now. We need cover. Over." The Bowman moved out of the building, keeping its bulk covering his left hand arcs. He turned his sensors over to active, scanning the rubble, shapes resolved out of the smoke. Muzzle flashes winked in murk, the millimetre wave radar picked out the distinctive shape of weapons. Davidson punched a command into a keypad, and the Bowman's left arm rose and began to track. The machine gun began to fire short bursts at each of the shapes, then moving on to others, keeping their heads down. From off from the right similar fire was coming from the concealed machine of Corporal Johns, Davidson's number two. As the machine gun buzzed away on auto-track, Davidson searched for targets. He found one crouched behind a pile of bricks, sheltering from the machine gun fire. He swung the target reticule across the crapaud and triggered the big shoulder mounted plasma gun. The bolt slashed through the brick work and vaporised the torso of the cowering alien. He searched for more targets, and the infantry fell rapidly back towards the school house. The hail of machine gun fire forced the aliens to hunker down, and the plasma gun did the rest. It was a system they called 'zapping' and it was hugely successful. The crapauds knew it and tried to find better cover, leaping up only to be slashed down by the heavy bullets. "X-ray Two Zero Bravo, this is Golf Three Zero
Alpha. We are at position MALPLAQUET. Over." "Colour! The gun's down." Johns was fighting the panic in his voice. Davidson felt it too. "Keep moving Corporal!" Without the second machine gun there wasn't enough fire going down to hold the crapauds, and the conspicuous walkers would be easy targets. Davidson triggered his forward grenade launchers, the extemporised fittings fired a clutch of concealment grenades to his front, filling the area with smoke. Davidson could see through it with radar, but the crapauds couldn't. A couple moved and he nailed them with the machine gun, but more of them began to move behind the smoke. Davidson made a decision, and switched radio nets. "Hello Mike One Two. This is X-ray Two Zero Bravo. Fire Mission. DF Alpha Zero One Zero Two. Enemy platoon. Neutralise for five minutes. Over." The artillery woman's voice came straight back too him, repeating what he had said. He continued to back up, firing as he went, glancing anxiously at the ammo supply counter. Twenty five kilometres away at the other side of the pass, a Mercer self-propelled gun of C Battery, 79 Regiment Royal Artillery, tracked its turret right and towards the sky. It then began to fire, slowly, only a round every ten seconds. "Hello, X-ray Two Zero Bravo, this is Mike One
Two. Shot. Over." A timer appeared on his displays
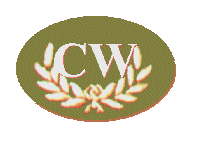
and began counting down. Back on the other side of the pass, the first Mercer fired its sixth shot and another gun, two kilometres away, fired its first. The Mercer moved out of its position and headed quickly to a nearby alternate. The crapauds had little artillery left for counter-battery fire, but it paid not to be sloppy, so each gun relocated after every shoot. The artillery ETA countdown was racing the ammo counter towards zero, and it won. The first 175mm high explosive shell smashed into the ground, nearly blowing Davidson's Bowman off its feet. It was only 170 metres from the impact, well inside the danger area, but the shrapnel only bounced off the armoured shell of the Bowman. The crapauds weren't so lucky. Davidson and Johns returned back to the new line, to rejoin the surviving seven machines of their platoon. As they did the high explosive shells continued to pulverise the enemy. Extract from 'The Green Howards in New Africa' by Captain F. D. D. Harris MC, from his article in the RUSI Journal. August 2304 The British Army has watched the rest of the world's militaries embrace the Combat Walker with some suspicion. Within the army much time was spent debating their worth on the modern battlefield. These initial debates came to a close with the realisation that the Combat Walker as it then stood was too unreliable for battlefield use and required inordinate amounts of maintenance and support. However the decision was taken to open an experimental wing at the School of Infantry at Catterick. The Combat Walker Trials Unit (CWTU) was equipped with a mixture of early combat walkers and spent much of its time out on the Catterick Training Area waiting for recovery vehicles to repair its broken down machines. Eventually with the emergence of the French BH-21, and rumours of Bavarian development of the Kz-VII the British judged the time to be right to really try to integrate the Combat Walker into its combat operations. And at the same time launched a preliminary design project for an indigenous design. The CWTU was shuttled around the various British Army training areas to take part in a variety of exercises. It was swiftly found that the deployment of CW with armoured or armoured infantry battle groups added little to the capabilities of those units. However when added to Light Role battalions the CWTU could bring increased firepower and tactical flexibility to their operations. As such the CWTU was still hampered by the excessive maintenance requirements of the CW units. At the same time as the CWTU was conducting these exercises, the Central Asian War was coming to a close. Both the French and more important numerically, the Japanese and Manchurians, deployed CW in some numbers and lessons had been learned from these operations. The French CWs had been used as mobile strong points in the line, down to platoon level, to stand against the wave attacks of the Manchurian Army against defensive positions. In attack the CWs would deploy just behind the advancing infantry, casualties were high as the Manchurian soldiers almost exclusively targeted the CWs. However the BH-18 had suffered from high levels of breakdown, and its single machine gun armament was considered too light. Unfortunately the much more capable BH-21 was not available for deployment until after the war. The Japanese Army on the other hand embraced the combat walker as an integral part of its military as early as practicable in the late '60's. They were a valued part of its all-arms tactics, and played a sizeable role in the peacekeeping operations that followed. The often derided Manchurian Army also had some excellent CW units, indeed the first deployment of Manchurian CW during the Slaver War went largely unremarked upon in the west. The Manchurian CW in Central Asia were most often used for spearheading close-quarter assaults on French defensive positions or in commando operations (especially the excellent Colonial CW Regiment from Chyuantii) and consequently suffered heavy casualties. However the few CW duels that developed with French units usually ended in favour of the more heavily armed Manchurian units. The CTWU thus made its recommendations for small numbers of high capability CWs to be included in light role battle groups. These CWs had to be heavily armed, reasonably armoured, and have reasonable manoeuvrability. Additional requirements were to be ease of maintenance, and the capability for the pilot to start and get into the CW on his own. These requirements were agreed by the Ministry of Defence and the Government and Project Walking Tank was set underway. (The name was a attempt to convince the rest of the world that the British CW would be a much more cumbersome beast than it actually was, and included mock-ups of four legged units.) A number of Bavarian Kz-VII combat walkers were purchased for the transition of the CWTU to become the Combat Walker Wing (CWW) of the School of Infantry, and develop its training and curriculum. At the same time the design for the Bowman was finalised and prototypes constructed. The short, sharp War of German Reunification, confirmed the British Army's doctrinal thinking about CW operations. The swift operations of the German forces that was stopped only at the Somme utilised only a few CW assets. However, the German Army used them alongside mechanised and light infantry forces to crack the intricate French defensive redoubts in the border area. In fact the work of these units on either bank of the Rhine and in the Ardennes that opened the way for the Panzers was overlooked for several years. French CW forces deployed in line divisions took heavy casualties and only those in urban areas and defensive positions proved their worth. Some notable walker-on-walker engagements took place, with the more experienced French units generally gaining the tactical initiative over their less numerous German opponents. In 2293 the first classes from the 1st Battalion, Queen's Own (Seaforth) Highlanders and 33 Commando RM arrived at Catterick to become the first students of the Combat Walker Wing. They graduated in August of that year and were deployed back to their battalions with their brand new Bowman Combat Walkers. In three years all of the United Kingdom's Light and Commando Brigades had been equipped with the new weapon system. The basic unit of organisation for CWs in the British Army is the platoon. This consists of 24 combat walkers, organised into three 6 CW sections (call-signs 21, 22 and 23), and a 6 CW headquarters element (20). The Section is sub-divided into three pairs, (known as Charlie, Delta and Echo) the lead pair is usually commanded by a sergeant, the second by a corporal and the last by a lance corporal. The remainder of the sections personnel are private soldiers (call-signs C1, D1, E1 etc.). The headquarters section is similarly organised into three pairs. The platoon commander is a senior NCO, usually one with plenty of CW experience if possible. In some battalions an officer may command the platoon, but this is quite unusual. The CWWO (Combat Walker Warrant Officer, (see-whoa)) is normally a WO2, and addressed as Sergeant-Major, and takes the call sign 20 A. His second in command is another experienced NCO, normally a colour-sergeant (c/s 20 B). The last NCO in the headquarters element is a signals specialist, normally a corporal (c/s 20 C), who pilots a Bowman C. The other soldiers in the section are normally private soldiers and take call-signs after their commander (20 A1 etc.) Each Light Role battalion, including battalions in Light, Airborne and Gurkha Brigades, and RM Commandos of 1st Commando Division have a Combat Walker Platoon. Typically the CW Platoon is a part of the Support Company. A pre-War innovation was the provision of two CW platoons to the Hostile Environment battalion based on Crater, to replace the Anti-Tank and Mortar Platoon, and these units proved somewhat limited in the guerrilla fighting against the Vah. However in the later operations on Crater the CW proved immensely useful during the campaign in the inhospitable Dayside, where conventional infantry were very limited, and led to the organisation of the Provisional Battlegroup of 8 platoons of CW. This unit was later disbanded and its platoons returned to their normal battalions, but the Crater Defence Force created a similar force, the Armoured Commando, of six CW troops (platoons) to replace it. In addition to the 24 front-line pilots, the platoon has around 16 further soldiers. 12 of these are soldiers from the battalion undergoing training in CW operations before being sent to the CWW. These soldiers act as armourers and basic maintenance men for the CWs, in addition they provide perimeter protection and drive the CW Platoon's back up vehicles. They may also be called upon to pilot a CW if the regular pilot is unable to continue through injury or fatigue. The remaining 4 soldiers are from the REME (Royal Electrical and Mechanical Engineers) and carry out more advanced repairs on the machines. The training of a British Army CW pilot in peacetime is lengthy and extensive. Before applying for the platoon, the soldier will normally have spent around three years in a rifle company and be a competent infantryman. Others will have served in the Recce or Support Companies. He will then spend a minimum of six months in the CW Platoon, learning his trade with the battalion before being considered for the CWW training package. Some spend up to six years with the platoon before being sent to Catterick, others never make it and are returned to their original companies. Competition for the few slots at the CWW is fierce. Whilst with the CW Platoon the soldier will learn all the basics about CW operation, maintenance, weaponry and tactics, and will become a competent pilot in his own right. The CWW course at Catterick is now nine months long and is one of the most testing anywhere. The staff, 2/3 Army and 1/3 Royal Marines, are all at the top of their profession and accept only 100% effort from their students. As all students are trained and experienced soldiers, a huge premium is based on self-discipline throughout the course. As always in the modern army much work is based out in the field, as well as in the maintenance bays and simulators. The course has a 1/3 failure rate, mainly through the mental stress put on students and failure to keep up with the technical aspects of the course. Some failures return to take the course again, but many return to their original platoons and some leave the army altogether. A graduate of the CWW is entitled to wear the CW badge on the left wrist of his working dress jumper and 'dress' uniform. The CW badge consists simply of the initials CW inside a set of laurels, but it is a matter of immense pride to those who have won the right to wear it. Below: CW Badge
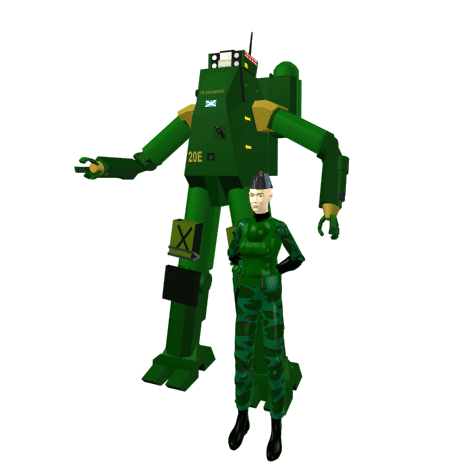
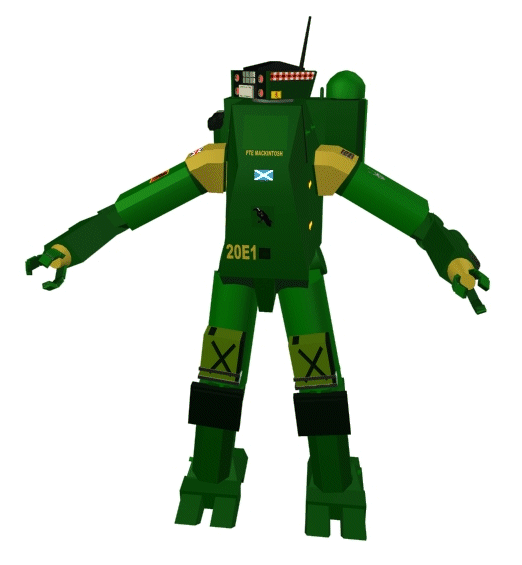
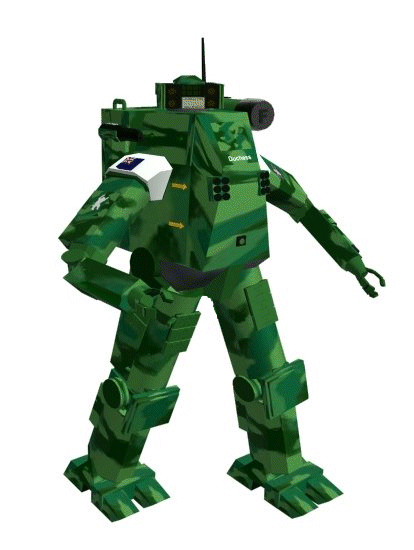
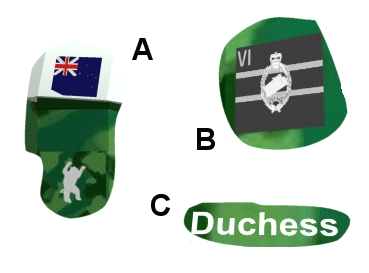
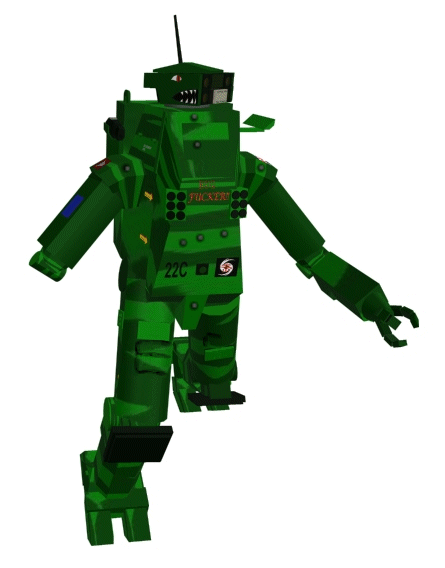
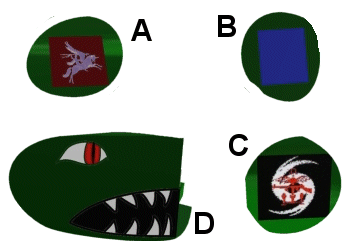
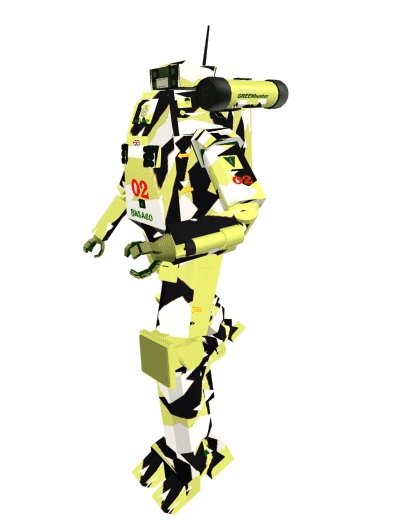
The CWW also runs a separate course that lasts for six months. The Combat Walker Tactical Instructors course (CWTI, or 'cutie') is open to experienced soldiers from the CW Platoons. At least four years of CW experience is advised before undertaking the course. One graduate of the course described it as trying to pass SAS Selection whilst studying for a masters degree in mechanical engineering. Pressure, both physical and mental is applied throughout the course and is responsible for the 50% failure rate of the course. Most who fail tend to leave the army soon after returning to their unit. However the CWTI course produces CW operators who are both technically efficient and mentally indomitable. This has been proved time and again on exercises and in combat operations against the Vah along the French Arm. There are normally around 4 CWTI qualified personnel in each platoon, including usually the CWWO and 2 i/c. The CWTI are responsible for the units internal training and operational efficiency, and often undertake stints as instructors at the CWW. A CWTI wears his CW badge on his right arm, either on his wrist if a Private (uncommon) or above his rank chevrons if an NCO. The heavy fighting on the French Arm has led to many British CW replacement pilots being trained by ad-hoc battalion or brigade cadres in the field, as units have been unable to return personnel to Earth to undertake the normal array of courses. In response to falling technical standards the commander of II Corps based on Beta Canum has created the 'Archer' Combat Walker Battle School, based in the ruined garrison town of New Aldershot. The Archer course is taught by CWTI pilots seconded from the battalions, these are all hardened veterans of the fighting and have produced an exceptionally testing month-long course concentrating on imparting vital lessons about fighting the Vah. Despite of the battered nature of some of the equipment the Archer course has produced some excellent results, and those few Archer graduates who have gone on to start the basic and CWTI courses at CWW have excelled on the tactical phases of the course. Such is the success achieved that the II Corps commander has begun to insist all new CW pilots coming into theatre undertake either an indoctrination or full course at Archer. As well as British CW pilots Archer has started to train local New Africans and some Crater personnel. 'Note: Archer is the British Army's anglicised version of the Kafer word Aach*ah or smart barbarian and was a widely used term with British forces and especially within the CW community who often used it as a callsign indicator' The current British doctrine is to use CW assets as integral parts of their light role battle groups. This is different to the normal French or American doctrine of deploying CW en-masse in separate units. The operations of the crack I/4e RIE and I/8e RPIMa on Aurore are typical of French tactical usage, that is broken into small assault units for special operations and in deep penetration raids into Vah territory. The close integration of British CW units also prevents the unhelpful 'Them and Us' attitude sometimes shown between pure CW and pure infantry units operating together. The British Army uses its CWs as supporting assets while in open ground, with a section of 6 CW deployed with each rifle company. The section is then capable of providing direct fire support and light anti-tank capability, without slowing down the rifle company. They will normally be deployed some four 'tactical bounds' (a distance that varies between 200-800 metres depending on the ground) behind the company's lead elements, from where they can provide in-depth fire and are a valuable reserve. Once under fire the CW allow time for fire support teams to be deployed into their proper positions. In addition CW are used for carrying additional loads for the infantry, normally a reserve of ammunition and anti-tank rounds, which takes much of the burden away from the leading infantry. It is also normal for CW to convey wounded soldiers out of killing areas back to medical aid. It is in close combat conditions, woods and urban areas, where the CW really comes into its own. Its sensor array and heavy armament can make light work of both finding the enemy and killing him. The CW platoons of the 1st and 2nd Light Brigade made great use of this on New Africa in urban fighting. A CW would use its sensors to scan a giving building and then use its plasma weaponry to pick off the Vah sheltering inside it. Supporting infantry would then be able to clear the building, with much lighter casualties than normal. CWs also were used to create breaches in fortified buildings, and even as mobile assault ladders for troops to gain access to upper floors. In these situations the CWs operated in the front line and even out in front of the infantry, but always with their close support. A recent innovation in British tactical use of CWs has been the introduction of the Bowman -D model with the ASLAN Pathfinders. The Bowman -D is a stripped down and up-powered version of the original Bowman and has been designed with planetary assault operations in mind. The D has a fully sealed environmental system (like all Bowman's), and has been designed with its own drop capsule. This allows the D model to be deployed at the same time as the light Pathfinders and provide them with close fire support which is not normally available to them. 6 Commando Brigade is now being equipped with Bowman-D's as each Commando rotates for refit. Pathfinders have conducted operation drops on both Kimanjano and MoD sources have also made references to other UK Special Forces using the Bowman-D in the fighting. Different methods of tactical deployment and mobile support have also arisen in different circumstances. On Crater a mixture of methods were used in the Dayside Campaign, for rapid response purposes against Kafer activities a mixed CW-infantry reserve was usually retained at Rimview alongside a number of interface capable space planes detached from the RSN. These trans-sonic capable aircraft were capable of swiftly delivering this force into the combat area as well as carrying a respectable weapons payload to support the ground troops. However most operations on the Dayside were conducted from secure base areas (usually recovered mines) and the troops would be delivered by large ACV 'Carriers'. The Carriers were converted from mine ore-transporters and were usually capable of supporting operations for respectable periods, as the campaign progressed these carriers became increasingly heavy armed. Often the 2nd RGL Light Company's specially converted CW carrying Rifleman APC's were used in conjunction with the carriers (and actually carried on-board the larger Carriers) in order to allow the CW units to penetrate deeper into Kafer territory. On Beta Canum during the early phases of the war the CW's were used in a much more conventional manner, although pre-war the Light Brigades had procured some mobile All-Terrain Vehicles these were little used in combat except for rear-echelon support. In this early phase the British forces tried to exploit whatever airmobility resources were to hand in the face of Kafer orbital superiority. Several times CW units were actually parachuted into operational areas, for which extemporised fittings and parachutes had to be manufactured, although tilt-wings were the preferred method of airmobility. CW platoons (especially that of 1 RGJ) were sometimes used as back-up QRF for special forces tasks also often by parachute, although casualty rates for these missions were always steep as normal scales of support were not available and recovery of damaged CW much more difficult. During mopping up operations ACV APC's of a number of different origins were converted to carry the walkers. These experiences on Beta Canum and Crater are being taken into consideration as new operational doctrine is drawn up. Despite the British Army's initial reluctance about the Combat Walker as a weapons system it has been used in large numbers during the fighting in the Beta Canum Cluster. In fact, including replacements over 600 Bowman CW were deployed in action on Beta Canum, Kimanjano, Crater and Joi. Beta Canum The conflict on BCV-4 was the longest running which involved British forces during the Kafer War and fell into several phases. During the initial invasion following the disaster on the French Continent caused by the cutting away of the Beanstalk, there were six British CW platoons present belonging to the battalions of the 1st and 2nd Light Brigades. These units took part in the heavy fighting at Bayview and the Chill River Valley during March 2302, and in operation 'Dynamo Bear' in April. The end of May saw airlifted CW units spearheading the attack on Adrian, and then providing the rearguard during the withdrawal. As well as these major offensive and defensive actions the combat walkers of the two brigades were continuously undertaking raids and QRF tasks, before finally taking part in the decisive 2nd Battle of Uethan. Also present at that battle were the CW Platoon of the Queen's Own (Seaforth) Highlanders who were part of the famed Joint Vogelheim Brigade. More British CW assets were brought into the continuing fighting when the ASLAN Pathfinders used their Bowman-D's during the unopposed landings on New Africa that brought fresh heavy forces from Earth to Beta Canum. The CW equipped 2nd RGL Light Company and CW platoons of the 6th Assault Brigade also arrived along with nearly 100 new Bowman's to replenish the badly depleted Light Brigade CW platoons. These new units were used in the bitter mopping up operations across the British and German Continents, although most of the newly arrived units were swiftly withdrawn to undertake other tasks on Crater, but not before the Para CW's of the Assault Brigade played a leading role in the Battle of Greenford. The RGL CW also gained experience that would later prove valuable when the Rickendorf Safe Place was stormed. Kimanjano British involvement on Kimanjano was brief and restricted to covering the retreat of the surviving French, American and Azanian troops from the planet at the end of the campaign in January 2302. The ASLAN Pathfinders were launched on their first combat drop and found the firepower of their Bowman-D's very handy in staving off the Kafer vanguards and scouts. The 2nd Battalion The Parachute Regiment was dropped in from the assault ship HMS Normandy to form the rearguard on part of the perimeter. 2 PARA faced armoured columns as well as dismounted infantry and artillery attacks from the Vah, and the CW platoon distinguished itself in many actions during the 3 day operation. However Sergeant Ken Sanderson of the Pathfinders was to be posthumously awarded the Victoria Cross after stalking and killing a Kafer Behemoth with his section of Bowman-D's. It was the first VC to be awarded to a regular British Army soldier for nearly 150 years. Crater Crater, little more than a mining outpost, was poorly defended with only a battalion of British regular troops (uniquely equipped with 2 CW platoons) as its garrison. The exposed position of the only city of Rimview and its vulnerability to orbital bombardment and invasion caused it to be abandoned with little fighting, although elements of the Coldstream Guard's 2nd CW Platoon were caught up in a covering action when protecting the retreat of the Governor General and suffered nearly 50% casualties. The subterranean guerrilla fighting that followed the Kafer occupation little suited the CW's and there personnel usually fought dismounted. However several ambushes in large caverns and raids on the surface utilised the impressive firepower of the Bowman. After the Liberation the CW really came into its own. The Kafers had retreated to the inhospitable Dayside of Crater and fortified several mines and a part constructed Safe Place (named Krak des Chevaliers by a romantically minded officer). The lightly equipped Royal Marines and Crateran troops had real problems in assaulting these locations, as conventional infantry clearing outlying positions were hampered badly by the appalling conditions. Initial operations by the surviving Coldstream Guards CW were immediately successful, so they and the 2nd RGL Light Company and the CW platoons of the 6th Assault Brigade were grouped together in the ad-hoc Provisional Battlegroup to exploit the situation. The Provisional BG was an immediate success, although casualties in close-in fighting in the canals were often significant, and the unit played a key role in the eventual capture of Krak des Chevaliers. However the fall of Krak des Chevaliers was not the complete end of the Kafer threat, and when the British regulars withdrew to re-group the Crater Defence Force created the Armoured Commando to replace the Provisional Battlegroup. Equipped mostly with the battered, cast-off Bowman A Mod 1's of the regulars the Armoured Commando has nevertheless gone on to gain a fine reputation in continuing mopping-up operations. Joi The Kafer War came late to Joi, and the invasion force was smashed by a human space force counter-attack before the capture of the world could be completed. However substantial Vah ground forces had been landed in several of the colonies and these had to be rooted out. The 1st Gurkha Brigade had been deployed to Joi to replace its usual garrison and had prepared for a long guerrilla campaign in the event of invasion. The invasion never touched New Cornwall however and the Gurkhas and there CW were moved by lander to the German colony. At the same time British CW of the Queen's Own (Seaforth) Highlanders (who would later also see action on Beta Canum) were supporting all the units of the multinational Joint Vogelheim Brigade in fighting in the Japanese colony. Most CW operations were of a conventional nature almost identical to the original ideas of the CWTU, with CW giving intimate fire and sensor support to light infantry units. Casualty rates were generally low, but significant over the two month campaign on both continents. Gurkha CW pilots were notable for their willingness to engage the Kafers at close quarters with an almost reckless bravery. A practice that won many bravery awards and killed many pilots, but saved many casualties amongst the infantry. Current Operations Today most of the British Army's CW strength is concentrated on Beta Canum, with the Light Division and Assault Brigade (although the latter unit is often on deployment). The platoons are rebuilt under battle-tested and experienced leadership and are in excellent shape to take the fight to the Kafers in the future. With the exception of some Kz-VII's in service with the CWW and with OPFOR RGL, all British CW units are equipped with the excellent Bowman combat walker produced by Vickers-Royal Ordnance at Leeds. The Bowman has had a long gestation period from when CW first became viable. Vickers-Royal Ordnance kept a design team working in close co-operation with the CWTU at Catterick, producing paper designs and the occasional trial prototype. When the go-ahead was finally given for the Bowman, the design had gone through countless refining iterations and benefited from the mistakes of those countries who brought CWs into service much earlier. The key design features of the Bowman were to be: ease of maintenance, ease of use (including preparation) and manoeuvrability (especially the ability to fire from prone positions). These have mostly been achieved, the Bowman is remarkably reliable for a CW, with a Cat 1 failure every 48 hours. Substantially better than the BH-21 its nearest rival. Basic maintenance can be performed by its pilot and a small REME team can change the suspension/drive system in a matter of hours. The Bowman is also easy to pilot, the pilot 'stands' inside the machine, (secured by a harness) with his feet just above knee level on the machine. His arms are inside the CW's upper arms, and his 'waldo' gloves either controlling the arms or acting as a data input devices. The Bowman then reacts to the movements of the pilot, piloting the Bowman is somewhat tiring and requires a high level of physical fitness. The Bowman is capable of a flat out sprint of just under 30 km/h but a more sustainable (increasing endurance fourfold in some tests) 14 km/h is its normal cruising speed. The Bowman is also capable of crawling and firing non-arm mounted weaponry from the prone position. All Bowman CW have a extensive sensor suite. It has six COS (Combat Optics Systems) packages, four mounted in pairs on either side or the 'head', one to the rear of the head, and one mounted at the 'navel'. The COS has an audio pickup, and a multi-mode optics set (capable of 1x to 40x magnification, image intensification and thermal imaging). The multiple mounts allow the Bowman's computer to track multiple targets as well as maintaining all-round surveillance. Also mounted in the head are centimetric and millimetric radar sets, a shotgun mic, and a little used spotlight. In the feet are seismic sensors, that in active mode are used to check footing but can also be used passively when stationary. Mounted in each arm is a small extendible boom with a sensor unit, which can be deployed to watch around corners without exposing the bulk of the CW. The Bowman has also has a comprehensive communications array consisting of a main unit with a 200 kilometre range and capable of operating on multiple frequencies with in built encryption. There is also a secondary set with a 20 km range. The communications suite has both standard and directional antennas and has military standard D-23 data link capability. This means that tactical data from Company or more often Battle group level can be sent direct to the CW unit. The basic Bowman also retains a rudimentary ECM jamming suite, but this is rarely used except at very close quarters due to its lack of effectiveness against more sophisticated systems. The Bowman's four computers are mounted either side of the CW's spine, behind the pilots back. These are sophisticated, solid state Black Arrow VT7 units that control all of the units functions. If these are disabled the Bowman has a backup system of ROM chips, which provide a much reduced capacity (the CW becomes incapable of crawling or running) but allow the unit to return to have the units replaced. The Bowman's twin power units are mounted in the lower legs, and each of them provides 9 hours of endurance. Although in emergencies both power units can be brought on line to provide extra short term performance. The power units are normally recharged in place, but can be removed and replaced for a quicker turn around. The power system is linked to the combined drive/suspension frame that moves and supports the unit. This is a more sophisticated system than used in other CWs, but so far has proved to be slightly more reliable. It should be noted that the drive system of the Bowman is substantially more powerful than that mounted on the Kz-7, (66% higher) and produces the Bowman's excellent performance. The armour shell of the walker uses the usual layered approach common to light armoured fighting vehicle design, including ceramics, diamond meshes and ballistic fabric spalling layers. The outer shell of the Bowman is covered in radar absorbent materials, has a computer controlled isomorphic camouflage scheme and several layers of emission masking, similar to that it use on starships. Loops for foliage are provided at the shoulders and head to try and break up the shape of the walker. Heat is vented from the rear back pack and through the feet, a thermal dam is also mounted in the backpack and can cut all thermal emissions to near zero for an hour if the unit remains stationary. Camouflage netting and poles are carried in the rear backpack of the machine to cover the unit when stationary. The standard weaponry for the Bowman consists of three weapons systems. An arm mounted machine gun, an shoulder mounted plasma weapon and a shoulder mounted missile system. The Royal Ordnance L74A2 7.5mm multiple barrelled gauss machine gun is found on many vehicles as a coaxial armament, it is a highly reliable system with an extremely high practical rate of fire and a range of out to 1000m. In the Bowman the L74A2 is mounted in the lower left arm, and has a liquid cooling system that can keep the gun firing at its maximum rate for five minutes. The unit has an 2300 round box in the backpack, and a 300 round cassette mounted in the arm, two further cassettes are carried on the right leg. The box cannot be replaced by the walker itself, but another walker or an infantry man can replace it with another in a matter of seconds. It is common for the cassettes to contain different rounds from the box. The Royal Ordnance L647A1 plasma weapon is a licence produced version of the German A-4 Sturmgewehr (licensed from Bavaria almost 20 years ago) and is nearly identical to it. The only real difference is that the Bowman has a better recoil damping mechanism for its shoulder mount and the walker itself reacts to the firing of the weapon. This means that the Bowman can fire this powerful weapon on the move. The L647A1 feeds from a 80 round replaceable magazine in the backpack. The last weapon is the Green Hunter guided missile system, which fires from the left shoulder of the machine. Green Hunter has a range of 6600 metres and is effective against most targets except the front armour of modern tanks. Green Hunter can be fired in either fire-or-forget or guided mode, but must be stationary once fired in this mode. The Bowman carries four rounds, one in the mount and three in the backpack. The mount has recently been made capable of firing standard infantry LAW rounds. The pilot of a Bowman enters the walker through the raised front breast plate. The walker is left in the kneeling position and the pilot backs into it, placing his legs into the machine's upper legs. He the straps himself in and attaches the data and medical lines to himself. He then puts his arms into the walkers arms and activates the machine, closing the breast plate and activating the internal NBC systems. After a number of checks the unit is then ready to move. The pilot wears normal British Army ballistic fatigues, together with a special cuirass, helmet and 'waldo' gloves. It is also normal for pilots to wear Internal Security pattern chest webbing whilst inside the machine, this reduces the amount of room in the chest cavity but the soldiers prefer to have their equipment close at hand (the soldier's rifle is carried inside a holster in the right leg, whilst a small Bergen (rucksack) is carried in the walkers backpack) . The cuirass contains special medical sensors as well as a radio with data link so that certain walker functions can be controlled remotely. A collar is placed around the pilots right arm which is attached to a medical unit which can provide immediate medical aid to the pilot if injured. For comfort, food (in tube and bar form) and water is carried inside the interior of the walker. A tube is provided for sanitary purposes but its use requires a certain talent for contortionism in the pilot, so it is rarely used. The control displays in the Bowman are all directed through the pilots helmet virtual HUD system. The computers patch together data from the sensors and other inputs and provide a composite display for the pilot. Control of the computer can be done through various methods depending on the pilot, the include voice, eye-movement and the use of the waldo gloves as standard 'portacomp' 5-key keyboards. The pilots all use slightly different methods of data display and input and their individual settings are contained on chips in the helmet and cuirass and are read by the walker on start up. Incoming communications and warnings are given a 'vector' by the units audio systems, that is a communication from behind the unit will sound as if it is coming from behind the pilot. If it is close it will sound louder than if it is further away, these are subtle changes but obvious to the trained user and aid situational awareness. The Bowman's systems are very complex and allow a great deal of flexibility including the automatic firing of weaponry when certain parameters are reached. (This is even possible when the pilot is absent from the walker). There are 4 main Bowman models. Bowman A
Bowman B
Bowman C
Bowman D
Bowman A Mod 2 Stats Weapons: Machine Gun, Gauss, Gatling, 7.5mm, L74A2 Ordnance, Plasma, 30MW, L647A1 Green Hunter British Combat Walker Pilots British Army and Royal Marines CW pilots are all
either Veteran or Elite NPCs in the Ground Military. They
always have a Veteran skill level in Combat Walker Pilot
and Heavy Weapons. If they have attended CWW this skills
are at Elite level. CWTI trained pilots have at least
that level of skill (usually 4) and elite levels at
Tactics. |

