ENIGMA 2.0

A Windows-based emulator of the 3 rotor service machine.

Chances are you already know all about these fascinating machines otherwise it's unlikely you'd be visiting this site. I'm therefore going to save time (and web space) by not going into the history and details of the machine. There are so many excellent web pages already devoted to the subject I feel that I certainly have nothing new to offer. However, I would like to point you to some of my personal favourites by drawing your attention to the links section at the bottom of the page.

Below are the details of my program ENIGMA 2.0 for WINDOWS which emulates the 3 rotor service machine. The program is available for download here.

I've tried to make the program as intuitive as possible but here are some instructions should you need them.

  • Click on the SET ROTORS button. You will see combo boxes appear.
  • The top row will let you select which particular ROTORS to use in each position (e.g. I, II, III etc.)
  • The Second row of combo boxes are the RING SETTINGS Ringstellung for each rotor.
  • You will also note that you can select which REFLECTOR to use, either B, or C. The reflector selected is indicated to the left of the leftmost rotor window.
  • Once you've set these, click "DONE" and the rotor's will be set.
  • Lastly, set your rotor start positions.

Note: The completed rotor settings (including the plugboard settings) can be saved to, and loaded from disk.
The addition of the Plugboard, or Stecker Board to the ENIGMA machine greatly increased the number of possible key combinations which could be used. The ENIGMA for Windows program supports this modification. It is extremely simple to use.

Setting the PLUGBOARD.
  • The plugboard is accessed by clicking on the SET PLUGBOARD button on the main ENIGMA screen.
  • To create a letter diversion simply click on the letter you wish to divert, it will change colour.
  • Now click on the letter you wish to divert it to. The pair will become connected by a coloured line.
  • Repeat this process to create as many pairings as you require (obviously up to a maximum of 13!)
  • Note that the usual practice was for between 7 and 10 pairs. The remaining letters would be left unpaired, or Self-Steckered.
  • Click on DONE when finished.
  • Notice that the stecker diversions can be seen on the status bar at the bottom of the main Enigma screen.
Screenshot of the Steckerboard

The ENIGMA is now set up, so you can begin typing your message.
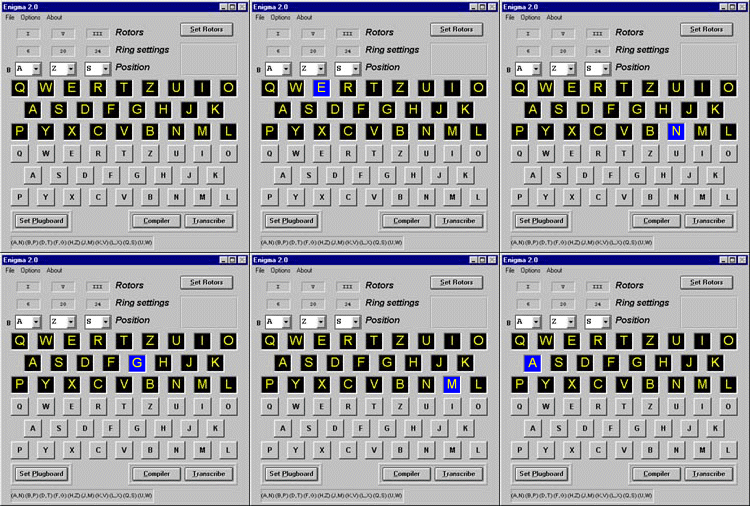
Use your mouse to operate the ENIGMA keyboard, you will see the rotors step and the encrypted letter illuminate on the lampboard. However, if you have a large amount of typing, then follow the instructions below on how to use the COMPILER.
The COMPILER (for want of a better name!) makes using the program a little easier, especially if you've a large amount of text to work with.
Screenshot of the Compiler
  • To access the compiler click on the COMPILER button on the main Enigma screen.
  • Type or paste text into the top (SOURCE) box.
  • Make sure you have set the required rotor and plug settings.
  • Click on the TRANSCRIBE button located on the main Enigma screen.
  • Encrypted / Decrypted text appears in the bottom (OUTPUT) box.

  • Note: Speed of Transcription depends on the message length and the speed of your system.
  • Text from either box can be cut or copied to the windows clipboard.

When pasting in plain text from another source be aware that the ENIGMA program will ignore any non-alphabetical characters.

For instance, if I have the following on the clipboard:

My favourite number is "69" What's yours?

On pasting into the compiler I would get:

MYFAV OURIT ENUMB ERISW HATSY OURS


Where numbers and punctuation have been thrown out.


Other Additions:

Notice on the menu of the COMPILER screen the options TEXT and VIEW. Click the TEXT option and you will get the following option: Spacebar Gives "X"
By checking this option, when (and ONLY when!!!) you are typing text straight into the compiler source box, pressing the space bar will generate an X which can be used as a word separator.
Spacebar gives X Checked


Paste Including X for spaces Menu Highlighted A similar function exists on the EDIT...PASTE INCL X FOR SPACES option.
This function parses any text which is being pasted in from the clipboard and inserts an "X" where a space had occured. This can be useful when using the CYPHERVIEWER.


Choosing VIEW... CYPHERVIEWER reveals the Cypherviewer screen.
The CYPHERVIEWER will parse any text pasted into its text box and remove ALL X's, replacing them instead with a space. This is really only useful if you've used any of the above options. But remember it removes ALL X's, so any words containing it will also be split!
View CypherViewer Option Selected

Download Enigma 2.0 for Windows


The program runs under Windows 3.1x or 95

As promised, a small sprinkling of ENIGMA related links..

And while you're at it, why not have a look at how the film is progressing:


You are visitor number: 


I would like to thank you from the deepest recesses of my bowels for visitng my humble page.
Any comments (especially nice ones) can be emailed to me at the following address:
andlaw@globalnet.co.uk
(c)Andy Lauwers 1998, 1999, 2000
XLKSE LWXVQ ZBZSF