


|
|
|
|


This chapter explains how keywords (functions and commands) are specified and used, then lists them all alphabetically. Use this chapter if you know which keyword you need to use, but need to check how to use it. Each one is listed with the specification of its usage, then a description of what it does.

|
Note that the example programs in this chapter do not include full error handling code. This means that the programs have been kept short and easy to understand, but may fail if, for example, you enter the wrong type of value for a variable. If you want to develop programs from these examples, it is recommended that you add some error handling code to them. See the ‘Error Handling’ chapter. |
CLS :PRINT "hello" :GET
Any commands may be strung together like this, and as many of them as you like, provided the total line length does not exceed 255 characters. The colon is optional before a REM statement.
CLS : PRINT "Press Esc"
Commands are specified as,
COMMAND argument(s)
where argument(s) follow the command after a space and are separated from each other by commas. The arguments may include:
For example, AT X%,Y% might be used like this: AT 15,2
Functions are specified as,
variable=FUNCTION(argument(s))
where variable may be f% or f& for a function returning an integer or long integer result, f for a function returning a floating-point result, or f$ for a function returning a string result. The argument(s):
E.g. f$=LEFT$(g$,x%) might be used like this: PRINT LEFT$(fname$,2)
If you use the wrong type of number as an argument it will, where possible, be converted. For example, you can use an integer for a floating-point argument, or a long integer for an integer argument. If the conversion is not possible - for example, if you use a floating-point number for an integer argument and its value is outside the range of integers an error will be produced and the program stopped. Some functions, such as GET, have no arguments.
Usage: a=ABS(x)
Returns the absolute value of a floating-point number that is, without any +/- sign for example ABS(-10.099) is 10.099
If x is an integer, you won’t get an error, but the result will be converted to floating-point for example ABS(-6) is 6.0. Use IABS to return the absolute value as a long integer.
Usage: a=ACOS(x)
Returns the arc cosine, or inverse cosine (COS-1) of x.
x must be in the range -1 to +1. The number returned will be an angle in radians. To convert the angle to degrees, use the DEG function.
Usage:
a&=ADDR(variable)
|
|
|
Returns the address at which variable is stored in memory.
The values of different types of variables are stored in bytes starting at ADDR(variable). See PEEK for details.
The maximum address is guaranteed to be less than 64K on the Series 3c, while it is not on the Series 5. The return type therefore must be a long integer on the Series 5, but may be an integer on the Series 3c.
|
|
See SETFLAGS if you require the 64K limit to be enforced on the Series 5. If the flag is set to restrict the limit, a& is guaranteed to fit into an integer. |
See UADD, USUB.
Usage:
|
|
pcelln&=ADJUSTALLOC(pcell&,off&,am&) |
|
|
pcelln%=ADJUSTALLOC(pcell%,off%,am%) |
Opens or closes a gap at off& (off%) within the allocated cell pcell& (pcell%), returning the new cell address or zero if out of memory. off& (off%) is 0 for the first byte in the cell. Opens a gap if the amount am& (am%) is positive, and closes it if negative.
The number of bytes allocated is restricted to 64K on the Series 3c, while it is not on the Series 5. The return type therefore must be a long integer on the Series 5, but may be an integer on the Series 3c.
|
|
Cells are allocated lengths that are the smallest multiple of four greater than the size requested. An error will be raised if the cell address argument is not in the range known by the heap. |
See ALLOC. See also the ‘Advanced Topics’ chapter.
Usage: any of
    r%=ALERT(m1$,m2$,b1$,b2$,b3$)
    r%=ALERT(m1$,m2$,b1$,b2$)
    r%=ALERT(m1$,m2$,b1$)
    r%=ALERT(m1$,m2$)
    r%=ALERT(m1$)
Presents an alert - a simple dialog - with the messages and keys specified, and waits for a response. m1$ is the message to be displayed on the first line, and m2$ on the second line. If m2$ is not supplied or if it is a null string, the second message line is left blank.
Up to three keys may be used. b1$, b2$ and b3$ are the strings (usually words) to use over the keys. b1$ appears over an Esc key, b2$ over Enter, and b3$ over Space. This means you can have Esc, or Esc and Enter, or Esc, Enter and Space keys. If no key strings are supplied, the word CONTINUE is used above an Esc key.
The key number 1 for Esc, 2 for Enter or 3 for Space is returned.
|
|
Constants for these return values are supplied in Const.oph. See the ‘Calling Procedures’ chapter for details of how to use this file and Appendix E for a listing of it. |
Usage:
|
|
pcell&=ALLOC(size&) |
|
|
pcell%=ALLOC(size%) |
Allocates a cell on the heap of the specified size, returning the pointer to the cell or zero if there is not enough memory.
The number of bytes allocated is restricted to 64K on the Series 3c, while it is not on the Series 5. The return type therefore must be a long integer on the Series 5, but may be an integer on the Series 3c.
|
|
Cells are allocated lengths that are the smallest multiple of four greater than the size requested. An error will be raised if the cell address argument is not in the range known by the heap. |
See ADJUSTALLOC, REALLOC, FREEALLOC. See also the ‘Advanced Topics’ chapter.
Usage:
|
|
APP caption,uid& |
|
|
APP caption |
Begins definition of an OPL application. caption is the application’s name (or caption) in the machine’s default language. Note that although caption is a string, it is not enclosed in quotes.
|
|
uid& is the application’s UID. For distributed applications, official reserved UIDs must be used. These can be obtained by contacting Psion Software plc (see the ‘OPL applications’ section in the ‘Advanced Topics’ chapter for details of how to do this). |
See also the ‘Advanced Topics’ chapter for more details of OPAs.
Usage: APPEND
Adds a new record to the end of the current data file. The record which was current is unaffected. The new record, the last in the file, becomes the current record.
The record added is made from the current values of the field variables A.field1$, A.field2$, and so on, of the current data file. If a field has not been assigned a value, zero will be assigned to it if it is a numeric field, or a null string if it is a string field.
Example:
    PROC add:
          OPEN "address",A,f1$,f2$,f3$
          PRINT "ADD NEW RECORD"
          PRINT "Enter name:",
          INPUT A.f1$
          PRINT "Enter street:",
          INPUT A.f2$
          PRINT "Enter town:",
          INPUT A.f3$
          APPEND
          CLOSE
    ENDP
To overwrite the current record with new field values, use UPDATE.
|
|
On the Series 5, INSERT, PUT and CANCEL should be used in preference to APPEND and UPDATE, although APPEND and UPDATE are still supported for Series 3c compatibility. However, note that APPEND can generate a lot of extra (intermediate) erased records. COMPACT should be used to remove them, or alternatively use SETFLAGS to set auto-compaction on. |
Usage: APPENDSPRITE time%,bit$(), dx%,dy%
or APPENDSPRITE time%,bit$()
Appends a single bitmap-set to the current sprite.
time% gives the duration in tenths of seconds for the bitmap-set to be displayed before going on to the next bitmap-set in the sequence.
bit$() contains the names of bitmap files in the set, or "" to specify no bitmap. The array must have at least 6 elements:
bit$(1) for setting black pixels
bit$(2) for clearing black pixels
bit$(3) for inverting black pixels
bit$(4) for setting grey pixels
bit$(5) for clearing grey pixels
bit$(6) for inverting grey pixels
All the bitmaps in a single bitmap-set must be the same size or ‘Invalid argument’ error (-2) is raised on attempting to draw the sprite. Bitmaps in different bitmap-sets may differ in size.
dx% and dy%, if supplied, are the (x,y) offsets from the sprite position to the top-left of this bitmap-set, with positive for right and down. The default value of each is zero.
|
|
On the Series 5, sprites are handled by the built-in Sprite OPX. See the ‘Using OPXs on the Series 5’ chapter for more details. |
Usage: a%=ASC(a$)
Returns the character code of the first character of a$.
For the Series 5, see Appendix D for the character set and for the Series 3c, see the character set in the back of the User Guide for the character codes. Alternatively, use A%=%char to find the code for char - e.g. %X for ‘X’.
If a$ is a null string ("") ASC returns the value 0.
Example: A%=ASC("hello") returns 104, the code for h.
Usage: a=ASIN(x)
Returns the arc sine, or inverse sine (SIN-1) of x.
x must be in the range -1 to +1. The number returned will be an angle in radians. To convert the angle to degrees, use the DEG function.
Usage: AT x%,y%
Positions the cursor at x% characters across the text window and y% rows down. AT 1,1 always moves to the top left corner of the window. Initially, the window is the full size of the screen, but you can change its size and position with the SCREEN command.
A common use of AT is to display strings at particular positions in the text window. For example:
AT 5,2 :PRINT "message".
PRINT statements without an AT display at the left edge of the window on the line below the last PRINT statement (unless you use , or ;) and strings displayed at the top of the window eventually scroll off as more strings are displayed at the bottom of the window.
Displayed strings always overwrite anything that is on the screen - they do not cause things below them on the screen to scroll down.
Example:
    PROC records:
          LOCAL k%
          OPEN "clients",A,name$,tel$
          DO
                CLS
                AT 1,7
                PRINT "Press a key to"
                PRINT "step to next record"
                PRINT "or Q to quit"
                AT 2,3 :PRINT A.name$
                AT 2,4 :PRINT A.tel$
                NEXT
                IF EOF
                      AT 1,6 :PRINT "EndOfFile"
                      FIRST
                ENDIF
                k%=GET
          UNTIL k%=%Q OR k%=%q
          CLOSE
    ENDP
Usage: a=ATAN(x)
Returns the arc tangent, or inverse tangent (TAN-1) of x.
The number returned will be an angle in radians. To convert the angle to degrees, use the DEG function.
Usage: BACK
Makes the previous record in the current data file the current record.
If the current record is the first record in the file, then the current record does not change.
Usage: BEEP time%,pitch%
Sounds the buzzer. The beep lasts for time%/32 seconds so for a beep a second long make time%=32, etc. The maximum is 3840 (2 minutes).
The pitch (frequency) of the beep is 512/(pitch%+1) KHz.
BEEP 5,300 gives a comfortably pitched beep.
If you make time% negative, BEEP first checks whether the sound system is in use (perhaps by another OPL program), and returns if it is. Otherwise, BEEP waits until the sound system is free.
Example a scale from middle C:
    PROC scale:
          LOCAL freq,n%                  REM n% relative to middle A
          n%=3                         REM start at middle C
          WHILE n%<16
                freq=440*2**(n%/12.0)       REM middle A = freq 440Hz
                BEEP 8,512000/freq-1.0
                n%=n%+1
                IF n%=4 OR n%=6 OR n%=9 OR n%=11 OR n%=13
                      n%=n%+1
                ENDIF
          ENDWH
    ENDP
|
|
Alternatively, sound the buzzer with this statement: PRINT CHR$(7). This beeps at a fixed pitch for a fixed length of time. |
|
|
Alternatively, sound the buzzer with this statement: PRINT CHR$(7). This produces a click sound. |
|
|
Usage: BEGINTRANS
Begins a transaction on the current database. The purpose of this is to allow changes to a database to be committed in stages. Once a transaction has been started on a view (or table) then all database keywords will function as usual, but the changes to that view will not be made until COMMITTRANS is used.
See also COMMITTRANS, ROLLBACK, INTRANS.
Usage: b%=BOOKMARK
Puts a bookmark at the current record of the current database view. The value returned can be used in GOTOMARK to make the record current again. Use KILLMARK to delete the bookmark.
Usage: BREAK
Makes a program performing a DO...UNTIL or WHILE...ENDWH loop exit the loop and immediately execute the line following the UNTIL or ENDWH statement.
Example:

Usage: any of
    BUSY str$,c%,delay%
    BUSY str$,c%
    BUSY str$
    BUSY OFF
BUSY str$ displays str$ in the bottom left of the screen, until BUSY OFF is called. Use this to indicate ‘Busy’ messages, usually when an OPL program is going to be unresponsive to keypresses for a while.
If c% is given, it controls the corner in which the message appears:
|
c% |
corner |
|
0 |
top left |
|
1 |
bottom left (default) |
|
2 |
top right |
|
3 |
bottom right |
|
|
Constants for these corner values are supplied in Const.oph. See the ‘Calling Procedures’ chapter for details of how to use this file and Appendix E for a listing of it. |
delay% specifies a delay time (in half seconds) before the message should be shown. Use this to prevent ‘Busy’ messages from continually appearing very briefly on the screen.
Only one message can be shown at a time. The maximum string length of a BUSY message is 80 characters on the Series 5, and an ‘Invalid argument’ error is returned for any value in excess of this. On the Series 3c, the maximum length is 19 characters.
Usage: BYREF variable
Passes variable by reference to an OPX procedure when used in a procedure argument list. This means that the value of the variable may be changed by the procedure.
See the ‘Using OPXs on the Series 5’ chapter for more details.
Usage: any of
    CACHE init%,max%
    CACHE ON
    CACHE OFF
CACHE creates a procedure cache of a specified initial number of bytes init% which may grow up to the maximum size max%. You should usually TRAP this.
Once a cache has been created, CACHE OFF prevents further cacheing, although the cache is still searched when calling subsequent procedures. CACHE ON may then be used to re-enable cacheing.
|
|
Series 5 procedures are automatically cached, so this command is not required. |
Usage: CACHEHDR addr(hdr%())
Read the current cache index header into array hdr%(), which must have at least 11 integer elements.
See the ‘Advanced Topics’ chapter for more details.
|
|
Series 5 procedures are automatically cached, so this command is not required. |
Usage: CACHEREC addr(rec%()),off%
Read the cache index record at offset off% into array rec%(), which must have at least 18 integer elements.
See the ‘Advanced Topics’ chapter for more details.
|
|
Series 5 procedures are automatically cached, so this command is not required. |
Usage: CACHETIDY
Remove from the cache any procedures that have returned to their callers.
|
|
Series 5 procedures are automatically cached, so this command is not required. |
Usage: e%=CALL(s%,bx%,cx%,dx%,si%,di%)
This function enables you to make Operating System calls. To use it requires extensive knowledge of the Operating System and related programming techniques. The syntax of this command is included here for completeness only.
The INT number itself is the least significant byte of s%. The AH value (the subfunction number) is the most significant byte of s%. The values of the other arguments are passed to the corresponding 8086 registers. The value of the AX register is returned.
|
|
The Series 5 supports calls to the operating system using OPXs. Full description of their design is beyond the scope of this manual and is documented instead in the EPOC32 C++ Software Development Kit (SDK) which is available from Psion Software plc. See the ‘Using OPXs on the Series 5’ chapter for details of built-in OPXs. |
Usage: CANCEL
Marks the end of a database’s INSERT or MODIFY phase and discards the changes made during that phase.
Usage: CAPTION caption$,languageCode%
Specifies an OPA’s public name (or caption) for a particular language, which will appear below its icon on the Extras bar and in the list of ‘Programs’ in the ‘New File’ dialog (assuming the setting of FLAGS allows these) when the language is that used by the machine. CAPTION may only be used inside an APP...ENDA construct.
The language code specifies for which language variant the caption should be used, so that the caption need not be changed when used on a different language machine. If used, for whatever language, CAPTION causes the default caption given in the APP declaration to be discarded. Therefore CAPTION statements must be supplied for every language in which the application is liable to be used, including the language of the machine on which the application is originally developed.
The values of the language code should be one of the following:
|
English |
1 |
French |
2 |
German |
3 |
Spanish |
4 |
|
Italian |
5 |
Swedish |
6 |
Danish |
7 |
Norwegian |
8 |
|
Finnish |
9 |
American |
10 |
Swiss-French |
11 |
Swiss-German |
12 |
|
Portuguese |
13 |
Turkish |
14 |
Icelandic |
15 |
Russian |
16 |
|
Hungarian |
17 |
Dutch |
18 |
Belgian-Flemish |
19 |
Australian |
20 |
|
Belgian-French |
21 |
Austrian |
22 |
New Zealand |
23 |
International French |
24 |
Constants for the language codes are supplied in Const.oph. See the ‘Calling Procedures’ chapter for details of how to use this file and Appendix E for a listing of it.
The maximum length of caption$ is 255 characters. However, you should bear in mind that a caption longer than around 8 characters will not fit neatly below the application’s icon on the Extras bar.
See APP. See also the ‘OPL applications’ section in the ‘Advanced Topics’ chapter.
Usage: CHANGESPRITE ix%,time%,bit$(),dx%,dy%
or CHANGESPRITE ix%,time%,bit$()
Changes the bitmap-set specified by ix% (1 for the first bitmap-set) in the current sprite, using the supplied bitmap files, offsets and duration in the same way as for APPENDSPRITE.
|
|
On the Series 5, sprites are handled by a built-in OPX. See the ‘Using OPXs on the Series 5’ chapter for more details. |
Usage: a$=CHR$(x%)
Returns the character with character code x%.
You can use it to display characters not easily available from the keyboard. For example, the instruction PRINT CHR$(133) displays an ellipsis (...).
The full character set for the Series 5 is in Appendix D. For the Series 3c, see the User Guide.
Usage: CLEARFLAGS flags&
Clears the flags given in flags& if they have previously been set by SETFLAGS, returning to the default.
See SETFLAGS.
Usage: CLOSE
|
|
Closes the current view on a database. If there are no other views open on the database then the database itself will be closed. See SETFLAGS for details of how to set auto-compaction on closing files. |
|
|
Closes the current file (that is, the one which has been OPENed and most recently USEd). |
If you’ve used ERASE to remove some records, CLOSE recovers the memory used by the deleted records, provided it is held either in the internal memory, on a memory disk (on the Series 5) or on a RAM SSD (on the Series 3c).
Usage: CLOSESPRITE id%
Closes the sprite with ID id%.
|
|
On the Series 5, sprites are handled by a built-in OPX. See the ‘Using OPXs on the Series 5’ chapter for more details. |
Usage: CLS
Clears the contents of the text window.
The cursor then goes to the beginning of the top line. If you have used CURSOR OFF the cursor is still positioned there, but is not displayed.
Usage: c$=CMD$(x%)
Returns the command-line arguments passed when starting a program. Null strings may be returned. x% should be from 1 to 3 for the Series 5 and may be up to 5 on the Series 3c. CMD$(2) to CMD$(5) are only for OPL applications.
CMD$(1) returns the full path name used to start the running program.
CMD$(2) returns the full path name of the file to be used by an OPL application. On the Series 5, if the CMD$(3)="R" (see below), a default filename, including path, is passed in CMD$(2).
CMD$(3) returns "C" for "Create file" or "O" for "Open file" and may also return "R" on the Series 5. If the OPL application is being run with a new filename, this will return "C". This happens the very first time the OPL application is used, and whenever a new filename is used to run it. Otherwise, the OPA is being run with the name of an existing file, and CMD$(3) will return "O" if it is selected directly from the system screen. "R" (Series 5 only) is returned if your application has been run from the Program editor or has been selected via the Application’s icon on the Extras bar, and not by the selection or creation of one of your documents from the system screen.
|
|
Constants for the array elements (1-3) and for the return values of CMD$(3) are supplied in Const.oph. See the ‘Calling Procedures’ chapter for details of how to use this file and Appendix E for a listing of it. |
|
|
CMD$(4) returns the alias information, if any. In practice this has no relevance for OPL applications. |
See the ‘Advanced Topics’ chapter for more details of OPL applications.
See also GETCMD$.
Usage: COMMITTRANS
Commits the transaction on the current view.
See also BEGINTRANS, ROLLBACK, INTRANS.
Usage: COMPACT file$
Compacts the database file$, rewriting the file in place. All views on the database and the hence the file itself should be closed before calling this command. This should not be done to often since it uses considerable processor power.
Compaction can also be done automatically on closing a file by setting the appropriate flag using SETFLAGS.
Usage: COMPRESS src$,dest$
Copies data file src$ to another data file dest$. If dest$ already exists, the records in src$ are appended to the end of dest$.
Deleted records are not copied. This makes COMPRESS particularly useful when copying from a Flash SSD. (The space used by deleted records on a RAM SSD or in internal memory is automatically freed when you close the file.)
If you want src$ to overwrite instead of append to dest$, use, TRAP DELETE dest$ before the COMPRESS statement.
You can use wildcards if you wish to copy more than one file at a time, but if the first name contains any wildcards, the second name must not include a filename, just the device and directory to which the files are to be copied under their original names.
Example: to copy all the data files on A: (in /OPD, the default directory) to B:/BCK/:
COMPRESS "A:*.ODB","B:/BCK/"
(Remember the final backslash on the directory name.)
See COPY for copying any type of file.
|
|
This command is replaced by COMPACT on the Series 5. |
Usage: CONTINUE
Makes a program immediately go to the UNTIL... line of a DO...UNTIL loop or the WHILE... line of a WHILE...ENDWH loop i.e. to the test condition.
Example:
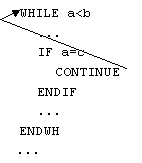
See also BREAK.
Usage: CONST KConstantName=constantValue
Declares constants which are treated as literals, not stored as data. The declarations must be made outside any procedure, usually at the beginning of the module. KConstantName has the normal type-specification indicators (%, &, $ or nothing for floating-point numbers). CONST values have global scope, and are not overridden by locals or globals with the same name: in fact the translator will not allow the declaration of locals or globals of the same name. By convention, all constants should be named with a leading K to distinguish them from variables.
It should be noted that it is not possible to define constants with values -32768 (for integers) and -214748648 (for long integers) in decimals, but hexadecimal notation may be used instead (i.e. values of $8000 and &80000000 respectively).
Usage: COPY src$,dest$
Copies the file src$, which may be of any type, to the file dest$. Any existing file with the name dest$ is deleted. You can copy across devices. On the Series 3c you can use the appropriate file extensions to indicate the type of file, and on all machines use wildcards if you wish to copy more than one file at a time.
|
|
If src$ contains wildcards, dest$ may specify either a filename similarly containing wildcards or just the device and directory to which the files are to be copied under their original names. |
|
|
If src$ contains wildcards, dest$ must not specify a filename, just the device and directory to which the files are to be copied under their original names. |
There are more details of full file specifications in the ‘Advanced topics’ chapter.
Usage: c=COS(x)
Returns the cosine of x, where x is an angle in radians.
To convert from degrees to radians, use the RAD function.
Usage: c%=COUNT
Returns the number of records in the current data file.
This number will be 0 if the file is empty.
|
|
If you try to count the number of records in a view while updating the view an ‘Incompatible update mode’ error will be raised (This will occur between assignment and APPEND / UPDATE or between MODIFY / INSERT and PUT). |
|
|
Usage: CREATE tableSpec$,log,f1,f2,... |
|
|
Compatibility with the Series 3cAs on the Series 3c, the table specification may contain just the filename. In this case the table name will default to Table1 and the field names will be derived from the handles: "$" replaced by "s", "%" by "i", and "&" by "a". E.g. n$ becomes ns. Knowing this allow views to be opened on tables (called Table1) that were created with the Series 3c OPL method. However, it would be better to create the fields with proper names in the first place.
For example:
CREATE "clients",A,n$,t%,d&
is a short version of
CREATE "clients FIELDS ns,ti,da TO Table1",A,n$,t%,d&
both creating Table1. Database clients is also created if it does not yet exist.
|
|
Usage: CREATE file$,log,f1,f2,85 |
See also the ‘Data File Handling’ chapter and the ‘Series 5 Database Handling’ chapter.
Usage: id%=CREATESPRITE
Creates a sprite, returning the sprite ID.
|
|
On the Series 5, sprites are handled by a built-in OPX. See the ‘Using OPXs on the Series 5’ chapter for more details. |
Usage: any of
    CURSOR ON
    CURSOR OFF
    CURSOR id%
    CURSOR id%,asc%,w%,h%
    CURSOR id%,asc%,w%,h%,type%
CURSOR ON switches the text cursor on at the current cursor position. Initially, no cursor is displayed.
You can switch on a graphics cursor in a window by following CURSOR with the ID of the window. This replaces any text cursor. At the same time, you can also specify the cursor’s shape, and its position relative to the baseline of text.
asc% is the ascent - the number of pixels (-128 to 127) by which the top of the cursor should be above the baseline of the current font. h% and w% (both from 0 to 255) are the cursor’s height and width.
If you do not specify them, the following default values are used:
|
asc% |
font ascent |
|
h% |
font height |
|
w% |
2 |
If type% is given, it can have these effects:
|
2 |
not flashing |
|
4 |
grey |
You can add these values together to combine effects - if type% is 6 a grey non-flashing cursor is drawn. The Series 3c also supports an obloid cursor by specifying a type% of 1. Using type%=1 on the Series 5 just displays a default graphics cursor, as though no type had been specified.
|
|
Constants for these types are supplied in Const.oph. See the ‘Calling Procedures’ chapter for details of how to use this file and Appendix E for a listing of it. |
An error is raised if id% specifies a bitmap rather than a window.
CURSOR OFF switches off any cursor.
Usage: s&=DATETOSECS(yr%,mo%,dy%,hr%,mn%,sc%)
Returns the number of seconds since 00:00 on 1/1/1970 at the date/time specified.
Raises an error for dates before 1/1/1970.
The value returned is an unsigned long integer. (Values up to +2147483647, which is 03:14:07 on 19/1/2038, are returned as expected. Those from +2147483648 upwards are returned as negative numbers, starting from -2147483648 and increasing towards zero.)
See also SECSTODATE, HOUR, MINUTE, SECOND.
Usage: d$=DATIM$
Returns the current date and time from the system clock as a string - for example: "Fri 16 Oct 1992 16:25:30". The string returned always has this format - 3 mixed-case characters for the day, then a space, then 2 digits for the day of the month, and so on.
|
|
Constants for offsets of each elements within the string (to be used with MID$, for example) are supplied in Const.oph. See the ‘Calling Procedures’ chapter for details of how to use this file and Appendix E for a listing of it. The Date OPX provides a large set of procedures for manipulating dates and for accurate timing. See the ‘Using OPXs on the Series 5’ chapter for more details. |
Usage: d%=DAY
Returns the current day of the month (1 to 31) from the system clock.
Usage: d$=DAYNAME$(x%)
Converts x%, a number from 1 to 7, to the day of the week, expressed as a three letter string. E.g. d$=DAYNAME$(1) returns MON.
Example:
    PROC Birthday:
          LOCAL d&,m&,y&,dWk%
          DO
                dINIT
                dTEXT "","Date of birth",2
                dTEXT "","eg 23 12 1963",$202
                dLONG d&,"Day",1,31
                dLONG m&,"Month",1,12
                dLONG y&,"Year",1900,2155
                IF DIALOG=0 :BREAK :ENDIF
                dWk%=DOW(d&,m&,y&)
                CLS :PRINT DAYNAME$(dWk%),
                PRINT d&,m&,y&
                dINIT dTEXT "","Again?",$202
                dBUTTONS "No",%N,"Yes",%Y
          UNTIL DIALOG<>%y
    ENDP
See also DOW.
Usage: d&=DAYS(day%,month%,year%)
Returns the number of days since 1/1/1900.
Use this to find out the number of days between two dates.
Example:
    PROC deadline:
          LOCAL a%,b%,c%,deadlin&
          LOCAL today&,togo%
          PRINT "What day? (1-31)"
          INPUT a%
          PRINT "What month? (1-12)"
          INPUT b%
          PRINT "What year? (19??)"
          INPUT c%
          deadlin&=DAYS(a%,b%,1900+c%)
          today&=DAYS(DAY,MONTH,YEAR)
          togo%=deadlin&-today&
          PRINT togo%,"days to go"
          GET
    ENDP
See also dDATE, SECSTODATE.
|
|
The Date OPX provides a large set of procedures for manipulating dates and for accurate timing. See the ‘Using OPXs on the Series 5’ chapter for more details. |
Usage: DAYSTODATE days&,year%,month%,day%
This converts days&, the number of days since 1/1/1900, to the corresponding date, returning the day of the month to day%, the month to month% and the year to year%. This is useful for converting the value set by dDATE, which also gives days since 1/1/1900.
Usage: any of
    dBUTTONS p1$,k1%,p2$,k2%,p3$,k3%
    dBUTTONS p1$,k1%,p2$,k2%
    dBUTTONS p1$,k1%
|
|
The Series 5 allows more than 3 buttons which may be added in the same way. |
Defines exit keys to go at the bottom (or the side on the Series 5: see dINIT) of a dialog.
From one to three (or more on the Series 5) exit keys may be defined. Each pair of p$ and k% specifies an exit key; p$ is the text to be displayed on it (above it on the Series 3c), while k% is the keycode of the shortcut key. DIALOG returns the keycode of the key pressed (in lower case for letters).
For alphabetic keys, use the % sign - %A means ‘the code of A’, and so on. The shortcut key is then Ctrl+alphabetic key on the Series 5, but just the alphabetic key without a modifier on the Series 3c. An appendix lists the codes for keys (such as Tab) which are not part of the character set. If you use the code for one of these keys, its name (e.g. ‘Tab’, or ‘Enter’) will be shown in the key.
|
|
On the Series 5, the following effects may be obtained by adding the appropriate constants to the shortcut key keycode: |
|
effect |
constant value |
|
display a button with no shortcut key label underneath it |
256 ($100) |
|
use the key alone (without the Ctrl modification) as the shortcut key |
512 ($200) |
|
|
|
If you use a negative value for a k% argument, that key is a ‘Cancel’ key. The corresponding positive value is used for the key to display and the value for DIALOG to return, but if you do press this key to exit, the var variables used in the commands like dEDIT, dTIME etc. will not be set. For the Series 5, when using a negative shortcut to specify the cancel button, you must negate the shortcut together with any added flags.
The Esc key will always cancel a dialog box, with DIALOG returning 0. If you want to show the Esc key as one of the exit keys, use -27 as the k% argument (its keycode is 27) so that the var variables will not be set if Esc is pressed.
There can be only one dBUTTONS item per dialog.
|
|
The buttons take up two lines on the screen. dBUTTONS may be used anywhere between dINIT and DIALOG; the postion of its use does not affect the position of the buttons in the dialog. |
|
|
The buttons take up three lines on the screen. dBUTTONS must be the last dialog command you use before DIALOG itself. |
Some keypresses cannot be specified, for example, those using the Control key for the Series 3c.
This example presents a simple query, returning ‘False’ for No, or ‘True’ for Yes, providing shortcut keys of N and Y respectively and without labels beneath the keys.
    PROC query:
          dINIT
          dTEXT "","FORGET CHANGES",2
          dTEXT "","Sure?",$202
          dBUTTONS "No",-(%N OR $300),"Yes",%Y OR $300
          RETURN DIALOG=%y
    ENDP
|
|
On the Series 3c, the same shortcut keys can be specified using, although labels are always visible on the Series 3c: |
See also dINIT.
Usage: dCHECKBOX chk%,prompt$
Creates a dialog checkbox entry. This is similar to a choice list with two items, except that the list is replaced by a checkbox with the tick either on or off. The state of the checkbox is maintained across calls to the dialog.
Initially you should set the live variable chk% to 0 to set the tick symbol off and to any other value to set it on. chk% is then automatically set to 0 if the box is unchecked or -1 if it is checked when the dialog is closed.
See also dINIT.
Usage:
dCHOICE var choice%,p$,list$
or
|
|
dCHOICE var choice%,p$,list1$+",..." |
Defines a choice list to go in a dialog.
p$ will be displayed on the left side of the line. list$ should contain the possible choices, separated by commas - for example, "No,Yes". One of these will be displayed on the right side of the line, and
choice% must be a LOCAL or a GLOBAL variable. It specifies which choice should initially be shown — 1 for the first choice, 2 for the second, and so on. When you finish using the dialog, choice% is given a value indicating which choice was selected — again, 1 for the first choice, and so on.
|
|
On the Series 5, dCHOICE supports an unrestricted number of items (up to memory limits). To extend a dCHOICE list, add a comma after the last item on the line followed by "..." (three full-stops), as shown in the usage above. choice% must be the same on all the lines, otherwise an error is raised. For example, the following specifies items |
    i1, i2, i3, i4, i5, i6:
    dCHOICE ch%,prompt$,"i1,i2,..."
    dCHOICE ch%,"","i3,14,..."
    dCHOICE ch%,"","i5,i6"
See also dINIT.
Usage: dDATE var lg&,p$,min&,max&
Defines an edit box for a date, to go in a dialog.
p$ will be displayed on the left side of the line.
lg&, which must be a LOCAL or a GLOBAL variable, specifies the date to be shown initially. Although it will appear on the screen like a normal date, for example 15/03/92, lg& must be specified as "days since 1/1/1900".
min& and max& give the minimum and maximum values which are to be allowed. Again, these are in days since 1/1/1900. An error is raised if min& is higher than max&.
When you finish using the dialog, the date you entered is returned in lg&, in days since 1/1/1900.
The system setting determines whether years, months or days are displayed first.
See also DAYS, SECSTODATE,DAYSTODATE, dINIT.
Usage: DECLARE EXTERNAL
Causes the translator to report an error if any variables or procedures are used before they are declared. It should be used at the beginning of the module to which it applies, before the first procedure. It is useful for detecting ‘Undefined externals’ errors at translate-time rather than at runtime.
For example, with DECLARE EXTERNAL commented out, the following translates and raises the error, ‘Undefined externals, i’ at runtime. Adding the declaration causes the error to be detected at translate-time instead.
    REM DECLARE EXTERNAL
    PROC main:
          LOCAL i%
          i%=10
          PRINT i
          GET
    ENDP
If you use this declaration, you will need to declare all subsequent variables and procedures used in the module, using EXTERNAL.
See also EXTERNAL.
Usage:
    DECLARE OPX opxname,opxUid&,opxVersion&
    ...
    END DECLARE
Declares an OPX. opxname is the name of the OPX, opxUid& its UID and opxVersion& its version number.
Declarations of the OPX’s preocedures should be made inside this structure.
See the ‘Using OPXs on the Series 5’ chapter for more details.
Usage: dEDIT var str$,p$,len%
or dEDIT var str$,p$
Defines a string edit box, to go in a dialog.
p$ will be displayed on the left side of the line.
str$ is the string variable to edit. Its initial contents will appear in the dialog. The length used when str$ was defined is the maximum length you can type in.
len%, if supplied, gives the width of the edit box (allowing for widest possible character in the font). The string will scroll inside the edit box, if necessary. If len% is not supplied, the edit box is made wide enough for the maximum width str$ could possibly be.
See also dTEXT.
Usage: dEDITMULTI var pData&,p$,widthInChars%,numLines%,maxLen%
Defines a multi-line edit box to go into a dialog. Normally the resulting text would be used in a subsequent dialog, saved to file or printed using the Printer OPX (see the ‘Using OPXs on the Series 5’ chapter). It is also possible to paste text into the buffer from other applications and vice versa, although any formatting or embedded objects contained in text pasted in will be removed.
pData& is the address of a buffer to take the edited data. It could be the address of an array as returned by ADDR, or of a heap cell, as returned by ALLOC (see ADDR and ALLOC). The buffer may not be specified directly as a string and may not be read as such. Instead it should be peeked, byte by byte (see PEEK). The leading 4 bytes at ptrData& contain the initial number of bytes of data following. These bytes are also set by dEDITMULTI to the actual number of bytes edited. For this reason it is convenient to use a long integer array as the buffer, with at least 1+(maxLen%+3)/4 elements. The first element of the array then specifies the initial length.
If an allocated cell is used (probably because more than 64K is required), the first 4 bytes of the cell must be set to the initial length of the data. If this length is not set then an error will be raised. For example if a cell of 100000 bytes is allocated, you would need to poke a zero long integer in the start to specify that there is initially no text in the cell. For example:
    p&=ALLOC(100000)
    POKEL p&,0            REM Text starts at p&+4
Special characters such as line breaks and tab characters may appear in the buffer. Constants for the codes of these are supplied in Const.oph. See the ‘Calling Procedures’ chapter for details of how to use this file and Appendix E for a listing of it.
The prompt, p$ will be displayed on the left side of the edit box. widthInChars% specifies the width of the edit box within which the text is wrapped, using a notional average character width. The actual number of characters that will fit depends on the character widths, with e.g. more ‘i’s fitting than ‘w’s. numLines% specifies the number of full lines displayed. Any more lines will be scrolled. maxLen% specifies the length in bytes of the buffer provided (excluding the bytes used to store the length).
The Enter key is used by a multi-line edit box which has the focus before being offered to any buttons. This means that Enter can’t be used to exit the dialog, unless another item is provided that can take the focus without using the Enter key. Normal practice is to provide a button that does not use the Enter key to exit a dialog whenever it contains a multi-line edit box. The Esc key will always cancel a dialog however, even when it contains a multi-line edit box.
The following example presents a three-line edit box which is about 10 characters wide and allows up to 399 characters:
    CONST KLenBuffer%=399
    PROC dEditM:
          LOCAL buffer&(101)
          REM 101=1+(399+3)/4 in integer arithmetic
          LOCAL pLen&,pText&
          LOCAL i%
          LOCAL c%
          pLen&=ADDR(buffer&(1))
          pText&=ADDR(buffer&(2))
          WHILE 1
                dINIT "Try dEditMulti"
                dEDITMULTI pLen&,"Prompt",10,3,KLenBuffer%
                dBUTTONS "Done",%d      REM button needed to exit dialog
                IF DIALOG=0 :BREAK :ENDIF
                PRINT "Length:";buffer&(1)
                PRINT "Text:"
                i%=0
                WHILE i%<buffer&(1)
                      c%=PEEKB(pText&+i%)
                      IF c%>=32
                            PRINT CHR$(c%);
                      ELSE
                            REM just print a dot for special characters
                            PRINT ".";
                      ENDIF
                      i%=i%+1
                ENDWH
          ENDWH
    ENDP
See also dINIT.
Usage: DEFAULTWIN mode%
Change the default window (ID=1) to enable or disable the use of grey (on the Series 3c) or change the colour mode (on the Series 5).
|
|
For the Series 5: |
|
|
For the Series 3c: |
You are advised to call DEFAULTWIN once and for all near the start of your program if you need to change the colour mode of the default window on the Series 5 or use grey on the Series 3c. If it fails with ‘Out of memory’ error, the program can then exit cleanly without losing vital information.
See also gGREY, gCOLOR, gCREATE.
Usage: d=DEG(x)
Converts from radians to degrees.
Returns x, an angle in radians, as a number of degrees. The formula used is: 180*x/PI
All the trigonometric functions (SIN,COS etc.) work in radians, not degrees. You can use DEG to convert an angle returned by a trigonometric function back to degrees:
Example:
    PROC xarctan:
          LOCAL arg,angle
          PRINT "Enter argument:";
          INPUT arg
          PRINT "ARCTAN of",arg,"is"
          angle=ATAN(arg)
          PRINT angle,"radians"
          PRINT DEG(angle),"degrees"
          GET
    ENDP
To convert from degrees to radians, use RAD.
Usage: DELETE filename$
Deletes any type of file.
|
|
You can use wildcards for example, to delete all the files in D:/OPL |
|
|
You can use wildcards for example, to delete all the OPL files in B:/OPL |
See also RMDIR.
Usage: DELETE dbase$,table$
This deletes the table, table$, from the database, dbase$. To do this all views of the database, and hence the database itself, must be closed.
Usage:
dFILE var file$,p$,f%
|
|
dFILE var file$,p$,f%,uid1&,uid2&,uid3& |
Defines a filename edit box or selector, to go in a dialog. A ‘Folder’ and ‘Disk’ selector are automatically added on the following lines (on the Series 3c, a ‘Disk’ selector only).
|
|
By default no prompts are displayed for the file, folder and disk selectors on the Series 5. A comma-separated prompt list should be supplied. For example, for a filename editor with the standard prompts use: |
|
|
The disk selector is automatically supplied with a prompt on the Series 3c and p$ will be the prompt on the left of the filename selector. |
f% controls the type of file editor or selector, and the kind of input allowed. You can add together any of the following values:
|
|
value |
meaning |
|
|
0 |
use a selector |
|
|
1 |
use an edit box |
|
|
2 |
allow directory names |
|
|
4 |
directory names only |
|
|
8 |
disallow existing files |
|
|
16 |
query existing files |
|
|
32 |
allos null string input |
|
|
64 |
don't display file extension |
|
|
128 |
obey/allow wildcards |
|
|
256 |
allow ROM files to be selected |
|
|
512 |
allow files in the System folder to be selected |
The first of the list is the most crucial. If you add 1 into f%, you will see a file edit box, as when creating a new file. If you do not add 1, you will see the ‘matching file’ selector, used when choosing an existing file.
The value 64 (to omit file extensions) is not valid on the Series 5 since file extensions are no longer treated as special components of the filename.
If performing a ‘copy to’ operation, you might use 1+2+16, to specify a file edit box, in which you can type the name of a directory to copy to, and which will produce a query if you type the name of an existing file.
If asking for the name of a directory to remove, you might use 4, to allow an existing directory name only.
‘Query existing’ is ignored if ‘disallow existing’ is set. These two, as well as ‘allow null string input’, only work with file edit boxes, not ‘matching file’ selectors.
|
|
For file selectors, dFILE supports file restriction by UID, or by type from the user’s point of view. Documents are identified by three UIDs which identify which application created the document and what kind of file it is. Specifying all three UIDs will restrict the files as much as is possible, and specifying fewer will provide less restriction. You can supply 0 for uid1& and uid2& if you only want to restrict the list to uid3&. This may be useful when dealing with documents from one of your own applications: you can easily find out the third UID as it will be the UID you specified in the APP statement. Note that UIDs are ignored for editors. For example, if your application has UID KUidMyApp&, then the following will list only your application-specific documents: |
|
|
file$ is the string variable to edit. Its initial contents always control the initial drive and directory used. Any filename part of file$ is shown initially in the filename box. For a ‘matching file’ selector, you can use wildcards in the filename part (such as *.tmp) to control which filenames are matched. To do this, you must add 128 to f%. 128 also allows wildcard specifications to be entered (returned in str$), for both ‘matching’ and ‘new file’ selectors. |
With a matching file selector (as opposed to an edit box) the value 8 restricts the selection to files which match the filename/extension in file$.
|
|
Matching file selectors can also use 64, in which case files with the same extension as that in file$ are shown without this extension. (Many Psion file selectors are like this.) |
You can always press Tab to produce the full file selector with a dFILE item.
|
|
file$ must be declared to be 255 bytes long, since file names may be up to this length, and if it is shorter an error will be raised. On the Series 3c, it must be at least 128 bytes long. |
See also dINIT.
Usage: dFLOAT var fp,p$,min,max
Defines an edit box for a floating-point number, to go in a dialog.
p$ will be displayed on the left side of the line.
min and max give the minimum and maximum values which are to be allowed. An error is raised if min is higher than max.
fp must be a LOCAL or a GLOBAL variable. It specifies the value to be shown initially. When you finish using the dialog, the value you entered is returned in fp.
See also dINIT.
Usage: n%=DIALOG
Presents the dialog prepared by dINIT and commands such as dTEXT and dCHOICE. If you complete the dialog by pressing Enter, your settings are stored in the variables specified in dLONG, dCHOICE etc., although you can prevent this with dBUTTONS.
If you used dBUTTONS when preparing the dialog, the keycode which ended the dialog is returned. Otherwise, DIALOG returns the line number of the item which was current when Enter was pressed. The top item (or the title line, if present), has line number 1.
If you cancel the dialog by pressing Esc, the variables are not changed, and 0 is returned.
See also dINIT.
Usage: DIAMINIT pos%,str1$,str2$...
Initialises the  list (discarding any existing list). str1$, str2$ etc. contain the text to be displayed in the status window for each item in the list.
pos% is the initial item on to which the indicator should be positioned, with pos%=1 specifying the first item. (Any value greater than the number of strings specifies the final item.) If pos%>=1 you must supply at least this many strings.
If pos% is not supplied or if pos%=0, or if DIAMINIT is used on its own with no arguments, no bar is defined.
If pos%=-1 the diamond bar is removed as for the small status window on the Series 3c.
|
|
The Series 5 has no status windows. You should use a toolbar instead. See the ‘Friendlier Interaction’ chapter for more details of toolbar usage. |
Usage: DIAMPOS pos%
Positions the indicator on the list.
Positioning outside the range of the items wraps around in the appropriate way. pos%=0 causes the symbol to disappear.
|
|
|
Usage: any of
dINIT
dINIT title$
|
|
dINIT title$,flags% |
Prepares for definition of a dialog, cancelling any existing one. Use dTEXT, dCHOICE etc. to define each item in the dialog, then DIALOG to display the dialog.
If title$ is supplied, it will be displayed at the top of the dialog.
|
|
Any supplied title$ will be centred and with a line across the dialog below it. |
|
|
Any supplied title$ will be positioned in a grey box at the top of the dialog. |
|
effect |
value |
|
buttons on the right rather than at the bottom |
1 |
|
no title bar (any title in dINIT is ignored) |
2 |
|
use the full screen |
4 |
|
don’t allow the dialog box to be dragged |
8 |
|
pack the dialog densely (not buttons though) |
16 |
|
|
|
          dINIT
          ONERR e1
          REM bad arg list gives argument error
          dCHOICE ch%,"ChList","a,b,,,,c"
    e1::
          ONERR OFF
          dLONG l&,"Long",0,12345
          DIALOG
Usage: d$=DIR$(filespec$)
then d$=DIR$("")
Lists filenames, including subdirectory names, matching a file specification. You can include wildcards in the file specification. If filespec$ is just a directory name, include the final backslash on the end for example, "/TEMP/" . Use the function like this:
DIR$(filespec$) returns the name of the first file matching the file specification.
DIR$("") then returns the name of the second file in the directory.
DIR$("") again returns the third, and so on.
When there are no more matching files in the directory, DIR$("") returns a null string.
|
|
Example, listing all the files whose names begin with A in C:/ME/ |
    PROC dir:
          LOCAL d$(255)
          d$=DIR$("C:/ME/A*")
          WHILE d$<>""
                PRINT d$
                d$=DIR$("")
          ENDWH
          GET
    ENDP
|
|
Example, listing all the.DBF files in M:/DAT: |
    PROC dir:
          LOCAL d$(128)
          d$=DIR$("M:/DAT/*.DBF")
          WHILE d$<>""
                PRINT d$
                d$=DIR$("")
          ENDWH
          GET
    ENDP
Usage: dLONG var lg&,p$,min&,max&
Defines an edit box for a long integer, to go in a dialog.
p$ will be displayed on the left side of the line.
min& and max& give the minimum and maximum values which are to be allowed. An error is raised if min& is higher than max&.
lg& must be a LOCAL or a GLOBAL variable. It specifies the value to be shown initially. When you finish using the dialog, the value you entered is returned in lg&.
See also dINIT.
Usage:
    DO
          statement
          ...
    UNTIL condition
DO forces the set of statements which follow it to execute repeatedly until the condition specified by UNTIL is met.
This is the easiest way to repeat an operation a certain number of times.
Every DO must have its matching UNTIL to end the loop.
If you set a condition which is never met, the program will go round and round, locked in the loop forever.
|
|
You can escape by pressing Ctrl+Esc, provided you haven’t set ESCAPE OFF. If you have set ESCAPE OFF, you will have to return to go to the Task list, select your program in the list and click the ‘Close file’ option. |
|
|
You can escape by pressing Psion-Esc, provided you haven’t set ESCAPE OFF. If you have set ESCAPE OFF, you will have to return to the System screen, move to the program name under the RunOpl icon, and press Delete. |
Usage: d%=DOW(day%,month%,year%)
Returns the day of the week from 1 (Monday) to 7 (Sunday) given the date.
day% must be between 1 and 31, month% from 1 to 12 and year% from 1900 to 2155.
For example, D%=DOW(4,7,1992) returns 6, meaning Saturday.
|
|
Constants for the numeric values assigned to the days of the week are supplied in Const.oph. See the ‘Calling Procedures’ chapter for details of how to use this file and Appendix E for a listing of it. |
Usage: dPOSITION x%,y%
Positions a dialog. Use dPOSITION at any time between dINIT and DIALOG.
dPOSITION uses two integer values. The first specifies the horizontal position, and the second, the vertical. dPOSITION -1,-1 positions to the top left of the screen; dPOSITION 1,1 to the bottom right; dPOSITION 0,0 to the centre, the usual position for dialogs.
dPOSITION 1,0, for example, positions to the right-hand edge of the screen, and centres the dialog half way up the screen.
|
|
Constants for the positions are supplied in Const.oph. See the ‘Calling Procedures’ chapter for details of how to use this file and Appendix E for a listing of it. |
See also dINIT.
Usage: DRAWSPRITE x%,y%
Draws the current sprite in the current window with top-left at pixel position x%,y%.
|
|
On the Series 5, sprites are handled by the built-in Sprite OPX. See the ‘Using OPXs on the Series 5’ for more details. |
Usage: dTEXT p$,body$,t%
or dTEXT p$,body$
Defines a line of text to be displayed in a dialog.
p$ will be displayed on the left side of the line, and body$ on the right side. If you only want to display a single string, use a null string ("") for p$, and pass the desired string in body$. It will then have the whole width of the dialog to itself. An error is raised if body$ is a null string.
body$ is normally displayed left aligned (although usually in the right column). You can override this by specifying t%:
|
t% |
effect |
|
0 |
left align body$ |
|
1 |
right align body$ |
|
2 |
centre body$ |
However, note that on the Series 5, alignment of body$ is only supported when p$ is null, with the body being left aligned otherwise. In addition, you can add any or all of the following three values to t%, for these effects:
|
|
$100 |
use bold for body$ |
|
|
$200 |
draw a line below this item |
|
|
$400 |
allow this item to be selected |
|
|
$800 |
specify this item as a text separator |
Note that on the Series 5, bold dialog text is not supported. You can display a line separator between any dialog items by setting the flag $800 on an item which has null p$ and body$. (If p$ and/or body$ are not null, then the flag is ignored and no separator is drawn.) The separator counts as an item in the value returned by DIALOG. On the Series 3c, only one line can be drawn across a dialog using the flag $200. It will be below the last item which asks for it, whether the title from dINIT (Series 3c only) or a dTEXT item. The flag $400 only allows the prompt, and not the body, to be selected.
|
|
Constants for the text types are supplied in Const.oph. See the ‘Calling Procedures’ chapter for details of how to use this file and Appendix E for a listing of it. |
See also dEDIT, dINIT
Usage: dTIME var lg&,p$,t%,min&,max&
Defines an edit box for a time, to go in a dialog.
p$ will be displayed on the left side of the line.
lg&, which must be a LOCAL or a GLOBAL variable, specifies the time to be shown initially. Although it will appear on the screen like a normal time, for example 18:27, lg& must be specified as seconds after 00:00. A value of 60 means one minute past midnight; 3600 means one o’clock, and so on.
min& and max& give the minimum and maximum values which are to be allowed. Again, these are in seconds after 00:00. An error is raised if min& is higher than max&.
When you finish using the dialog, the time you entered is returned in lg&, in seconds after 00:00.
t% specifies the type of display required, as follows:
|
|
t% |
time display |
|
|
0 |
absolute time no seconds |
|
|
1 |
absolute time with seconds |
|
|
2 |
duration no seconds |
|
|
3 |
duration with seconds |
|
|
4 |
time without hours |
|
|
8 |
absolute time in 24 hours |
|
|
Constants for dTIME types are supplied in Const.oph. See the ‘Calling Procedures’ chapter for details of how to use this file and Appendix E for a listing of it. |
For example, 03:45 represents an absolute time while 3 hours 45 minutes represents a duration.
Absolute times are displayed in 24-hour or am/pm format according to the current system setting. 8 displays the time in 24 hour clock, regardless of the system setting on the Series 5.
Absolute times always display am or pm as appropriate, unless 24 hour clock is being used. Durations never display am or pm. Note, however, that if you use the flag 4 (no hours) then the am/pm symbol will be displayed and the flag 2 must be added if you wish to hide it.
See also dINIT.
Usage: dXINPUT var str$,p$
Defines a secret string edit box, such as for a password, to go in a dialog.
p$ will be displayed on the left side of the line.
str$ is the string variable to take the string you type.

|
str$ must be less than 16 characters long on the Series 5 and must be at least eight characters long on the Series 3c. |
Initially the dialog does not show any characters for the string; the initial contents of str$ are ignored. A special symbol will be displayed for each character you type, to preserve the secrecy of the string.
See also dINIT.
Usage: EDIT a$
Displays a string variable which you can edit directly on the screen. All the usual editing keys are available the arrow keys move along the line, Esc clears the line, and so on.
When you have finished editing, press Enter to confirm the changes. If you press Enter before you have made any changes, then the string will be unaltered.
If you use EDIT in conjunction with a PRINT statement, use a comma at the end of the PRINT statement, so that the string to be edited appears on the same line as the displayed string:
    ...
    PRINT "Edit address:",
    EDIT A.address$
    UPDATE
    ....
If the Esc key is pressed while no text is on the input line, the ‘Escape key pressed’ error (number -114) will be returned by ERR provided that the EDIT has been trapped. You can use this feature to enable the user to press the Esc key to escape from inputting a string.
See also INPUT, dEDIT.
See IF.
See APP.
See VECTOR
See WHILE.
Usage: ret%=ENTERSEND(pobj%,m%,var p1,...)
This is the same as SEND except that, if the method leaves, the error code is returned to the caller. Otherwise the value returned is as returned by the method.
|
|
OPL now handles leaving without the need to use this function. |
Usage: ret%=ENTERSEND0(pobj%,m%,var p1,...)
This is the same as ENTERSEND except that, if the method does not leave, zero is returned.
|
|
OPL now handles leaving without the need to use this function. |
Usage: e%=EOF
Finds out whether you’re at the end of a file yet.
Returns -1 (true) if the end of the file has been reached, or 0 (false) if it hasn’t.
When reading records from a file, you should test whether there are still records left to read, otherwise you may get an error.
Example:
    PROC eoftest:
          OPEN "myfile",A,a$,b%
          DO
                PRINT A.a$
                PRINT A.b%
                NEXT
                PAUSE -40
          UNTIL EOF
          PRINT "The last record"
          GET
          RETURN
    ENDP
Usage: ERASE
Erases the current record in the current file.
The next record is then current. If the erased record was the last record in a file, then following this command the current record will be null and EOF will return true.
Usage: e%=ERR
Returns the number of the last error which occurred, or 0 if there has been no error.
Example:
          ...
          PRINT "Enter age in years"
    age::
          TRAP INPUT age%
          IF ERR=-1
                PRINT "Number please:"
                GOTO age
          ENDIF
          ...
|
|
You can set the value returned by ERR to 0 (or any other value) by using TRAP RAISE 0. This is useful for clearing ERR. |
|
|
To clear the value of ERR on the Series 3c, you need to do the following, |
          ONERR e0
          RAISE 0
    e0::
          ONERR OFF
See also ERR$,ERRX$. See the ‘Error Handling’ chapter for full details, including the list of error numbers and messages.
Usage: e$=ERR$(x%)
Returns the error message for the specified error code x%.
ERR$(ERR) gives the message for the last error which occurred. Example:
    TRAP OPEN "/FILE",A,field1$
    IF ERR
          PRINT ERR$(ERR)
          RETURN
    ENDIF
See also ERR, ERRX$. See the ‘Error Handling’ chapter for full details, including the list of error numbers and messages.
Usage: x$=ERRX$
Returns the current extended error message (when an error has been trapped), e.g.
‘Error in MODULE/PROCEDURE,EXTERN1,EXTERN2,...’
which would have been presented as an alert if the error had not been trapped. This allows the list of missing externals, missing procedure names, etc. to be found when an error has been trapped by a handler.
See ERR, ERR$. See the ‘Error Handling’ chapter for full details, including the list of error numbers and messages.
Usage:
    ESCAPE OFF
    ...
    ESCAPE ON
ESCAPE OFF stops Ctrl+Esc on the Series 5 or Psion-Esc on the Series 3c being used to break out of the program when it is running. ESCAPE ON enables this feature again.
ESCAPE OFF takes effect only in the procedure in which it occurs, and in any sub-procedures that are called. Ctrl+Esc or Psion-Esc is always enabled when a program begins running.
|
|
If your program enters a loop which has no logical exit, and ESCAPE OFF has been used, you will have to go to the Task list, move to the program name, and select the ‘Close file’ option. |
|
|
If your program enters a loop which has no logical exit, and ESCAPE OFF has been used, you will have to return to the System screen, move to the program name under the RunOpl icon, and press the Delete key. |
Usage: d=EVAL(s$)
Evaluates the mathematical string expression s$ and returns the floating-point result. s$ may include any mathematical function or operator. Note that floating-point arithmetic is always performed.
|
|
On the Series 5, EVAL runs in the "context" of the current procedure, so globals and externals can be used in s$, procedures in loaded modules can be called and the current values of gX and gY, can be used etc. LOCAL variables cannot be used in s$ (because the translator cannot deference them). |
For example:
    DO
          AT 10,5 :PRINT "Calc:",
          TRAP INPUT n$
          IF n$="" :CONTINUE :ENDIF
          IF ERR=-114 :BREAK :ENDIF
          CLS :AT 10,4
          PRINT n$;"=";EVAL(n$)
    UNTIL 0
See also VAL.
Usage: e%=EXIST(filename$)
Checks to see that a file exists.
Returns -1 (‘True’) if the file exists and 0 (‘False’) if it doesn’t.
Use this function when creating a file to check that a file of the same name does not already exist, or when opening a file to check that it has already been created:
    IF NOT EXIST("CLIENTS")
          CREATE "CLIENTS",A,names$
    ELSE
          OPEN "CLIENTS",A,names$
    ENDIF
    ...
Usage: e=EXP(x)
Returns ex - that is, the value of the arithmetic constant e (2.71828...) raised to the power of x.
Usage: EXT name$
Gives the file extension of files used by an OPA.
This can only be used between APP and ENDA.
See the ‘Advanced Topics’ chapter for more details of OPAs.
|
|
OPL application documents do not have file extensions on the Series 5, so this command is not used. |
Usage: EXTERNAL variable
or EXTERNAL prototype
Required if DECLARE EXTERNAL is specified in the module.
The first usage declares a variable as external. For example, EXTERNAL screenHeight%
The second usage declares the prototype of a procedure (prototype includes the final : and the argument list). The procedure may then be referred to before it is defined. This allows parameter type-checking to be performed at translate-time rather than at runtime and also provides the necessary information for the translator to coerce numeric argument types. This is reasonable because OPL does not support argument overloading. The same coercion occurs as when calling the built-in keywords.
Following the example of C and C++, you would normally provide a header file declaring prototypes of all the procedures and INCLUDE this header file at the beginning of the module which defines the declared procedures to ensure consistency. The header file would also be INCLUDEd in any other modules which call these procedures. Then you should use DECLARE EXTERNAL at the beginning of modules which include the header file so that the translator can ensure that these procedures are called with correct parameter types or types which can be coerced.
The following is an example of usage of DECLARE EXTERNAL and EXTERNAL:
    DECLARE EXTERNAL
    EXTERNAL myProc%:(i%,l&)
    REM or INCLUDE "myproc.oph" that defines all your procedures

    PROC test:
          LOCAL i%,j%,s$(10)

          REM j% is coerced to a long integer
          REM as specified by the prototype.
          myProc%:(i%,j%)

          REM translator ‘Type mismatch’ error:
          REM string can’t be coerced to numeric type
          myProc%:(i%,s$)

          REM wrong argument count gives translator error
          myProc%:(i%)
    ENDP

    PROC myProc%:(i%,l&)
          REM Translator checks consistency with prototype above
          ...
    ENDP
See DECLARE EXTERNAL.
Usage: f%=FIND(a$)
Searches the current data file (or view on the Series 5) for fields matching a$. The search starts from the current record, so use NEXT to progress to subsequent records. FIND makes the next record containing a$ the current record and returns the number of the record found. Capitals and lower-case letters match.
You can use wildcards:
|
? |
matches any single character |
|
* |
matches any group of characters |
To find a record with a field containing Dr and either BROWN or BRAUN, use:
F%=FIND("*DR*BR??N*")
FIND("BROWN") will find only those records with a field consisting solely of the string BROWN.
You can only search string fields.
See also FINDFIELD.
Usage: f%=FINDFIELD(a$,start%,no%,flags%)
Like FIND, finds a string, makes the record with this string the current record, and returns the number of this record.
a$ is the string for which to search: the search will be carried out in no% fields in each record, starting at the field with number start% (1 is the number of the first field). start% and no% may refer to string fields only and other types will be ignored. The flag% argument specifies the type of search as explained below. If you want to search in all fields, use start%=1 and for no% use the number of fields you used in the OPEN/CREATE command.
flags% should be specified as follows:
|
search direction |
flags% |
|
backwards from current record |
0 |
|
forwards from current record |
1 |
|
backwards from end of file |
2 |
|
backwards from start of file |
3 |
|
|
Constants for these flags are supplied in Const.oph. See the ‘Calling Procedures’ chapter for details of how to use this file and see Appendix E for a listing of it. |
Add 16 to the value of flag% given above to make the search case-dependent, where case-dependent means that the record will exactly match the search string in case as well as characters. Other wise the search will case-independent which means that upper case and lower case characters will match.
See also the ‘Data File Handling’ chapter.
Usage: ret%=FINDLIB(var cat%,name$)
Find DYL category name$ (including .DYL extension) in the ROM. On success returns zero and writes the category handle to cat%.
|
|
The Series 5 supports use of OPXs only. See the ‘Using OPXs on the Series 5’ chapter for further details. |
Usage: FIRST
Positions to the first record in the current data file (or view on the Series 5).
Usage: f$=FIX$(x,y%,z%)
Returns a string representation of the number x, to y% decimal places. The string will be up to z% characters long.
Example: FIX$(123.456,2,7) returns "123.46".
If z% is negative then the string is right-justified for example FIX$(1,2,-6) returns " 1.00" where there are two spaces to the left of the 1.
If z% is positive then no spaces are added for example FIX$(1,2,6) returns "1.00".
If the number x will not fit in the width specified by z%, then the string will just be asterisks, for example FIX$(256.99,2,4) returns "****".
See also GEN$, NUM$, SCI$.
Usage: FLAGS flags%
Replaces TYPE on the Series 5. flags% values as follows:
1 specifies an application which can create files. It will then be included in the list of applications offered when the user creates a new file from the System screen.
2 prevents the application from appearing in the Extras bar. It is very unusual to have this flag set.
Constants for these flags are supplied in Const.oph. See the ‘Calling Procedures’ chapter for details of how to use this file and Appendix E for a listing of it.
FLAGS may only be used within the APP85ENDA construct.
See APP. See also the section on OPAs in the ‘Advanced Topics’ chapter.
Usage: f=FLT(x&)
Converts an integer expression (either integer or long integer) into a floating-point number. Example:
    PROC gamma:(v)
          LOCAL c
          c=3E8
          RETURN 1/SQR(1-(v*v)/(c*c))
    ENDP
You could call this procedure like this: gamma:(FLT(a%)) if you wanted to pass it the value of an integer variable without having first to assign the integer value to a floating-point variable.
See also INT and INTF.
Usage:
|
|
FONT id&,style% |
|
|
FONT id%,style% |
Sets the text window font and style.
|
|
Constants for the font UIDs are supplied in Const.oph. See the ‘Calling Procedures’ chapter for details of how to use this file and Appendix E for a listing of it. |
See ‘The text and graphics windows’ in the ‘Graphics’ chapter for more details.
Usage:
|
|
FREEALLOC pcell& |
|
|
FREEALLOC pcell% |
Frees a previously allocated cell at pcell& (pcell%).
The number of bytes allocated is restricted to 64K on the Series 3c, while it is not on the Series 5. The input value is therefore a long integer on the Series 5 and an integer on the Series 3c.
|
|
See also SETFLAGS if you require the 64K limit to be enforced on the Series 5. If the flag is set to restrict the limit, pcell& is guaranteed to fit into a short integer. |
Usage: gAT x%,y%
Sets the current position using absolute co-ordinates. gAT 0,0 moves to the top left of the current drawable.
See also gMOVE.
Usage: gBORDER flags%,width%,height%
or gBORDER flags%
Draws a one-pixel wide, black border around the edge of the current drawable. If width% and height% are supplied, a border shape of this size is drawn with the top left corner at the current position. If they are not supplied, the border is drawn around the whole of the current drawable.
flags% controls three attributes of the border a shadow to the right and beneath, a one-pixel gap all around, and the type of corners used:
|
flags% |
effect |
|
1 |
single pixel shadow |
|
2 |
removes a single pixel shadow (leaves a gap for single pixel shadow on Series 3c) |
|
3 |
double pixel shadow |
|
4 |
removes a double pixel shadow (leaves a gap for double pixel shadow on Series 3c) |
|
$100 |
one pixel gap all round |
|
$200 |
more rounded corners |
|
|
Constants for the values of these flags are supplied in Const.oph. See the ‘Calling Procedures’ chapter for details of how to use this file and Appendix E for a listing of it. |
|
|
You can combine the values to control the three different effects. (1, 2, 3 and 4 are mutually exclusive you cannot use more than one of them.) For example, for rounded corners and a double pixel shadow, use flags%=$203.
Set flags%=0 for no shadow, no gap, and sharper corners.
For example, to de-emphasise a previously emphasised border, use gBORDER with the shadow turned off:
    gBORDER 3             REM show border
    GET
    gBORDER 4             REM border off
    ...
See also gXBORDER.
Usage: gBOX width%,height%
Draws a box from the current position, width% to the right and height% down. The current position is unaffected.
Usage: any of
gBUTTON text$,type%,w%,h%,st%
|
|
gBUTTON text$,type%,w%,h%,st%,bmpId& |
Draws a 3-D black and grey button at the current position in a rectangle of the supplied width w% and height h%, which fully encloses the button in all its states. text$ specifies up to 64 characters to be drawn in the button in the current font and style. You must ensure that the text will fit in the button.
type%=1 draws a Series 3c button; type%=2 specifies Series 5.
state%=0 draws a raised button, state%=1 a semi-depressed (flat) button and state%=2 a fully-depressed (sunken) button. On the Series 3c, an error is raised if the current window has no grey plane.
|
|
On the Series 5, there is added support so that bitmaps may be used on buttons. Three extra optional arguments can be passed which give the bitmap ID, the mask ID and the layout for the button respectively. maskId% can be 0 to specify no mask. |
|
position of text |
layout% |
|
right |
0 |
|
bottom |
1 |
|
top |
2 |
|
left |
3 |
|
|
|
|
share |
0 |
|
to text |
$10 |
|
to picture |
$20 |
|
|
|
|
layout% |
description |
|
$13 |
creates a button with text on the left and left aligned in any excess space. |
|
$20 |
creates a button with text on the right and the picture left aligned in any excess space. |
|
$10 |
creates a standard toolbar button, putting the text on the right. |
|
|
|
Usage: gCIRCLE radius%
or gCIRCLE radius%,fill%
Draws a circle with the centre at the current position in the current drawable. If the value of radius% is negative then no circle is drawn.
If fill% is supplied and if fill%<>0 then the circle is filled with the current pen colour.
See gELLIPSE, gCOLOR.
Usage: any of
    gCLOCK ON/OFF
    gCLOCK ON,mode%
    gCLOCK ON,mode%,offset&
    gCLOCK ON,mode%,offset&,format$
    gCLOCK ON,mode%,offset&,format$,font%
    gCLOCK ON,mode%,offset&,format$,font%,style%
|
|
Note: offset& is replaced by offset% and font& by font% on the Series 3c. |
Displays or removes a clock showing the system time. The current position in the current window is used. Only one clock may be displayed in each window.
mode% controls the type of clock.
Values are:
|
|
6 |
black and grey medium, system setting |
|
|
7 |
black and grey medium, analog |
|
|
8 |
second type medium, digital |
|
|
9 |
black and grey extra large |
|
|
10 |
formatted digital (described below) |
|
|
11 |
formatted digital (described below) |
|
|
Constants for the modes are supplied in Const.oph. See the ‘Calling Procedures’ chapter for details of how to use this file and Appendix E for a listing of it. |
|
|
On the Series 3c, modes 1 to 5 are provided for Series 3 compatibility, and produce small (digital), medium (system setting), medium (analog), medium (digital), and large (analog) clocks respectively. |
|
$10 |
shows the date in all except the extra large and formatted clocks |
|
$20 |
shows seconds in small digital, large analog, black and grey medium analog and extra large clocks |
|
$40 |
shows am/pm in small digital and black medium clocks only. |
|
$80 |
specifies that a clock is to be drawn in the grey plane (only for clocks that do not contain both black and grey: i.e. all except the black and grey, medium, analog clock and the extra large clock). |
|
|
It is possible to draw clocks that include grey in windows that have no grey plane. |
|
|
On the Series 5, there are additional features on the basic clocks which partially replace these effects. The digital clock (mode%=8) automatically displays the day of the week and day of the month below the time. The extra large analog clock (mode%=9) automatically displays a second hand. |
|
|
Do not use gSCROLL to scroll the region containing a clock. When the time is updated, the old position would be used. The whole window may, however, be moved using gSETWIN. |
Digital clocks display in 24-hour or 12-hour mode according to the system-wide setting.
offset& specifies an offset in minutes from the system time to the time displayed. This allows you to display a clock showing a time other than the system time.
|
|
On the Series 5, a flag, which has the value $100, may be ORed with mode% so that offset& may be specified in seconds rather than minutes. The offset is a long integer to enable a whole day to be specified when the offset is in seconds. |
If these arguments are not supplied, mode% is taken as 1, and offset& as 0.
|
|
The system setting for the clock type (i.e. digital or analog) can be changed by an OPL program using the procedure LCSETCLOCKFORMAT: in Date OPX This is function should be used to implement, for example, tapping a toolbar clock to change its type as in the built-in Series 5 applications. See the ‘Using OPXs on the Series 5’ section for full details of this procedure. |
format$, font% and style% are used only for formatted digital clocks (mode% 10 on the Series 3c and 11 on the Series 5). The values for font& and style% are as for gFONT and gSTYLE. The default font for gCLOCK is the system font. The default style is normal (0).
For the formatted digital clock, a format string (up to 255 characters long) specifies how the clock is to be displayed. The format string contains a number of format specifiers in the form of a % followed by a letter. (Upper or lower case may be used.)
|
|
For the Series 5, the format string may contain the following symbols to obtain the required effects: |
|
%% |
Insert a single % character in the string |
|
%* |
Abbreviate following item. (The asterisk should be inserted between the % and the number or letter, e.g. %*1). In most cases this amounts to omitting any leading zeros, for example if it is the first of the month "%F %*M" will display as 1 rather than 01. |
|
%:n |
Insert a system time separator character. n is an integer between zero and three inclusive which indicates which time separator character is to be used. For European time settings, only n=1 and n=2 are used, giving the hours/minutes separator and minutes/seconds separator respectively. |
|
%/n |
Insert a system date separator character. n is an integer between zero and three inclusive which indicates which date separator character is to be used. For European time settings, only n=1 and n=2 are used, giving the day/month separator and month/year separator respectively. |
|
%1 |
Insert the first component of a three component date (i.e. a date including day, month and year) where the order of the components is determined by the system settings. The possibilities are: dd/mm/yyyy, (European), mm/dd/yyyy (American), yyyy/mm/dd (Japanese). |
|
%2 |
Insert the second component of a three component date where the order has been determined by the system settings. See %1. |
|
%3 |
Insert the third component of a three component date where the order has been determined by the system settings. See %1. |
|
%4 |
Insert the first component of a two component date (i.e. a date including day and month only) where the order has been determined by system settings. The possibilities are: dd/mm, (European), mm/dd (American), mm/dd (Japanese). |
|
%5 |
Insert the second component of a two component date where the order has been determined by the system settings. See %4. |
|
%A |
Insert am or pm according to the current language and time of day. Text is printed even if 24 hour clock is in use. Text may be specified to be printed before or after the time, and a trailing or leading space as appropriate will be added. The abbreviated version (%*A) removes this space. Optionally, a minus or plus sign may be inserted between the % and the A. This operates as follows: %-A causes am/pm text to be inserted only if the system setting of the am/pm symbol position is set to display before the time. Similarly, %+A causes am/pm text to be inserted only if the system setting of the am/pm symbol is set to display after the time. No am/pm text will be inserted before the time if a + is inserted in the string. For example you could use, "%-A%H%:1%T%+A" to insert the am/pm symbol either before or after the time, according to the system setting. %+A and %-A cannot be abbreviated. |
|
%B |
As %A, except that the am/pm text is only inserted if the system clock setting is 12 hour. (This should be used in conjunction with %J.) |
|
%D |
Insert the two-digit day number in month (in conjunction with %1 etc.). |
|
%E |
Insert the day name. Abbreviation is language specific (3 letters in English). |
|
%F |
Use this at the beginning of a format string to make the date/time formatting independent of the system setting. This fixes the order of the following day/month/year component(s) in their given order, removing the need to use %1 to %5, allowing individual components of the date to be printed. (No abbreviation.) |
|
%H |
Insert the two-digit hour component of the time in 24 hour clock format. |
|
%I |
Insert the two-digit hour component of the time in 12 hour clock format. Any leading zero is automatically suppressed, regardless of whether an asterisk is inserted or not. |
|
%J |
Insert the two-digit hour component of time in either 12 or 24 hour clock format depending on the corresponding system setting. When the clock has been set to 12 hour format, the hour’s leading zero is automatically suppressed regardless of whether an asterisk has been inserted between the % and J. |
|
%M |
Insert the two-digit month number (in conjunction with %1 etc.). |
|
%N |
Insert the month name (in conjunction with %1 etc.). When using system settings (i.e. not using %F) this causes all months following %N in the string to be written in words. When using fixed format (i.e. when using %F) %N may be used alone to insert a month name. Abbreviation is language specific (3 letters in English). |
|
%S |
Insert the two-digit second component of the time. |
|
%T |
Insert the two-digit minute component of the time. |
|
%W |
Insert the two-digit week number in year, counting the first (part) week as week 1. |
|
%X |
Insert the date suffix. When using system settings (i.e. not using %F), this causes a suffix to be put on any date following %X in the string. When using fixed format (i.e. using %F), %X following any date appends a suffix for that particular date. Cannot be abbreviated. |
|
%Y |
Insert the four digit year number (in conjunction with %1 etc.). The abbreviation is the last two digits of the year. |
|
%Z |
Insert the three digit day number in year. |
|
|
|
|
|
The format string for the Series 3c may be defined in a similar manner to the Series 5, although generally less functionality is available. Any item may be abbreviated by using a * after the %. For example, %*T at 11:05 pm abbreviates 05 to 5. In the following list of specifiers, those which produce numbers will do so without any leading zero if you use %* instead of %. Other abbreviations are marked: |
|
%% |
Insert a single % character in the string. |
|
%:, %/ |
Insert a system time, date separator character. |
|
%A |
Insert am or pm text, according to the system time. (Abbreviation: 1st letter only) |
|
%D, %W, %M |
Insert the day, week, month number as two digits, in the range 01-31, 01-53 and 01-12, respectively |
|
%E, %N |
Insert the day, month name. (Abbreviation: language dependent - first 3 letters in English) |
|
%H, %I |
Insert the hour in 24-hour, 12-hour format, in the range 00-23 and 01-12, respectively |
|
%S, %T |
Insert the seconds, minutes, in the range 00-59. |
|
%X |
Insert the suffix string for day number, e.g. st in ‘1st’, nd in ‘2nd’ |
|
%Y |
Insert the year as a four digit number (Abbreviation: discards the century, i.e. last two digits) |
|
%1, %2, %3 |
Insert the day, month, year ordered according to the system setting. E.g. European setting is day/month/year, so %1=%D, %2=%M, %3=%Y. So to display a date in correct format use "%1/%2/%3". (Abbreviation: see %G, %P, %U) |
|
%4, %5 |
Insert the day, month as ordered in the system setting. |
|
%F, %O |
Toggles days, months (displayed by %1, %2 and %3) between numeric and name formats. On 9th March 1993, with European date type, "%1%F%1%F%1" gives 09Tuesday09. |
|
%G, %P, %U |
Toggles %1, %2 and %3 between long form and abbreviation. On 9th March 1993, with European date type, "%F%1%G%1%G%1" gives TuesdayTueTuesday. |
|
%L |
Toggles the suffix on the day number for %1, %2, %3 (in numeric form only). On 9th March 1993, with European date type, "%G%1%L%1%L%1" gives 99th9. |
|
%6, %7 |
Inserts the hour and am/pm text according to the system setting. With am-pm format, %6=%I and %7=%A. With 24-hour format, %6=%H and %7 gives no ‘am/pm’ characters. |
|
|
|
|
|
|
|
|
Usage: gCLOSE id%
Closes the specified drawable that was previously opened by gCREATE, gCREATEBIT or gLOADBIT.
If the drawable closed was the current drawable, the default window (ID=1) becomes current.
An error is raised if you try to close the default window.
Usage: gCLS
Clears the whole of the current drawable and sets the current position to 0,0, its top left corner.
Usage: gCOLOR red%,green%,blue%
Sets the pen colour of the current window. The red%,green%,blue% values specify a colour which will be mapped to white, black or one of the greys on non-colour screens. Note that if the values of red%, green% and blue% are equal, then a pure grey results, ranging from black (0) to white (255).
Usage: gCOPY id%,x%,y%,w%,h%,mode%
Copies a rectangle of the specified size (width w%, height h%) from the point x%,y% in drawable id%, to the current position in the current drawable.
|
|
On the Series 5, it is unadvisable to use gCOPY to copy from windows as it is very slow. It should only be used for copying from bitmaps to windows or other bitmaps. |
As this command can copy both set and clear pixels, the same modes are available as when displaying text. Set mode% = 0 for set, 1 for clear, 2 for invert or 3 for replace. 0, 1 and 2 act only on set pixels in the pattern; 3 copies the entire rectangle, with set and clear pixels.
The current position is not affected in either window.
|
|
gCOPY is affected by the setting of gGREY (in the current window) as follows: with gGREY 0 it copies black to black; with gGREY 1 it copies grey to grey, or black to grey if source is black only; with gGREY 2 it copies grey to grey and black to black, or black to both if source is black only. |
Usage: any of
id%=gCREATE(x%,y%,w%,h%,v%)
|
|
id%=gCREATE(x%,y%,w%,h%,v%,grey%) |
|
|
id%=gCREATE(x%,y%,w%,h%,v%,flags%) |
Creates a window with specified position and size (width w%, height h%), and makes it both current and foreground. Sets the current position to 0,0, its top left corner. If v% is 1, the window will immediately be visible; if 0, it will be invisible.
Returns id% which identifies this window for other keywords.
The least significant 4 bits of flags% gives the colour-mode as before 0 (2 colour-mode), 1 (4 colour-mode), 2 (16 colour-mode).
The next 4 bits may be set to specify the shadowing on the window. If 0, the window has no shadow. The next 4 bits give the shadow height relative to the window behind it (a height of N units gives a shadow of N x 2 pixels).
The flags% argument is most easily specified in hexadecimal:
|
flags% |
description |
|
$412 |
16 colour-mode ($2), shadowed window ($1), with height 4 units ($4) above the previous window with a shadow of 8 pixels. |
|
$010 |
2 colour-mode (black and white) shadowed window at the same height as the previous window. |
|
$101 |
4 colour mode window with no shadow (height ignored if shadow disabled). |
|
$111 |
4 colour mode window with shadow of 1 unit above window behind, i.e. 2 pixel shadow. |
Constants for specifying various of the arguments taken by gCREATE are given in Const.oph. See the ‘Calling Procedures’ chapter for details of how to use this file and Appendix E for a listing of it.
Note that 63 windows may be open at any time and it is recommended that you use many small windows rather than a few large ones.
|
|
If grey% is not given or is 0, the window will not have a grey plane. If grey% is 1, it will have one. |
See also gCLOSE, gGREY, DEFAULTWIN.
Usage:
id%=gCREATEBIT(w%,h%)
|
|
id%=gCREATEBIT(w%,h%,mode%) |
Creates a bitmap with the specified width and height, and makes it the current drawable. Sets the current position to 0,0, its top left corner.
Returns id% which identifies this bitmap for other keywords.
|
|
gCREATEBIT may be used with an optional third parameter which specifies the graphics mode of the bitmap to be created. The values of these are as given in gCREATE. By default the graphics mode of a bitmap is 2-colour. |
See also gCLOSE,gCREATE.
Usage: gDRAWOBJECT type%,flags%,w%,h%
Draws the scaleable graphics object specified by type%, scaled to fit in the rectangle with top left at the current graphics cursor position and with the specified width w% and height h%.
The Series 3c has only one object type (set type%=0) a ‘lozenge’. This is a 3-D rounded box lit from the top left, with a shadow at bottom right and a grey body. (For an example, see the text ‘City’ in the top left of the World application.)
For type%=0, flags% specifies the corner roundness:
|
0 |
for normal roundness |
|
1 |
for more rounded |
|
2 |
for a single pixel removed from each corner |
An error is raised if the current window has no grey plane.
Usage: gELLIPSE hRadius%,vRadius%
or gELLIPSE hRadius%,vRadius%,fill%
Draws an ellipse with the centre at the current position in the current drawable. hRadius% is the horizontal distance in pixels from the centre of the ellipse to the left (and right) of the ellipse. vRadius% is the vertical distance from the centre of the ellipse to the top (and bottom). If the length of either radius is less than zero, then no ellipse is drawn.
If fill% is supplied and if fill%<>0 then the ellipse is filled with the current pen colour.
See gCIRCLE, gCOLOR.
Usage: g$=gen$(x,y%)
Returns a string representation of the number x. The string will be up to y% characters long.
Example GEN$(123.456,7) returns "123.456" and GEN$(243,5) returns "243".
If y% is negative then the string is right-justified - for example GEN$(1,-6) returns " 1" where there are five spaces to the left of the 1.
If y% is positive then no spaces are added for example GEN$(1,6) returns "1".
If the number x will not fit in the width specified by y%, then the string will just be asterisks, for example GEN$(256.99,4) returns "****".
See also FIX$, NUM$, SCI$.
Usage: g%=GET
Waits for a key to be pressed and returns the character code for that key.
For example, if the A key is pressed with Caps Lock off, the integer returned is 97 (a), or 65 (A) if A was pressed with the Shift key down.
The character codes of special keys, such as Pg Dn, are given in Appendix D.
You can use KMOD to check whether modifier keys (Shift, Control, Psion (on the Series 3c), Fn (on the Series 5) and Caps Lock) were used.
See Appendix D for the full character set for the Series 5. For the Series 3c, see the User Guide.
See also KEY.
Usage: g$=GET$
Waits until a key is pressed and then returns which key was pressed, as a string.
For example, if the A key is pressed in lower case mode, the string returned is "a".
You can use KMOD to check whether any modifier keys (Shift, Control, Psion (on the Series 3c), Fn (on the Series 5) and Caps Lock) were used.
See also KEY$.
Usage: w$=GETCMD$
Returns new command-line arguments to an OPA, after a "change files" or "quit" event has occurred. The first character of the returned string is "C", "O" or "X". If the return is "C" or "O", the rest of the string is a filename.
The first character has the following meaning:
|
|
Constants for these return values are supplied in Const.oph. See the ‘Calling Procedures’ chapter for details of how to use this file and Appendix E for a listing of it. |
You can only call GETCMD$ once for each system message.
See the ‘Advanced Topics’ chapter for more details of OPAs.
See also CMD$.
Usage: docname$=GETDOC$
Returns the name of the current document.
See also SETDOC.
Usage: GETEVENT var a%()
Waits for an event to occur. Returns with a%() specifying the event. The data returned in a%() depends on the type of event that occurred. If the event is a key-press, (a%(1) AND $400) is guaranteed to be zero. For other events (a%(1) AND $400) is guaranteed to be non-zero.
|
If a key has been pressed: |
a%(1) |
keycode (as for GET) |
|
|
a%(2) AND $00ff |
modifier (as for KMOD) |
|
|
a%(2)/256 |
auto-repeat count (ignored by GET) |
|
If a program has moved to |
|
|
|
foreground: |
a%(1)= $401 |
|
|
background: |
a%(1)= $402 |
|
|
If the machine has switched on: |
a%(1)= $403 |
|
|
If the Psion wants an OPA to |
|
|
|
change files or exit: |
a%(1)= $404 |
|
|
If the date changes: |
a%(1)= $405 |
|
|
|
Note that date change events are not detected by the Series 5. |
|
|
For a key-press event, the modifier is returned in a%(2) and is not returned by KMOD.
|
|
If a non-key event such as ‘foreground’ occurs while a keyboard keyword such as GET, INPUT, MENU or DIALOG is being used, the event is discarded. So GETEVENT must be used if non-key events are to be monitored. If you need to use these keywords in OPAs, use LOCK ON / LOCK OFF around them, so that the System screen won’t send messages to switch files or shutdown while the application cannot respond. |
The array (or string of integers) must be at least 6 integers long.
See also TESTEVENT, GETCMD$, GETEVENT32.
Usage: GETEVENT32 ev&()
Gets all event types handled by GETEVENT ev%() and additionally pointer (pen) events. The latter are too large to fit into the array of integers provided for GETEVENT ev%(). ev&() must have at least 16 elements.
All events return a 32-bit time stamp. The window ID mentioned below refers to the value returned by the gCREATE keyword. The modifier values and scancode values for a keypress (which specify a location on the keyboard) are given in the ‘Advanced Topics’ chapter and Appendix D.
GETEVENT32 returns more information than GETEVENT, as listed below:
|
If a key has been pressed |
(ev&(1) AND &400)=0 |
|
|
|
ev&(1) |
keycode |
|
|
ev&(2) |
time stamp |
|
|
ev&(3) |
scan code |
|
|
ev&(4) |
modifier |
|
|
ev&(5) |
repeat |
Note that unlike the repeat for GETEVENT, the repeat for GETEVENT32 is strictly a repeat, i.e. if there is only one keypress, then the value of ev&(5) is 0.
For all the other event types, ev&(1) is greater than &400:
|
If the program has moved to foreground: |
ev&(1)=&401 |
|
|
|
ev&(2) |
time stamp |
|
If the program has moved to background: |
ev&(1)=&402 |
|
|
|
ev&(2) |
time stamp |
|
If the machine is switched on |
ev&(1)=&403 |
|
|
|
ev&(2) |
time stamp |
Note that this event is not enabled unless the appropriate flag is set (by default it is not): see SETFLAGS.
|
If the Series 5 wants the OPL application to switch files or exit: |
ev&(1)=&404 |
If this event is received, GETCMD$ should be called to find out what action should be taken: see GETCMD$.
|
If a key is pressed down: |
ev&(1)=&406 |
|
|
|
ev&(2) |
time stamp |
|
|
ev&(3) |
scan code |
|
|
ev&(4) |
modifiers |
|
If a key is released: |
ev&(1)=&407 |
|
|
|
ev&(2) |
time stamp |
|
|
ev&(3) |
scan code |
|
|
ev&(4) |
modifiers |
|
If a pen event occurs: |
ev&(1)=&408 |
|
|
|
ev&(2) |
time stamp |
|
|
ev&(3) |
window ID |
|
|
ev&(4) |
pointer type (see below) |
|
|
ev&(5) |
modifiers |
|
|
ev&(6) |
x-co-ordinate |
|
|
ev&(7) |
y-co-ordinate |
|
|
ev&(8) |
x-co-ordinate relative to parent window |
|
|
ev&(9) |
y-co-ordinate relative to parent window |
For pen events, ev&(4) has one of the following values:
|
0 |
pen down |
|
1 |
pen up |
|
6 |
drag |
Other values:
|
If a pen enters contact with the screen: |
ev&(1)=&409 |
|
|
|
ev&(2) |
time stamp |
|
|
ev&(3) |
window ID |
|
If a pen exits contact with the screen: |
ev&(1)=&40A |
|
|
|
ev&(2) |
time stamp |
|
|
ev&(3) |
window ID |
Constants for the array subscripts and the return values are supplied in Const.oph. See the ‘Calling Procedures’ chapter for details of how to use this file and Appendix E for a listing of it.
Some pointer events, and pointer enters and exits, can be filtered out to avoid being swamped by unwanted event types. See POINTERFILTER.
|
|
Note that for other unknown events, ev&(1) contains &1400 added to the code returned by the window server. ev&(2) is the timestamp and ev&(3)is the window ID, and the rest of the data returned by the window server is put into ev&(4), ev&(5), etc. |
|
|
If a non-key event such as ‘foreground’ occurs while a keyboard keyword such as GET, INPUT, MENU or DIALOG is being used, the event is discarded. So GETEVENT must be used if non-key events are to be monitored. If you need to use these keywords in OPAs, use LOCK ON / LOCK OFF around them, so that the System screen won’t send messages to switch files or shutdown while the application cannot respond. |
See also GETEVENT, GETEVENTA32.
Usage: GETEVENTA32 status%,ev&()
Asynchronous version of GETEVENT32. GETEVENTA32 returns the same codes to the array ev&() as GETEVENT32.
See GETEVENTC, GETEVENT32, GETEVENT. See also the ‘I/O functions and commands’ section in the ‘Advanced Topics’ chapter for details of asynchronous I/O functions.
Usage: GETEVENTC(var stat%)
Cancels the previously called GETEVENTA32 function with status stat%. Note that GETEVENTC consumes the signal (unlike IOCANCEL), so IOWAITSTAT should not be used after GETEVENTC.
See the ‘Advanced Topics’ chapter for details.
Usage: cat%=GETLIBH(num%)
Convert a category number num% to a handle. If num% is zero, gets the handle for OPL.DYL.
Usage: gFILL width%,height%,gMode%
Fills a rectangle of the specified size from the current position, according to the graphics mode specified.
The current position is unaffected.
Usage:
|
|
gFONT fontUid& |
|
|
gFONT fontId% |
Sets the font for current drawable to fontId%. The font may be one of the predefined fonts in the ROM or a user-defined font. See the ‘Graphics’ chapter for more details of fonts.
|
|
Constants for the font UIDs are supplied in Const.oph. See the ‘Calling Procedures’ chapter for details of how to use this file and see Appendix E for a listing of it. |
|
|
User-defined fonts must first be loaded by gLOADFONT, which returns the fontId% which may be used with gFONT. |
See also gLOADFONT, FONT.
Usage: gGMODE mode%
Sets the effect of all subsequent drawing commands gLINEBY, gBOX etc. on the current drawable.
|
Mode% |
pixels will be |
|
0 |
set |
|
1 |
cleared |
|
2 |
inverted |
|
|
Constants for the mode are supplied in Const.oph. See the ‘Calling Procedures’ chapter for details of how to use this file and see Appendix E for a listing of it. |
When you first use drawing commands on a drawable, they set pixels in the drawable. Use gGMODE to change this. For example, if you have drawn a black background, you can draw a white box outline inside it with either gGMODE 1 or gGMODE 2, followed by gBOX.
Usage: gGREY mode%
|
|
Changes the pen colour between black and grey. mode% has the following effects: |
|
|
Controls whether all subsequent graphics drawing and graphics text in the current window draw to the grey plane, the black plane or to both. |
See also DEFAULTWIN and gCREATE.
Usage: height%=gHEIGHT
Returns the height of the current drawable.
Usage: id%=gIDENTITY
Returns the ID of the current drawable.
The default window has ID=1.
Usage: gINFO var i%()
Gets general information about the current drawable and about the graphics cursor (whichever window it is in). The information is returned in the array i%() which must be at least 32 integers long.
The information is about the drawable in its current state, so e.g. the font information is for the current font in the current style.
The following information is returned:
|
i%(1) |
lowest character code |
|
i%(2) |
highest character code |
|
i%(3) |
height of font |
|
i%(4) |
descent of font |
|
i%(5) |
ascent of font |
|
i%(6) |
width of '0' character |
|
i%(7) |
maximum character width |
|
i%(8) |
flags for font (see below) |
|
i%(9-17) |
name of font |
|
i%(18) |
current graphics mode (gGMODE) |
|
i%(19) |
current text mode (gTMODE) |
|
i%(20) |
current style (gSTYLE) |
|
i%(21) |
cursor state (ON=1,OFF=0) |
|
i%(22) |
ID of window containing cursor (-1 for text cursor) |
|
i%(23) |
cursor width |
|
i%(24) |
cursor height |
|
i%(25) |
cursor ascent |
|
i%(26) |
cursor x position in window |
|
i%(27) |
cursor y position in window |
|
i%(28) |
1 if drawable is a bitmap |
|
i%(29) |
cursor effects |
|
i%(30) |
gGREY setting |
|
i%(31) |
reserved (window server ID of drawing) |
|
i%(32) |
reserved |
i%(8) specifies a combination of the following font characteristics:
|
value |
meaning |
|
1 |
font uses standard ASCII characters (32-126) |
|
2 |
fond uses Code Page 850 characters (128-255) |
|
4 |
font is bold |
|
8 |
font is italic |
|
16 |
font is serifed |
|
32 |
font is mono-spaced |
|
$8000 |
font is stored expanded for quick drawing |
Use PEEK$(ADDR(i%(9))) to read the name of the font as a string.
If the cursor is on (i%(21)=1), it is visible in the window identified by i%(22).
i%(29) has bit 0 set (i%(29) AND 1) if the cursor is obloid, bit 1 set (i%(29) AND 2) if not flashing, and bit 2 set (i%(29) AND 4) if grey.
If the cursor is off (i%(21)=0), or is a text cursor (i%(22)=-1), i%(23) to i%(27) and i%(29)should be ignored.
Usage: gINFO32 var i&()
Gets general information about the current drawable and about the graphics cursor (whichever window it is in). This replaces gINFO because the information available has changed. i&() must have 48 elements (although elements 37 to 48 are currently unused). The same information is returned to the array elements as for gINFO except for the following,
|
i&(1) |
reserved |
|
i&(2) |
reserved |
|
i&(9) |
the font UID as used in gFONT |
|
i&(10-17) |
unused |
|
i&(30) |
graphics colour-mode of current window |
|
i&(31) |
gCOLOR red% of foreground |
|
i&(32) |
gCOLOR green% of foreground |
|
i&(33) |
gCOLOR blue% of foreground |
|
i&(34) |
gCOLOR red% of background |
|
i&(35) |
gCOLOR green% of background |
|
i&(36) |
gCOLOR blue% of background |
Additionally note that on the Series 5, i&(8)=2 means that Code Page 1252 is used (rather than Code Page 850) and also that there is no obloid cursor, so bit 0 will never be set in i&(29).
See also gINFO, gFONT, gCOLOR, gCREATE.
Usage: gINVERT width%,height%
Inverts the rectangle width% to the right and height% down from the cursor position, except for the four corner pixels.
Usage: GIPRINT str$,c%
or GIPRINT str$
Displays an information message for about two seconds, in the bottom right corner of the screen. For example, GIPRINT "Not Found" displays Not Found. If a string is too long for the screen, it will be clipped.
If c% is given, it controls the corner in which the message appears:
|
c% |
corner |
|
0 |
top left |
|
1 |
bottom left |
|
2 |
top right |
|
3 |
bottom right (default) |
|
|
Constants for these corner values are supplied in Const.oph. See the ‘Calling Procedures’ chapter for details of how to use this file and Appendix E for a listing of it. |
Only one message can be shown at a time. You can make the message go away - for example, if a key has been pressed - with GIPRINT "".
Usage: gLINEBY dx%,dy%
Draws a line from the current position to a point dx% to the right and dy% down. Negative dx% and dy% mean left and up respectively.
|
|
The Series 5 never draws the end point, so for gLINEBY dx%,dy%, point gX+dx%,gY+dy% is not drawn. |
|
|
For horizontal lines, the line includes the pixel with the lower x co-ordinate and excludes the pixel with the higher x co-ordinate. Similarly for vertical lines, the line includes the pixel with the lower y co-ordinate and excludes the pixel with the higher y co-ordinate. For oblique lines (where the x and y co-ordinates change), the line is drawn minus one or both end points. |
For all machines, the current position moves to the end of the line drawn.
gLINEBY 0,0 sets the pixel at the current position.
See also gLINETO, gPOLY.
Usage: gLINETO x%,y%
Draws a line from the current position to the point x%,y%. The current position moves to x%,y%.
|
|
The Series 5 never draws the end point, so for gLINETO x%,y%, point x%,y% is not drawn |
|
|
For horizontal lines, the line includes the pixel with the lower x co-ordinate and excludes the pixel with the higher x co-ordinate. Similarly for vertical lines, the line includes the pixel with the lower y co-ordinate and excludes the pixel with the higher y co-ordinate. For oblique lines (where the x and y co-ordinates change), the line is drawn minus one or both end points. |
To plot a single point on all machines, use gLINETO to the current position (or gLINEBY 0,0).
See also gLINEBY, gPOLY.
Usage: any of
    id%=gLOADBIT(name$,write%,index%)
    id%=gLOADBIT(name$,write%)
    id%=gLOADBIT(name$)
Loads a bitmap from the named bitmap file and makes it the current drawable. Sets the current position to 0,0, its top left corner.
|
|
gLOADBIT does not add a default filename extension to the input argument name. |
|
|
If name$ has no file extension, .PIC is used. |
The bitmap is kept as a local copy in memory.
Returns id% which identifies this bitmap for other keywords.
write%=0 sets read-only access. Attempts to write to the bitmap in memory will be ignored, but the bitmap can be used by other programs without using more memory. write%=1 allows you to write to and re-save the bitmap. This is the default case.
|
|
Constants for the values of write% are supplied in Const.oph. See the ‘Calling Procedures’ chapter for details of how to use this file and Appendix E for a listing of it. |
For bitmap files which contain more than one bitmap, index% specifies which one to load. For the first bitmap, use index%=0, which is also the default value.
|
|
Bitmap files saved with gSAVEBIT have only one bitmap if they are saved from an in-memory bitmap rather than from a window. Saving a black/grey/white window on the Series 3c saves two planes black to index%=0 and grey to index%=1. |
See also gCLOSE.
Usage:
|
|
fileId%=gLOADFONT(file$) |
|
|
fontId%=gLOADFONT(name$) |
Loads the user-defined font. This is done differently between machines as follows:
|
|
Loads the user-defined fonts specified in the file file$ and returns the file ID of the font file, which can be used only with gUNLOADFONT. The maximum number of font files which may be loaded at any one time is 16. |
    fileId%=gLOADFONT("Music1")
    gFONT KMusic1Font1&
    ...
    gUNLOADFONT fileId%
|
|
Loads the user-defined font name$ and returns a font ID which can be used with gFONT to make the current drawable use this font. If name$ does not contain a file extension, .FON is used. |
gFONT itself is very efficient, so you should normally load all required fonts at the start of a program.
Note that the built-in fonts are automatically available, and do not need loading.
See gUNLOADFONT.
Usage: GLOBAL variables
Declares variables to be used in the current procedure (as does the LOCAL command) and (unlike LOCAL) in any procedures called by the current procedure, or procedures called by them.
The variables may be of 4 types, depending on the symbol they end with:
Array variables have a number immediately following them in brackets which specifies the number of elements in the array. Array variables may be of any type, for example: x(6),y%(5),f$(5,12),z&(3).
When declaring string arrays, you must give two numbers in the brackets. The first declares the number of elements, the second declares their maximum length. For example surname$(5,8) declares five elements, each up to 8 characters long.
|
|
Variable names may be any combination of up to 32 numbers and alphabetic characters and the underscore character. They must start with a alphabetic character or an underscore. |
|
|
Variable names may be any combination of up to 8 numbers and alphabetic letters. They must start with a letter. |
The length of a variable name includes the %, & or $ sign, but not the () in string and array variables.
More than one GLOBAL or LOCAL statement may be used, but they must be on separate lines, immediately after the procedure name.
See also LOCAL.
Usage: gMOVE dx%,dy%
Moves the current position dx% to the right and dy% downwards, in the current drawable.
A negative dx% causes movement to the left; a negative dy% causes upward movement.
See also gAT.
Usage: gORDER id%,position%
Sets the window specified by id% to the selected foreground/background position, and redraws the screen. Position 1 is the foreground window, position 2 is next, and so on. Any position greater than the number of windows is interpreted as the end of the list.
On creation, a window is at position 1 in the list.
Raises an error if id% is a bitmap.
See also gRANK.
Usage: x%=gORIGINX
Returns the gap between the left side of the screen and the left side of the current window.
Raises an error if the current drawable is a bitmap.
Usage: y%=gORIGINY
Returns the gap between the top of the screen and the top of the current window.
Raises an error if the current drawable is a bitmap.
Usage:
    GOTO label or  GOTO label::
    ...
    label::
Goes to the line following the label:: and continues from there. The label
Must be in the current procedure
Must start with a letter and end with a double colon, although the double colon is not necessary in the GOTO statement
May be up to 32 characters long on the Series 5, or 8 on the Series 3c, excluding the colons.
Usage: GOTOMARK b%
Makes the record with bookmark b%, as returned by BOOKMARK, the current record. b% must be a bookmark in the current view.
Usage: gPATT id%,width%,height%,mode%
Fills a rectangle of the specified size from the current position with repetitions of the drawable id%.
As with gCOPY, this command can copy both set and clear pixels, so the same modes are available as when displaying text. Set mode%=0 for set, 1 for clear, 2 for invert or 3 for replace. 0, 1 and 2 act only on set pixels in the pattern; 3 copies the entire rectangle, with set and clear pixels.
If you set id%=-1 a pre-defined grey pattern is used.
The current position is unaffected.
|
|
gPATT is affected by the setting of gGREY (in the current window) in the same way as gCOPY: with gGREY 0 it copies black to black; with gGREY 1 it copies grey to grey, or black to grey if source is black only; with gGREY 2 it copies grey to grey and black to black, or black to both if source is black only. |
Usage:
gPEEKLINE id%,x%,y%,d%(),ln%
|
|
gPEEKLINE id%,x%,y%,d%(),ln%,mode% |
Reads a horizontal line from the black plane of the drawable id%, length ln%, starting at x%,y%. The leftmost 16 pixels are read into d%(1), with the first pixel read into the least significant bit.
|
|
If you set id% to 0, this just reads from the whole screen, not from any particular window. |
|
|
gPEEKLINE has an extra optional parameter mode% to specify the colour mode: |
|
mode% |
colour mode |
colour of pixel which sets bits |
|
-1 |
black and white |
black |
|
0 |
black and white |
white |
|
1 |
4-colour mode |
white |
|
2 |
16-colour mode |
white |
|
|
|
The array d%() must be long enough to hold the data. You can work out the number of integers required with ((ln%+15)/16) (using whole-number division).
|
|
Note that if the optional parameter mode% is used on the Series 5, the array size allowed must be adjusted accordingly: it must be at least twice as long as the array needed for black and white if the line you wish to peek in 4-colour mode and four times as long in 16-colour mode. |
On the Series 3c, if you add $8000 to id%, the grey plane (not the black plane) will be peeked, but note that $8000 ORed with the id% on the Series 5 will raise an ‘Invalid arguments’ error.
Usage: gPOLY a%()
Draws a sequence of lines, as if by gLINEBY and gMOVE commands.
The array is set up as follows:
|
a%(1) |
starting x position |
|
a%(2) |
starting y position |
|
a%(3) |
number of pairs of offsets |
|
a%(4) |
dx1% |
|
a%(5) |
dy1% |
|
a%(6) |
dx2% |
|
a%(7) |
dy2% etc. |
|
|
Constants for the first five array subscripts are supplied in Const.oph. See the ‘Calling Procedures’ chapter for details of how to use this file and Appendix E for a listing of it. |
Each pair of numbers dx1%,dy1%, for example specifies a line or a movement. To draw a line, dy% is the amount to move down, while dx% is the amount to move to the right multiplied by two.
To specify a movement (i.e. without drawing a line) work out the dx%,dy% as for a line, then add 1 to dx%.
(For drawing/movement up or left, use negative numbers.)
gPOLY is quicker than combinations of gAT, gLINEBY and gMOVE.
Example, to draw three horizontal lines 50 pixels long at positions 20,10, 20,30 and 20,50:
    a%(1)=20 :a%(2)=10             REM 20,10
    a%(3)=5                               REM 5 operations
    a%(4)=50*2  :a%(5)=0             REM draw right 50
    a%(6)=0*2+1 :a%(7)=20             REM move down 20
    a%(8)=-50*2 :a%(9)=0            REM draw left 50
    a%(10)=0*2+1 :a%(11)=20            REM draw left 50
    a%(12)=50*2 :a%(13)=0            REM draw right 50
    gPOLY a%()
Usage: gPRINT list of expressions
Displays a list of expressions at the current position in the current drawable. All variable types are formatted as for PRINT.
Unlike PRINT, gPRINT does not end by moving to a new line. A comma between expressions is still displayed as a space, but a semicolon has no effect. gPRINT without a list of expressions does nothing.
See also gPRINTB, gPRINTCLIP, gTWIDTH, gXPRINT, gTMODE.
Usage: any of
    gPRINTB t$,w%,al%,tp%,bt%,m%
    gPRINTB t$,w%,al%,tp%,bt%
    gPRINTB t$,w%,al%,tp%
    gPRINTB t$,w%,al%
    gPRINTB t$,w%
Displays text t$ in a cleared box of width w% pixels. The current position is used for the left side of the box and for the baseline of the text.
al% controls the alignment of the text in the box 1 for right aligned, 2 for left aligned, or 3 for centred.
tp% and bt% are the clearances between the text and the top/bottom of the box. Together with the current font size, they control the height of the box. An error is raised if tp% plus the font ascent is greater than 255.
m% controls the margins. For left alignment, m% is an offset from the left of the box to the start of the text. For right alignment, m% is an offset from the right of the box to the end of the text. For centring, m% is an offset from the left or right of the box to the region in which to centre, with positive m% meaning left and negative meaning right.
If values are not supplied for some arguments, these defaults are used:
|
al% |
left |
|
tp% |
0 |
|
bt% |
0 |
|
m% |
0 |
|
|
Constants for the layout features and the defaults are supplied in Const.oph. See the ‘Calling Procedures’ chapter for details of how to use this file and Appendix E for a listing of it. |
See also gPRINT, gPRINTCLIP, gTWIDTH, gXPRINT.
Usage: w%=gPRINTCLIP(text$,width%)
Displays text$ at the current position, displaying only as many characters as will fit inside width% pixels. Returns the number of characters displayed.
See also gPRINT, gPRINTB, gTWIDTH, gXPRINT, gTMODE.
Usage: rank%=gRANK
Returns the foreground/background position, from 1 to 64 on the Series 5, and 1 to 8 on the Series 3c, of the current window.
Raises an error if the current drawable is a bitmap.
See also gORDER.
Usage: gSAVEBIT name$,width%,height%
or gSAVEBIT name$
Saves the current drawable as the named bitmap file. If width% and height% are given, then only the rectangle of that size from the current position is copied.
gSAVEBIT does not add a default filename extension to the input argument name if none is provided on the Series 5, while on the Series 3c, if name$ has no file extension .PIC is used.
|
|
Saving a window to file when it includes grey will save both planes to the file, black bitmap first followed by grey. |
Usage: gSCROLL dx%,dy%,x%,y%,wd%,ht%
or gSCROLL dx%,dy%
Scrolls pixels in the current drawable by offset dx%,dy%. Positive dx% means to the right, and positive dy% means down. The drawable itself does not change its position.
If you specify a rectangle in the current drawable, at x%,y% and of size wd%,ht%, only this rectangle is scrolled.
The areas dx% wide and dy% deep which are "left behind" by the scroll are cleared.
The current position is not affected.
Usage: gSETPENWIDTH width%
Sets the pen width in the current drawable to width% pixels.
Usage: gSETWIN x%,y%,width%,height%
or gSETWIN x%,y%
Changes position and, optionally, the size of the current window.
An error is raised if the current drawable is a bitmap.
The current position is unaffected.
If you use this command on the default window, you must also use the SCREEN command to ensure that the area for PRINT commands to use is wholly contained within the default window.
Usage: gSTYLE style%
Sets the style of text displayed in subsequent gPRINT, gPRINTB and gPRINTCLIP commands on the current drawable.
|
Style% |
text style |
|
0 |
normal |
|
1 |
bold |
|
2 |
underline |
|
4 |
inverse |
|
8 |
double height |
|
16 |
mono-spaced |
|
32 |
italic |
You can combine these styles by adding their values for example, to set bold, underlined and double height, use gSTYLE 11, as 11=1+2+8.
This command does not affect non-graphics commands, like PRINT.
|
|
Constants for the styles are supplied in Const.oph. See the ‘Calling Procedures’ chapter for details of how to use this file and see Appendix E for a listing of it. |
Usage: gTMODE mode%
Sets the way characters are displayed by subsequent gPRINT and gPRINTCLIP commands on the current drawable.
|
Mode% |
pixels will be |
|
0 |
set |
|
1 |
cleared |
|
2 |
inverted |
|
3 |
replaced |
When you first use graphics text commands on a drawable, each dot in a letter causes a pixel to be set in the drawable. This is mode%=0.
When mode% is 1 or 2, graphics text commands work in a similar way, but the pixels are cleared or inverted. When mode% is 3, entire character boxes are drawn on the screen - pixels are set in the letter and cleared in the background box.
This command does not affect other text display commands.
|
|
Constants for the modes are supplied in Const.oph. See the ‘Calling Procedures’ chapter for details of how to use this file and see Appendix E for a listing of it. |
Usage: width%=gTWIDTH(text$)
Returns the width of text$ in the current font and style.
See also gPRINT, gPRINTB, gPRINTCLIP, gXPRINT.
Usage:
|
|
gULOADFONT fileId% |
|
|
gUNLOADFONT fontId% |
Unloads a user-defined font that was previously loaded using gLOADFONT. Raises an error if the font has not been loaded.
The built-in fonts are not held in memory and cannot be unloaded.
See also gLOADFONT.
Usage: any of
    gUPDATE ON
    gUPDATE OFF
    gUPDATE
The Psion’s screen is usually updated whenever you display anything on it. gUPDATE OFF switches off this feature. The screen will then be updated as few times as possible (though note that some keywords will always cause an update.) You can still force an update by using the gUPDATE command on its own.
This can result in a considerable speed improvement in some cases. You might, for example, use gUPDATE OFF, then a sequence of graphics commands, followed by gUPDATE. You should certainly use gUPDATE OFF if you are about to write exclusively to bitmaps.
gUPDATE ON returns to normal screen updating.
gUPDATE affects anything that displays on the screen. If you are using a lot of PRINT commands, gUPDATE OFF may make a noticeable difference in speed.
Note that with gUPDATE OFF, the location of errors which occur while the procedure is running may be incorrectly reported. For this reason, gUPDATE OFF is best used in the final stages of program development, and even then you may have to remove it to locate some errors.
Usage: gUSE id%
Makes the drawable id% current. Graphics drawing commands will now go to this drawable. gUSE does not bring a drawable to the foreground (see gORDER).
Usage: gVISIBLE ON
or gVISIBLE OFF
Makes the current window visible or invisible.
Raises an error if the current drawable is a bitmap.
Usage: width%=gWIDTH
Returns the width of the current drawable.
Usage: x%=gX
Returns the x current position (in from the left) in the current drawable.
Usage: gXBORDER type%,flags%,w%,h%
or gXBORDER type%,flags%
Draws a border in the current drawable of a specified type, fitting inside a rectangle of the specified size or with the size of the current drawable if no size is specified.
type%=1 for drawing the Series 3c 3-D grey and black border. A shadow or a gap for a shadow is always assumed.
type%=2 for drawing the Series 5 borders.
|
|
Values for flags% and their effects on the Series 5 are as follows, |
|
border type |
flags% |
|
none |
$00 |
|
single black |
$01 |
|
shallow sunken |
$42 |
|
deep sunken |
$44 |
|
deep sunken with outline |
$54 |
|
shallow raised |
$82 |
|
deep raised |
$84 |
|
deep raised with outline |
$94 |
|
vertical bar |
$22 |
|
horizontal bar |
$2a |
|
|
|
|
|
On the Series 3c, flags%=1,2,3,4 are as for gBORDER. When the shadow is enabled (1 or 3) only the grey and black parts of the border are drawn; you should pre-clear the background for the white parts. When the shadow is disabled (2 or 4) the outer and inner border lines are drawn, but the areas covered by grey/black when the shadow is enabled are now cleared. (This allows a shadow to be turned off simply by calling gXBORDER again.) |
The following values of flags% apply to all border types:
0 for normal corners
Adding $100 leaves 1 pixel gap around the border.
Adding $200 for more rounded corners
Adding $400 for losing a single pixel.
If both $400 and $200 are mistakenly supplied, $200 has priority.
See also gBORDER.
Usage: gXPRINT string$,flags%
Displays string$ at the current position, with precise highlighting or underlining. The current font and style are still used, even if the style itself is inverse or underlined. If text mode 3 (replace) is used both set and cleared pixels in the text are drawn.
flags% has the following effect:
|
flags% |
effect |
|
0 |
normal, as with gPRINT |
|
1 |
inverse |
|
2 |
inverse, except corner pixels |
|
3 |
thin inverse |
|
4 |
thin inverse, except corner pixels |
|
5 |
underlined |
|
6 |
thin underlined |
|
|
Constants for these flags are supplied in Const.oph. See the ‘Calling Procedures’ chapter for details of how to use this file and Appendix E for a listing of it. |
Where lines of text are separated by a single pixel, the thin options maintain the separation between lines.
gXPRINT does not support the display of a list of expressions of various types.
Usage: y%=gY
Returns the y current position (down from the top) in the current drawable.
Usage: h$=HEX$(x&)
Returns a string containing the hexadecimal (base 16) representation of integer or long integer x&.
For example HEX$(255) returns the string "FF".
To enter integer hexadecimal constants (16 bit) put a $ in front of them. For example $FF is 255 in decimal. (Don’t confuse this use of $ with string variable names.)
To enter long integer hexadecimal constants (32 bit) put a & in front of them. For example &FFFFF is 1048575 in decimal.
Counting in hexadecimal is done like this: 0 1 2 3 4 5 6 7 8 9 A B C D E F 10... where A stands for decimal 10, B for decimal 11, C for decimal 12 ... up to F for decimal 15. After F comes 10, which is equivalent to decimal 16. To understand numbers greater than hexadecimal 10, again compare hexadecimals with decimals. In these examples, 102 means 10
253 in decimal is:
(2 x 10²)+(5 x 101)+(3 x 100) = (2 x 100)+(5 x 10)+(3 x 1) = 200+50+3
By analogy, &253 in hexadecimal is:
(&2 x 162)+(&5 x 161)+(&3 x 160) =(2 x 256)+(5 x 16)+(3 x 1) =512+80+3 = 595 in decimal.
Similarly, &A6B in hexadecimal is:
(&A x 162)+(&6 x 161)+(&B x 160) =(10 x 256)+(6 x 16)+(11 x 1) =2560+96+11 = 2667 in decimal.
You may also find this table useful for converting between hex and decimal:
|
hex |
decimal |
|
|
&1 |
1 |
=160 |
|
&10 |
16 |
=161 |
|
&100 |
256 |
=162 |
|
&1000 |
4096 |
=163 |
For example, &20F9 is
(2 x &1000)+(0 x &100)+(15 x &10)+9 which in decimal is: (2 x 4096)+(0 x 256)+(15 x 16)+9 = 8441.
All hexadecimal constants are integers ($) or long integers (&). So arithmetic operations involving hexadecimal numbers behave in the usual way. For example, &3/&2 returns 1, &3/2.0 returns 1.5, 3/$2 returns 1.
Usage: h%=HOUR
Returns the number of the current hour from the system clock as an integer between 0 and 23.
Usage: i&=IABS(x&)
Returns the absolute value, i.e. without any sign, of the integer or long integer expression x&.
For example IABS(-10) is 10.
See also ABS, which returns the absolute value as a floating-point value.
Usage: ICON mbm$
Gives the name of the bitmap file mbm$ (also known as an EPOC Picture file) to use as the icon for an OPL Application.
If the ICON command is not used inside the APP85ENDA structure, then a default icon is used, but the rest of the information in the APP..ENDA construct is still used to specify the other features of the OPL application.
|
|
On the Series 5, mbm$ is a multi-bitmap file which can contain up to three bitmap/mask pairs - the sizes are 24, 32 and 48 squares. These different sizes are used for the different zoom levels in the system screen. The sizes are read from the MBM and the most suitable size is zoomed if the exact sizes required are not provided or if some are missing. |
This command can only be used between APP and ENDA.
See the ‘Advanced Topics’ chapter for more details of OPL applications.
Usage:
    IF condition1
          ...
    ELSEIF condition2
          ...
    ELSE
          ...
    ENDIF
Does either
or
or
After the ENDIF statement, the lines following ENDIF carry on as normal.
IF, ELSEIF, ELSE and ENDIF must be in that order.
Every IF must be matched with a closing ENDIF.
You can also have an IF...ENDIF structure within another, for example:
    IF condition1
          ...
    ELSE
          ...
          IF condition2
                ....
          ENDIF
          ...
    ENDIF
condition is an expression returning a logical value for example a<b. If the expression returns logical true (non-zero) then the statements following are executed. If the expression returns logical false (zero) then those statements are ignored. For more details about logical expressions, see Appendix B.
Usage: INCLUDE file$
Includes a file, file$, which may contain CONST definitions, prototypes for OPX procedures and prototypes for module procedures. The included file may not include module procedures themselves. Procedure and OPX procedure prototypes allow the translator to check parameters and coerce numeric parameters (that are not passed by reference) to the required type.
Including a file is logically identical to replacing the INCLUDE statement with the file’s contents.
The filename of the header may or may not include a path. If it does include a path, then OPL will only scan the specified folder for the file. However, the default path for INLCUDE is /System/Opl/, so when INCLUDE is called without specifying a path, OPL looks for the file firstly in the current folder and then in /System/Opl/ in all drives from Y: to A: and then in Z:, excluding any remote drives.
See CONST, EXTERNAL. See also the ‘Using OPXs on the Series 5’ chapter.
Usage: INPUT variable
or INPUT log.field
Waits for a value to be entered at the keyboard, and then assigns the value entered to a variable or data file field.
You can edit the value as you type it in. All the usual editing keys are available: the arrow keys move along the line, Esc clears the line and so on.
If inappropriate input is entered, for example a string when the input was to be assigned to an integer variable, a ? is displayed and you can try again. However, if you used TRAP INPUT, control passes on to the next line of the procedure, with the appropriate error condition being set and the value of the variable remaining unchanged.
INPUT is usually used in conjunction with a PRINT statement:
    PROC exch:
          LOCAL pds,rate
          DO
                PRINT "Pounds Sterling?",
                INPUT pds
                PRINT "Rate (DM)?",
                INPUT rate
                PRINT "=",pds*rate,"DM"
                GET
          UNTIL 0
    ENDP
Note the commas at the end of the PRINT statements, used so that the cursor waiting for input appears on the same line as the messages.
If a bad value is entered (for example "abc" for a%) in response to a TRAP INPUT, the ? is not displayed, but the ERR function can be called to return the value of the error which has occurred. If the Esc key is pressed while no text is on the input line, the ‘Escape key pressed’ error (number -114) will be returned by ERR (provided that the INPUT has been trapped). You can use this feature to enable someone to press the Esc key to escape from inputting a value.
See also EDIT. This works like INPUT, except that it displays a string to be edited and then assigned to a variable or field. It can only be used with strings.
Usage: INSERT
Inserts a new, blank record into the current view of a database. The fields can then be assigned to before using PUT or CANCEL.
Usage: i&=INT(x)
Returns the integer (in other words the whole number) part of the floating-point expression x. The number is returned as a long integer.
Positive numbers are rounded down, and negative numbers are rounded up for example INT(-5.9) returns -5 and INT(2.9) returns 2. If you want to round a number to the nearest integer, add 0.5 to it (or subtract 0.5 if it is negative) before you use INT.
|
|
In the Calculator, you need to use INT to pass a number to a procedure which requires a long integer parameter. This is because the Calculator passes all numbers as floating-point by default. |
See also INTF.
Usage: i=INTF(x)
Used in the same way as the INT function, but the value returned is a floating-point number. For example, INTF(1234567890123.4) returns 1234567890123.0
You may also need this when an integer calculation may exceed integer range.
See also INT.
Usage: i&=INTRANS
Finds out whether the current view is in a transaction. Returns -1 if it is in a transaction or 0 if it is not.
See also BEGINTRANS.
These functions are covered in detail in the ‘Advanced Topics’ chapter.
r%=IOA(h%,f%,var status%,var a1,var a2)
This has the same form as IOC, but it returns an error value of the request is not completed successfully. IOC should be used in preference to IOA.
IOC(h%,f%,var status%,var a1,var a2)
Make an I/O request with guaranteed completion. The device driver opened with handle h% performs the asynchronous I/O function f% with two further arguments, a1 and a2. The argument status% is set by the device driver. If an error occurs while making a request, status% is set to an appropriate values, but IOC always returns zero, not an error value. .An IOWAIT or IOWAITSTAT must be performed for each IOC. IOC should be used in preference to IOA.
r%=IOCANCEL(h%)
Cancels any outstanding asynchronous I/O request (IOC or IOA). Note, however, that the request will still complete, so the signal must be consumed using IOWAITSTAT.
r%=IOCLOSE(h%)
Closes a file with the handle h%.
r%=IOOPEN(var h%,name$,mode%)
Creates or opens a file called name$. Defines h% for use by other I/O functions. mode% specifies how to open the file. For unique file creation, use IOOPEN(var h%,addr%,mode%)
|
|
r%=IOREAD(h%,addr&,maxLen%) |
|
|
r%=IOREAD(h%,addr%,maxLen%) |
Reads from the file with the handle h%. address% is the address of a buffer large enough to hold a maximum of maxLen% bytes. The value returned to r% is the actual number of bytes read or, if negative, is an error value.
r%=IOSEEK(h%,mode%,var off&)
Seeks to a position in a file that has been opened for random access. mode% specifies how the offset argument off& is to be used. Values for mode% may be found in the ‘Advanced topics’ chapter. off& may be positive to move forwards or negative to move backwards. IOSEEK sets the variable off& to the absolute position set.
IOSIGNAL
Signals an asynchronous I/O function’s completion.
r%=IOW(h%,func%,var a1,var a2)
The device driver opened with handle h% performs the synchronous I/O function func% with the two further arguments.
IOWAIT
Waits for an asynchronous I/O function to signal completion.
IOWAITSTAT var stat%
Waits for an asynchronous function, called with IOC or IOA, to complete.
|
|
IOWAITSTAT32 var stat& |
|
|
|
|
|
|
|
r%=IOWRITE(h%,addr%,length%) |
Writes length% bytes in a buffer at address% to the file with the handle h%.
IOYIELD
Ensures that any asynchronous handler set up with IOC or IOA is given a chance to run. IOYIELD must always be called before polling status words on the Series 5, i.e. before reading a 16-bit status word if IOWAIT or IOWAITSTAT have not been used first.
Note the following example when you use #:
On the Series 3c you would call IOSEEK using,
ret%=IOSEEK(h%,mode%,#ptrOff%)
but on the Series 5 you would use,
ret%=IOSEEK(h%,mode%,#ptrOff&)
passing the long integer ptrOff&.
See also the ’32-bit addressing’ section in the ‘Advanced Topics’ chapter.
Usage: k%=KEY
Returns the character code of the key last pressed, if there has been a keypress since the last use of the keyboard by INPUT, EDIT, GET, GET$, KEY, KEY$, MENU and DIALOG.
If no key has been pressed, zero is returned.
See Appendix D for a list of special key codes. You can use KMOD to check whether modifier keys (Shift, Control, Fn (on the Series 5), Psion (on the Series 3c) and Caps Lock) were used.
This command does not wait for a key to be pressed, unlike GET.
Usage: k$=KEY$
Returns the last key pressed as a string, if there has been a keypress since the last use of the keyboard by INPUT, EDIT, GET, GET$, KEY, KEY$, MENU and DIALOG.
If no key has been pressed, a null string ("") is returned.
See Appendix D for a list of special key codes. You can use KMOD to check whether modifier keys (Shift, Control, Fn (on the Series 5), Psion (on the Series 3c) and Caps Lock) were used.
This command does not wait for a key to be pressed, unlike GET$.
Usage: err%=KEYA(var stat%,var key%(1))
This is an asynchronous keyboard read function.
See the ‘Advanced Topics’ chapter for details.
Cancel with KEYC.
Usage: err%=KEYC(var stat%)
Cancels the previously called KEYA function with status stat%. Note that KEYC consumes the signal (unlike IOCANCEL), so IOWAITSTAT should not be used after KEYC.
See the ‘Advanced Topics’ chapter for details.
Usage: KILLMARK b%
Removes the bookmark b%, which has previously been returned by BOOKMARK, from the current view of a database.
See BOOKMARK, GOTOMARK.
Usage: k%=KMOD
Returns a code representing the state of the modifier keys (whether they were pressed or not) at the time of the last keyboard access, such as a KEY function. The modifiers have these codes:
|
|
decimal code |
hex code |
|
|
|
2 |
Shift down |
$2 |
|
|
4 |
Control down |
$4 |
|
|
8 |
Psion down |
$6 |
|
|
16 |
Caps Lock on |
$10 |
|
|
128 |
Fn down |
$80 |
|
|
Constants for these codes are supplied in Const.oph. See the ‘Calling Procedures’ chapter for details of how to use this file and Appendix E for a listing of it. |
If there was no modifier, the function returns 0. If a combination of modifiers was pressed, the sum of their codes is returned - for example 20 is returned if Control (4) was held down and Caps Lock (16) was on.
Always use immediately after a KEY/KEY$/GET/GET$ statement.
The value returned by KMOD has one binary bit set for each modifier, as shown above. By using the logical operator AND on the value returned by KMOD you can check which of the bits are set, in order to see which modifier keys were held down. For more details on AND, see Appendix B.
Example:
    PROC modifier:
          LOCAL k%,mod%
          PRINT "Press a key" :k%=GET
          CLS :mod%=KMOD
          PRINT "Key code",k%,"with"
          IF mod%=0
                PRINT "no modifier"
          ENDIF
          IF mod% AND 2
                PRINT "Shift down"
          ENDIF
          IF mod% AND 4
                PRINT "Control down"
          ENDIF
          IF mod% AND 8                        REM only needed on Series 3c
                PRINT "Psion down"
          ENDIF
          IF mod% AND 16
                PRINT "Caps Lock on"
          ENDIF
          IF mod% AND 128                  REM only needed on Series 5
                PRINT "Fn down"
          ENDIF
    ENDP
Usage: LAST
Positions to the last record in a data file.
Usage: LCLOSE
Closes the device opened with LOPEN. (The device is also closed automatically when a program ends.)
Usage: b$=LEFT$(a$,x%)
Returns the leftmost x% characters from the string a$.
For example if n$ has the value Charles, then b$=LEFT$(n$,3) assigns Cha to b$.
Usage: a%=LEN(a$)
Returns the number of characters in a$.
E.g. if a$ has the value 34 Kopechnie Drive then LEN(a$) returns 18.
You might use this function to check that a data file string field is not empty before displaying:
    IF LEN(A.client$)
          PRINT A.client$
    ENDIF
Usage:
|
|
len&=LENALLOC(pcell&) |
|
|
len%=LENALLOC(pcell%) |
Returns the length of the previously allocated cell at pcell& (pcell% on the Series 3c).
|
|
Cells are allocated lengths that are the smallest multiple of four greater than the size originally requested. An error will be raised if the cell address argument is not in the range known by the heap. |
Usage: LINKLIB cat%
Link any libraries that have been loaded using LOADLIB.
|
|
The Series 5 supports use of OPXs only. See the ‘Using OPXs on the Series 5’ chapter for further details. |
Usage: a=LN(x)
Returns the natural (base e) logarithm of x.
Use LOG to return the base 10 log of a number.
Usage: ret%=LOADLIB(var cat%,name$,link%)
Load and optionally link a DYL that is not in the ROM. If successful, this writes the category handle to cat% and returns zero. The DYL is shared in memory if already loaded by another process.
|
|
The Series 5 supports use of OPXs only. See the ‘Using OPXs on the Series 5’ chapter for further details. |
Usage: LOADM module$
Loads a translated OPL module so that procedures in that module can be called. Until a module is loaded with LOADM, calls to procedures in that module will give an error.
module$ is a string containing the name of the module. Specify the full file name only where necessary.
Example: LOADM "MODUL2"
Up to 8 modules on the Series 5, or 4 on the Series 3c, can be in memory at any one time, including the top level module; if you try to LOADM a ninth (fifth) module, you get an error. Use UNLOADM to remove a module from memory so that you can load a different one.
|
|
By default, LOADM always uses the folder of the top level module. It is not affected by the SETPATH command. |
|
|
By default, LOADM always uses the directory of the initial running program, or the one specified by a OPA application. It is not affected by the SETPATH command. |
Usage: a%=LOC(a$,b$)
Returns an integer showing the position in a$ where b$ occurs, or zero if b$ doesn’t occur in a$. The search matches upper and lower case.
Example: LOC("STANDING","AND") would return the value 3 because the substring AND starts at the third character of the string STANDING.
Usage: LOCAL variables
Used to declare variables which can be referenced only in the current procedure. Other procedures may use the same variable names to create new variables. Use GLOBAL to declare variables common to all called procedures.
The variables may be of 4 types, depending on the symbol they end with:
Array variables have a number immediately following them in brackets which specifies the number of elements in the array. Array variables may be of any type, for example: x(6),y%(5),f$(5,12),z&(3)
When declaring string arrays, you must give two numbers in the brackets. The first declares the number of elements, the second declares their maximum length. For example surname$(5,8) declares five elements, each up to 8 characters long.
|
|
Variable names may be any combination of up to 32 numbers, alphabetic letters and the underscore character. They must start with a letter or an underscore. The length includes the %, & or $ sign, but not the () in string and array variables. |
|
|
Variable names may be any combination of up to 8 numbers and alphabetic letters. They must start with a letter. The length includes the %, & or $ sign, but not the () in string and array variables. |
More than one GLOBAL or LOCAL statement may be used, but they must be on separate lines, immediately after the procedure name.
See also GLOBAL, CONST and the ‘Variables and Constants’ chapter.
Usage: LOCK ON
or LOCK OFF
Mark an OPA (OPL application) as locked or unlocked. When an OPA is locked with LOCK ON, the System screen will not send it events to change files or quit.
|
|
If, for example, you move to the task list or the document name in the System screen try to stop that running OPA by using the ‘Close file’ button or Ctrl+E respectively, a message will appear, indicating that the OPA cannot close down at that moment. |
|
|
If, for example, you move on to the file list in the System screen and press Delete to try to stop that running OPA, a message will appear, indicating that the OPA cannot close down at that moment. |
You should use LOCK ON if your OPA uses a command, such as EDIT, MENU or DIALOG, which accesses the keyboard. You might also use it when the OPA is about to go busy for a considerable length of time, or at any other point where a clean exit is not possible. Do not forget to use LOCK OFF as soon as possible afterwards.
An OPA is initially unlocked.
Usage: a=LOG(x)
Returns the base 10 logarithm of x.
Use LN to find the base e (natural) log.
Usage: LOPEN device$
Opens the device to which LPRINTs are to be sent.
No LPRINTs can be sent until a device has been opened with LOPEN.
You can open any of these devices:
|
|
The parallel port, with LOPEN "PAR:A" |
The serial port, with LOPEN "TTY:A"
A file on the Psion
|
|
A file on an attached computer. LOPEN the file name, e.g. on a PC: |
Any existing file of the name given will be overwritten when you print to it.
Only one device may be open at any one time. Use LCLOSE to close the device. (It also closes automatically when a program finishes running.)
See Appendix C.
Usage: b$=LOWER$(a$)
Converts any upper case characters in the string a$ to lower case and returns the completely lower case string.
E.g. if a$="CLARKE", LOWER$(a$) returns the string "clarke"
Use UPPER$ to convert a string to upper case.
Usage: LPRINT list of expressions
Prints a list of items, in the same way as PRINT, except that the data is sent to the device most recently opened with LOPEN.
The expressions may be quoted strings, variables, or the evaluated results of expressions. The punctuation of the LPRINT statement (commas, semicolons and new lines) determines the layout of the printed text, in the same way as PRINT statements.
If no device has been opened with LOPEN you will get an error.
See PRINT for displaying to the screen.
See LOPEN for opening a device for LPRINT.
See Appendix C for an overview of printing from OPL. See also Printer OPX in the ‘Using OPXs on the Series 5’ chapter for details of more advanced printing features.
Usage: m=MAX(list)
or m=MAX(array(),element)
Returns the greatest of a list of numeric items.
The list can be either:
or
When operating on an array, the first argument must be the array name followed by (). The second argument, separated from the first by a comma, is the number of array elements you wish to operate on for example m=MAX(arr(),3) would return the value of the largest of elements arr(1), arr(2) and arr(3).
Usage: mCARD title$,n1$,k1%
or mCARD title$,n1$,k1%,n2$,k2% etc.
Defines a menu. When you have defined all of the menus, use MENU to display them.
title$ is the name of the menu. From one to eight items on the menu may be defined, each specified by two arguments. The first is the item name, and the second the keycode for a shortcut key. This specifies a key which, when pressed together with the Ctrl (Psion on the Series 3c) key, will select the option. If the keycode is for an upper case key, the shortcut key will use both the Shift and Ctrl (Psion) keys.
The options can be divided into logical groups by displaying a separating line under the final option in a group. To do this, pass the negative value corresponding to the shortcut key keycode for the final option in the group. For example, -%A specifies shortcut key Ctrl+Shift+A (Shift-Psion-A in Series 3c) and displays a separating line under the associated option in the menu.
|
|
Series 5 supports the following menu features |
|
Effect |
value |
|
menu item dimmed |
$1000 |
|
item has check-box |
$0800 |
|
start of an option button list |
$0900 |
|
middle of an option button list |
$0A00 |
|
end of an option button list |
$0B00 |
|
checkbox/option button symbol on |
$2000 |
|
checkbox/option button symbol indeterminate |
$4000 |
|
|
Constants for these flags are supplied in Const.oph. See the ‘Calling Procedures’ chapter for details of how to use this file and Appendix E for a listing of it. |
See also the ‘Friendlier Interaction’ chapter.
Usage: mCASC title$,item1$,hotkey1%,item2$,hotkey2%
Creates a cascade for a menu, on which less important menu items can be displayed. The cascade must be defined before use in a menu card. For example, a ‘Bitmap’ cascade under the File menu of a possible OPL drawing application could be defined like this:
    mCASC "Bitmap","Load",%L,"Merge",%M
    mCARD "File","New",%n,"Open",%o,"Save",%s,"Bitmap>",16,"Exit",%e
The trailing > character specifies that a previously defined cascade item is to be used in the menu at this point: it is not displayed in the menu item. A cascade has a filled arrow head displayed along side it in the menu. The cascade title in mCASC is also used only for identification purposes and is not displayed in the cascade itself. This title needs to be identical to the menu item text apart from the >. For efficiency, OPL doesn’t check that a defined cascade has been used in a menu and an unused cascade will simply be ignored. To display a > in a cascaded menu item, you can use >>.
Shortcut keys used in cascades may be added to the appropriate constant values as for mCARD to enable checkboxes, option buttons and dimming of cascade items.
As is typical for cascade titles, a shortcut value of 16 is used in the example above. This prevents the display or specification of any shortcut key. However, it is possible to define a shortcut key for a cascade title if required, for example to cycle through the options available in a cascade.
See mCARD, MENU, mINIT.
Usage: m=MEAN(list)
or m=MEAN(array(),element)
Returns the arithmetic mean (average) of a list of numeric items.
The list can be either:
or
When operating on an array, the first argument must be the array name followed by (). The second argument, separated from the first by a comma, is the number of array elements you wish to operate on for example m=MEAN(arr(),3) would return the average of elements arr(1), arr(2) and arr(3).
This example displays 15.0:
    a(1)=10
    a(2)=15
    a(3)=20
    PRINT MEAN(a(),3)
Usage: val%=MENU
or val%=MENU(var init%)
Displays the menus defined by mINIT, mCARD and mCASC, and waits for you to select an item. Returns the shortcut key keycode of the item selected, as defined in mCARD, in lower case.
If you cancel the menu by pressing Esc, MENU returns 0.
If the name of a variable is passed, it sets the initial menu pane and item to be highlighted. init% should be 256*(menu%)+item%; for both menu% and item%, 0 specifies the first, 1 the second and so on. If init% is 517 (=256*2+5), for example, this specifies the 6th item on the third menu.
If init% was passed, MENU writes back to init% the value for the item which was last highlighted on the menu. You can then use this value when calling the menu again.
|
|
You only need to use this technique if you have more than one menu in your program, maintaining one initialisation variable for each. |
|
|
It is necessary to use MENU(init%), passing back the same variable each time the menu is opened if you wish the menu to reopen with the highlight set on the last selected item. |
          mINIT
          ONERR errIgnore1
          mCARD "Xxx","ItemA",0      REM bad shortcut
    errIgnore1::
          ONERR errIgnore2
          mCARD "Yyy",""
          REM ‘Structure fault’ error (mINIT discarded)
    errIgnore2::
          ONERR OFF
          MENU                              REM ‘Structure fault’ again
Usage: m$=MID$(a$,x%,y%)
Returns a string comprising y% characters of a$, starting at the character at position x%.
E.g. if name$="McConnell" then MID$(name$,3,4) would return the string Conn.
Usage: m=MIN(list)
or m=MIN(array(),element)
Returns the smallest of a list of numeric items.
The list can be either:
or
When operating on an array, the first argument must be the array name followed by (). The second argument, separated from the first by a comma, is the number of array elements you wish to operate on for example m=MIN(arr(),3) would return the minimum of elements arr(1), arr(2) and arr(3).
Usage: mINIT
Prepares for definition of menus, cancelling any existing menus. Use mCARD and mCASC (on the Series 5 only) to define each menu, then MENU to display them.
|
|
On the Series 5, it is incorrect to ignore mCARD or mCASC errors by having an ONERR label around an mCARD or mCASC call. If you do, the menu is discarded and a ‘Structure fault’ will be raised if there is an occurrence of mCARD, mCASC or MENU without first using mINIT again. See also MENU for an example of this. |
Usage: m%=MINUTE
Returns the current minute number from the system clock (0 to 59).
E.g. at 8.54am MINUTE returns 54.
Usage: MKDIR name$
Creates a new folder/directory.
|
|
For example, MKDIR "C:/MINE/TEMP" creates a C:/MINE/TEMP folder, also creating C:/MINE if it is not already there. |
|
|
For example, MKDIR "M:/MINE/TEMP" creates a M:/MINE/TEMP directory, also creating M:/MINE if it is not already there. |
Usage: MODIFY
Allows the current record of a view to be modified without moving the record. The fields can then be assigned to before using PUT or CANCEL.
Usage: m%=MONTH
Returns the current month from the system clock as an integer between 1 and 12.
E.g. on 12th March 1992 m%=MONTH returns 3 to m%.
|
|
Constants for the month numbers are given in Const.oph. For details of how to use this file, see the ‘Calling Procedures chapter and for a listing of it see Appendix E. |
Usage: m$=MONTH$(x%)
Converts x%, a number from 1 to 12, to the month name, expressed as a three-letter mixed case string.
E.g. MONTH$(1) returns the string Jan.
|
|
Constants for the month numbers are given in Const.oph. For details of how to use this file, see the "Calling Procedures" chapter and for a lisitng of it see Appendix E. |
Usage: mPOPUP(x%,y%,posType%,item1$,key1%,item2$,key2%,...)
Presents a popup menu. mPOPUP returns the value of the keypress used to exit the popup menu, this being 0 if Esc is pressed.
|
|
Note that mPOPUP defines and presents the menu itself, and should not and need not be called from inside the mINIT...MENU structure. |
posType% is the position type controlling which corner of the popup menu x%,y% specifies and can take the values,
|
posType% |
corner |
|
0 |
top left |
|
1 |
top right |
|
2 |
bottom left |
|
3 |
bottom right |
Constants for these corner values are supplied in Const.oph. See the ‘Calling Procedures’ chapter for details of how to use this file and Appendix E for a listing of it.
item$ and key% can take the same values as for mCARD, with key% taking the same constant values to specify checkboxes, option buttons and dimmed items. However, cascades in popup menus are not supported.
For example
mPOPUP (0,0,0,"Continue",%c,"Exit",%e)
specifies a popup menu with 0,0 as its top left-hand corner with the items ‘Continue’ and ‘Exit’, with the shortcut keys Ctrl+C and Ctrl+E respectively.
See also mCARD.
Usage: pobj%=NEWOBJ(num%,clnum%)
Create a new object by category number num% belonging to the class clnum%, returning the object handle on success or zero if out of memory.
|
|
The Series 5 supports use of OPXs only. See the ‘Using OPXs on the Series 5’ chapter for further details. |
Usage: pobj%=NEWOBJH(cat%,clnum%)
Create a new object by category handle cat% belonging to the class clnum%, returning the object handle on success or zero if out of memory.
|
|
The Series 5 supports use of OPXs only. See the ‘Using OPXs on the Series 5’ chapter for further details. |
Usage: NEXT
Positions to the next record in the current data file.
If NEXT is used after the end of a file has been reached, no error is reported but the current record is null and the EOF function returns true.
Usage: n$=NUM$(x,y%)
Returns a string representation of the integer part of the floating-point number x, rounded to the nearest whole number. The string will be up to y% characters wide.
If y% is negative then the string is right-justified for example NUM$(1.9,-3) returns " 2" where there are two spaces to the left of the 2.
If y% is positive no spaces are added: e.g. NUM$(-3.7,3) returns "-4".
If the string returned to n$ will not fit in the width y%, then the string will just be asterisks; for example NUM$(256.99,2) returns "**".
See also FIX$, GEN$, SCI$.
Usage: ODBINFO var info%()
Provided for advanced use only, this keyword allows you to use OS and CALL to access data file interrupt functions not accessible with OPL keywords.
See the ‘Advanced Topics’ chapter for more details.
|
|
The Series 5 supports calls to the operating system using OPXs. Full description of their design is beyond the scope of this manual and is documented instead in the EPOC32 C++ Software Development Kit (SDK) which is available from Psion Software plc. See the ‘Using OPXs on the Series 5’ chapter for details of built-in OPXs. |
Usage: OFF
or OFF x%
Switches the Psion off.
When you switch back on, the statement following the OFF command is executed, for example:
OFF :PRINT "Hello again"
If you specify an integer, x%, greater than 2 (between 2 and 16383 on the Series 3c; 16383 is about 4.5 hours), the machine switches off for that number of seconds and then automatically turns back on and continues with the next line of the program. However, during this time the machine may be switched on by an alarm, and of course you can turn it on as usual.
|
|
The minimum time to switch off is 5 seconds on the Series 5. EPOC32 also prevents switch off if there's an absolute timer outstanding and due to go off in less than 5 seconds. |
|
|
Be careful how you use this command. If, due to a programming mistake, a program uses OFF in a loop, you may find it impossible to switch the Psion back on, and may have to reset the computer. |
Usage:
    ONERR label  or  ONERR label::
    ...
    ONERR OFF
ONERR label:: establishes an error handler in a procedure. When an error is raised, the program jumps to the label:: instead of the program stopping and an error message being displayed.
|
|
The label may be up to 32 characters long starting with a letter or an underscore. |
|
|
The label may be up to 8 characters long starting with a letter. |
It ends with a double colon (::), although you don’t need to use this in the ONERR statement.
ONERR OFF disables the ONERR command, so that any errors occurring after the ONERR OFF statement no longer jump to the label.
It is advisable to use the command ONERR OFF immediately after the label:: which starts the error handling code.
See the ‘Error Handling’ chapter for full details.
|
|
Usage:OPEN query$,log,f1,f2,... |
Compatibility with the Series 3cAs on the Series 3c (see below), query$ may contain just the filename. In this case a table with the default name Table1 would be opened if it exists. The field names would then be unimportant as access will be given to as many fields as there are supplied handles. The type indicators on the field handles must match the types of the fields.
|
|
Usage:OPEN file$,log,f1,f2... |
See also the ‘Data File Handling’ chapter and the ‘Series 5 Database Handling’ chapter.
See also CREATE, USE and OPENR.
Usage:
|
|
OPEN query$,log,f1,f2,... |
|
|
OPENR file$,log,f1,f2... |
This command works exactly like OPEN except that the opened file is read-only - in other words, you cannot APPEND, UPDATE or PUT the records it contains.
This means that you can run two separate programs at the same time, both sharing the same file.
Usage: a%=OS(i%,addr1%)
or a%=OS(i%,addr1%,addr2%)
Calls the Operating System interrupt i%, reading the values of all returned 8086 registers and flags. The CALL function, although simpler to use, does not allow the AL register to be passed and no flags are returned, making it suitable only for certain interrupts.
The input registers are passed at the address addr1%. The output registers are returned at the address addr2% if supplied, otherwise they are returned at addr1%. Both addresses can be of an array, or of six consecutive integers.
Register values are stored sequentially as 6 integers and represent the register values in this order: AX, BX, CX, DX, SI and DI. The interrupt’s function number, if required, is passed in AH.
The output array must be large enough to store the 6 integers returned in all cases, irrespective of the interrupt being called.
The value returned by OS is the flags register. The Carry flag, which is relevant in most cases, is in bit 0 of the returned value, so (a% AND 1) will be ‘True’ if Carry is set. Similarly, the Zero flag is in bit 6, the Sign flag in bit 7 and the Overflow flag in bit 10.
For example, to find COS(pi/4):
    PROC add:
          LOCAL a%,b%,c%,d%,si%,di%
          LOCAL result,cosArg,flags%
          cosArg=pi/4
          si%=ADDR(cosArg)
          di%=ADDR(result)
          ax%=$0100                              REM AH=1 for cosine
          flags%=OS(140,addr(ax%))
    ENDP
The OS function requires extensive knowledge of the Operating System and related programming techniques.
See also CALL.
|
|
The Series 5 supports calls to the operating system using OPXs. Full description of their design is beyond the scope of this manual and is documented instead in the EPOC32 C++ Software Development Kit (SDK) which is available from Psion Software plc. See the ‘Using OPXs on the Series 5’ chapter for details of built-in OPXs. |
Usage: p$=PARSE$(f$,rel$,var off%())
Returns a full file specification from the filename f$, filling in any missing information from rel$.
The offsets to the filename components in the returned string is returned in off%() which must be declared with at least 6 integers:
|
off%(1) |
filing system offset (1 always) |
|
off%(2) |
device offset (1 always on Series 5, since the filing system is not a component of filename on the Series 5) |
|
off%(3) |
path offset |
|
off%(4) |
filename offset |
|
off%(5) |
file extension offset |
|
off%(6) |
flags for wildcards in returned string |
The flag values in offset%(6) are:
|
0 |
no wildcards |
|
1 |
wilcard in filename |
|
2 |
wilcard in file extension |
|
3 |
wildcard in both |
|
|
Constants for the array subscripts and the flags are supplied in Const.oph. See the ‘Calling Procedures’ chapter for details of how to use this file and Appendix E for a listing of it. |
If rel$ is not itself a complete file specification, the current filing system, device and/or path are used as necessary to fill in the missing parts.
f$ and rel$ should be separate strings.
|
|
Example: |
|
|
Example: |
Usage: PATH name$
Gives the folder (directory on the Series 3c) to use for an OPA’s files.
This can only be used between APP and ENDA.
See the ‘Advanced Topics’ chapter for more details of OPAs.
|
|
OPL Applications do not have paths on the Series 5, so this command is not used. |
Usage: PAUSE x%
Pauses the program for a certain time, depending on the value of x%:
|
x% |
result |
|
0 |
waits for a key to be pressed |
|
+ve |
pauses for x% twentieths of a second |
|
-ve |
pauses for x% twentieths of a second or until a key is pressed |
So PAUSE 100 would make the program pause for 100/20 = 5 seconds, and PAUSE -100 would make the program pause for 5 seconds or until a key is pressed.
If x% is less than or equal to 0, a GET, GET$, KEY or KEY$ will return the key press which terminated the pause. If you are not interested in this keypress, but in the one which follows it, clear the buffer after the PAUSE with a single KEY function: PAUSE -10 :KEY
You should be especially careful about this if x% is negative, since then you cannot tell whether the pause was terminated by a keypress or by the time running out.
PAUSE should not be used in conjunction with GETEVENT or GETEVENT32 because events are discarded by PAUSE.
The PEEK functions find the values stored in specific bytes.
|
|
p%=PEEKB(x&) |
|
|
p%=PEEKB(x%) |
Returns the integer value of the byte at address x& (x%)
|
|
p%=PEEKW(x&) |
|
|
p%=PEEKW(x%) |
Returns the integer at address x& (x%)
|
|
p&=PEEKL(x&) |
|
|
p&=PEEKL(x%) |
Returns the long integer value at address x& (x%)
|
|
p=PEEKF(x&) |
|
|
p=PEEKF(x%) |
Returns the floating-point value at address x& (x%)
|
|
p$=PEEK$(x&) |
|
|
p$=PEEK$(x%) |
Returns the string at address x& (x%)
Usually you would find out the byte address with the ADDR function. For example, if var% has the value 7, PEEKW(ADDR(var%)) returns 7.
The different types are stored in different ways across bytes:
Integers are stored in two bytes. The first byte is the least significant byte, for example:
1 0 = 1
0 1 = 256
ADDR returns the address of the first (least significant) byte.
Long integers are stored in four bytes, the least significant first and the most significant last, for example:
0 0 1 0 = 65536
ADDR returns the address of the first (least significant) byte.
Strings are stored with one character per byte, with a leading byte containing the string length, e.g.:
3 65 66 67 = "ABC"
Each letter is stored as its character code - for example, A as 65.
For example, if var$="ABC", PEEK$(ADDR(var$)) will return the string ABC. ADDR returns the address of the length byte.
Floating-point numbers are stored under IEEE format, across eight bytes. PEEKF automatically reads all eight bytes and returns the number as a floating-point. For example if var=1.3 then PEEKF(ADDR(var)) returns 1.3.
You can use ADDR to find the address of the first element in an array, for example ADDR(x%(), you can also specify individual elements of the array, for example ADDR(x%(2)).
See also the POKE commands and ADDR. See also the ‘Series 5 32-bit addressing’ section in the ‘Advanced Topics’ chapter.
Usage: p=PI
Returns the value of
Usage: POINTERFILTER filter%,mask%
Filters pointer events in the current window out or back in. Add the following flags together to achieve the desired filter% and mask%:
|
event |
value |
|
none |
0 |
|
enter/exit |
1 |
|
drag |
4 |
Constants for these values are supplied in Const.oph. See the ‘Calling Procedures’ chapter for details of how to use this file and Appendix E for a listing of it.
The bits set in filter% specify the settings to be used, 1 to filter out the event and 0 to remove the filter. Only those bits set in mask% will be used for filtering. This allows the current setting of a particular bit to be left unchanged if that bit is zero in the mask. (i.e. mask% dictates what to change and filter% specifies the setting to which it should be changed). For example,
    mask%=5
    REM  =1+4 - allows enter/exit and drag settings to be changed
    POINTERFILTER 1,mask%
    REM filters out enter/exit, but not dragging
    ...
    POINTERFILTER 4,mask%
    REM filters out drag and reinstates enter/exit
Initially the events are not filtered out.
See also GETEVENT32, GETEVENTA32.
The POKE commands store values in specific bytes.
|
|
|
|
|
|
Stores the integer value y% (less than 256) in the single byte at address x& (x%)
|
|
|
|
|
|
Stores the integer y% across two consecutive bytes, with the least significant byte in the lower address, that is x& (x%)
|
|
|
|
|
|
Stores the long-integer y& in bytes starting at address x& (x%)
|
|
|
|
|
|
Stores the floating-point value y in bytes starting at address x& (x%)
|
|
|
|
|
|
Stores the string y$ in bytes starting at address x& (x%)
Use ADDR to find out the address of your declared variables.
|
|
Casual use of these commands can result in the loss of data in the Series 3c. |
See PEEK for more details of how the different types are stored across bytes.
Usage: p%=POS
|
|
Returns the number of the current record in the current view. You are advised to use bookmarks instead of POS on the Series 5. |
|
|
Returns the number of the current record in the current data file, from 1 (the first record) upwards. |
A Series 5 file has no limit on the number of records and Series 3c files can have up to 65534 records. However, integers can only be in the range -32768 to +32767. Record numbers above 32767 are therefore returned like this:
|
record value |
returned by POS |
|
32767 |
32767 |
|
32768 |
32768 |
|
32769 |
32767 |
|
32770 |
32766 |
|
... |
... |
|
65534 |
2 |
To display record numbers, you can use this check:
    IF POS<0
          PRINT 65536+POS
    ELSE
          PRINT POS
    ENDIF
|
|
Note that on the Series 5 the number of the current record may be greater than or equal to 65535 and hence values may need to be truncated to fit into p%, giving inaccurate results. You are particuarly advised to use bookmarks when dealing with a large number of records. Note, however, that the value returned by POS can become inaccurate if used in conjunction with bookmarks and multiple views on a table. Accuracy can be restored by using FIRST or LAST on the current view. |
Usage: POSITION x%
|
|
Makes record number x% the current record in the current view. By using bookmarks and editing the same table via different views, positional accuracy can be lost and POSITION x% could access the wrong record. Accuracy can be restored by using FIRST or LAST on the current view. |
Makes record number x% the current record in the current data file.
If x% is greater than the number of records in the file then the EOF function will return true.
Usage: POSSPRITE x%,y%
Set the position of the current sprite to pixel x%,y%.
|
|
On the Series 5, sprites are handled by a built-in OPX. See the ‘Using OPXs on the Series 5’ chapter for more details. |
Usage: PRINT list of expressions
Displays a list of expressions on the screen. The list can be punctuated in one of these ways:
If items to be displayed are separated by commas, there is a space between them when displayed.
If they are separated by semicolons, there are no spaces.
Each PRINT statement starts a new line, unless the preceding PRINT ended with a semicolon or comma.
There can be as many items as you like in this list. A single PRINT on its own just moves to the next line.
Examples: On 1st January 1997,
|
code |
display |
|
PRINT "TODAY is", :PRINT DAY;".";MONTH;".";YEAR |
TODAY is 1.1.1997 |
|
PRINT 1 |
1 |
|
PRINT "Hello" |
Hello |
|
PRINT "Number",1 |
Number 1 |
See also LPRINT, gUPDATE, gPRINT, gPRINTB, gPRINTCLIP, gXPRINT.
Usage: PUT
Marks the end of a database’s INSERT or MODIFY phase and makes the changes permanent.
See INSERT, MODIFY, CANCEL.
Usage: r=RAD(x)
Converts x from degrees to radians.
All the trigonometric functions assume angles are specified in radians, but it may be easier for you to enter angles in degrees and then convert with RAD.
Example:
    PROC xcosine:
          LOCAL angle
          PRINT "Angle (degrees)?:";
          INPUT angle
          PRINT "COS of",angle,"is",
          angle=RAD(angle)
          PRINT COS(angle)
          GET
    ENDP
(The formula used is (PI*x)/180).
To convert from radians to degrees use DEG.
Usage: RAISE x%
Raises an error.
The error raised is error number x%. This may be one of the errors listed in the ‘Error Handling’ chapter, or a new error number defined by you.
The error is handled by the error processing mechanism currently in use — either OPL’s own, which stops the program and displays an error message, or the ONERR handler if you have ONERR on.
Usage: TRAP RAISE x%
Sets the value of ERR to x% and clears the trap flag.
For a full explanation of the use of RAISE, see the ‘Error Handling’ chapter.
Usage: RANDOMIZE x&
Gives a ‘seed’ (start-value) for RND.
Successive calls of the RND function produce a sequence of random numbers. If you use RANDOMIZE to set the seed back to what it was at the beginning of the sequence, the same sequence will be repeated.
For example, you might want to use the same ‘random’ values to test new versions of a procedure. To do this, precede the RND statement with the statement RANDOMIZE value. Then to repeat the sequence, use RANDOMIZE value again.
Example:
    PROC SEQ:
          LOCAL g$(1)
          WHILE 1
                PRINT "S: set seed to 1"
                PRINT "Q: quit"
                PRINT "other key: continue"
                g$=UPPER$(GET$)
                IF g$="Q"
                      BREAK
                ELSEIF g$="S"
                      PRINT "Setting seed to 1"
                      RANDOMIZE 1
                      PRINT "First random no:"
                ELSE
                      PRINT "Next random no:"
                ENDIF
                PRINT RND
          ENDWH
    ENDP
Usage:
|
|
pcelln&=REALLOC(pcell&,size&) |
|
|
pcelln%=REALLOC(pcell%,size%) |
Change the size of a previously allocated cell at pcell& (pcell%) to size& (size%), returning the new cell address or zero if there is not enough memory.
|
|
Cells are allocated lengths that are the smallest multiple of four greater than the size requested. An error will be raised if the cell address argument is not in the range known by the heap. |
See also the ‘Advanced Topics’ chapter.
Usage: r%=RECSIZE
Returns the number of bytes occupied by the current record.
Use this function to check that a record may have data added to it without overstepping the 1022-character limit.
Example:
    PROC rectest:
          LOCAL n$(20)
          OPEN "name",A,name$
          PRINT "Enter name:",
          INPUT n$
          IF RECSIZE<=(1022-LEN(n$))
                A.name$=n$
                APPEND
          ELSE
                PRINT "Won’t fit in record"
          ENDIF
    ENDP
|
|
This function is not required on the Series 5 because the character limit is larger than the OPL record length (i.e. 32 |
Usage: REM text
Precedes a remark you include to explain how a program works. All text after the REM up to the end of the line is ignored.
When you use REM at the end of a line you need only precede it with a space, not a space and a colon.
Examples:
INPUT a :b=a*.175 REM b=TAX
INPUT a :b=a*.175 :REM b=TAX
Usage: RENAME file1$,file2$
Renames file1$ as file2$. You can rename any type of file.
You cannot use wildcards.
You can rename across directories RENAME "/dat/xyz.abc","/xyz.abc" is OK. If you do this, you can choose whether or not to change the name of the file.
Example:
    PRINT "Old name:" :INPUT a$
    PRINT "New name:" :INPUT b$
    RENAME a$,b$
Usage: r$=REPT$(a$,x%)
Returns a string comprising x% repetitions of a$.
For example, if a$="ex", r$=REPT$(a$,5) returns exexexexex.
Usage: RETURN
or RETURN variable
Terminates the execution of a procedure and returns control to the point where that procedure was called (ENDP does this automatically).
RETURN variable does this as well, but also passes the value of variable back to the calling procedure. The variable may be of any type. You can return the value of any single array element - for example RETURN x%(3). You can only return one variable.
RETURN on its own, and the default return through ENDP, causes the procedure to return the value 0 or a null string.
Example:
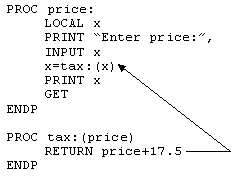
Usage: r$=RIGHT$(a$,x%)
Returns the rightmost x% characters of a$.
Example:
    PRINT "Enter name/ref",
    INPUT c$
    ref$=RIGHT$(c$,4)
    name$=LEFT$(c$,LEN(c$)-4)
Usage: ROLLBACK
Cancels the current transaction on the current view. Changes made to the database with respect to this particular view since BEGINTRANS was called will be discarded.
See also BEGINTRANS, COMMITTRANS.
Usage: RMDIR str$
Removes the directory given by str$. You can only remove empty directories.
Usage: r=RND
Returns a random floating-point number in the range 0 (inclusive) to 1 (exclusive).
To produce random numbers between 1 and n e.g. between 1 and 6 for a dice use the following statement: f%=1+INT(RND*n)
RND produces a different number every time it is called within a program. A fixed sequence can be generated by using RANDOMIZE. You might begin by using RANDOMIZE with an argument generated from MINUTE and SECOND (or similar), to seed the sequence differently each time.
Example:
    PROC rndvals:
          LOCAL i%
          PRINT "Random test values:"
          DO
                PRINT RND
                i%=i%+1
                GET
          UNTIL i%=10
    ENDP
Usage: s$=SCI$(x,y%,z%)
Returns a string representation of x in scientific format, to y% decimal places and up to z% characters wide.
Examples:
SCI$(123456,2,8)="1.23E+05"
SCI$(1,2,8)="1.00E+00"
SCI$(1234567,1,-8)=" 1.2E+06"
If the number does not fit in the width specified then the returned string contains asterisks.
If z% is negative then the string is right-justified.
See also FIX$, GEN$, NUM$.
Usage: SCREEN width%,height%
or SCREEN width%,height%,x%,y%
Changes the size of the window in which text is displayed. x%,y% specify the character position of the top left corner; if they are not given, the text window is centred in the screen.
An OPL program can initially display text to the whole screen.
See SCREENINFO.
Usage: SCREENINFO var info%()
Gets information on the text screen (as used by PRINT, SCREEN etc.)
This keyword allows you to mix text and graphics. It is required because while the default window is the same size as the physical screen, the text screen is slightly smaller and is centred in the default window. The few pixels gaps around the text screen, referred to as the left and top margins, depend on the font in use.
On return, the array info%(), which must have at least 10 elements, contains this information:
info%(1) left margin in pixels
info%(2) top margin in pixels
info%(3) text screen width in character units
info%(4) text screen height in character units
info%(5) reserved (window server id for default window)
|
|
The font ID is a 32-bit integer on the Series 5 and therefore would not fit into a single element of info%(). Hence, the least significant 16 bits of the font ID are returned to info%(9) and the most significant 16 bits to info%(10). |
|
|
On the Series 3c, the font ID is returned to info%(6). |
Initially SCREENINFO returns the values for the initial text screen. Subsequently any keyword which changes the size of the text screen font, such as FONT or SCREEN, will change some of these values and SCREENINFO should therefore be called again.
See also FONT, SCREEN.
Usage: s%=SECOND
Returns the current time in seconds from the system clock (0 to 59).
E.g. at 6:00:33 SECOND returns 33.
Usage: SECSTODATE s&,var yr%,var mo%,var dy%,var hr%,var mn%, var sc%,var yrday%
Sets the variables passed by reference to the date corresponding to s&, the number of seconds since 00:00 on 1/1/1970. yrday% is set to the day in the year (1-366).
s& is an unsigned long integer. To use values greater than +2147483647, subtract 4294967296 from the value.
See also DATETOSECS, HOUR, MINUTE, SECOND, dDATE, DAYS.
Usage: ret%=SEND(pobj%,m%,var p1,...)
Send a message to the object pobj% to call the method number m%, passing between zero and three arguments (p1...) depending on the requirements of the method, and returning the value returned by the selected method.
|
|
The Series 5 supports use of OPXs only. See the ‘Using OPXs on the Series 5’ chapter for further details. |
Usage: SETDOC file$
Sets the file file$ to be a document. This command should be called immediately before the creation of file$ if it is to be recognised as a document. SETDOC may be used with the commands CREATE, gSAVEBIT and IOOPEN.
The string passed to SETDOC must be identical to the name passed to the following CREATE or gSAVEBIT otherwise a non-document file will be created. Example of document creation:
    SETDOC "myfile"
    CREATE "myfile",a,a$,b$
SETDOC should also be called after successfully opening a document to allow the System screen to display the correct document name in its task list.
In case of failure in creating or opening the required file, you should take the following action:
Creating - try to re-open the last file and if this fails display an appropriate error dialog and exit. On reopening, call SETDOC back to the original file so the Task list is correct.
Opening - as for creating, but calling SETDOC again is not strictly required.
Database documents, created using CREATE, and multi-bitmap documents, created using gSAVEBIT, will automatically contain your application UID in the file header. For binary and text file documents created using IOOPEN and LOPEN, it is the programmer’s responsibility to save the appropriate header in the file. This is a fairly straight-forward process and the following suggests one way of finding out what the header should be:
Create a database or bitmap document in a test run of you application using SETDOC as shown above
Use a hex editor or hex dump program to find the 1st 16 bytes, or run the program below which reads the four long integer UIDs from the test document.
Write these four long integers to the start of the file you create using IOOPEN.
    INCLUDE "Const.oph"
    DECLARE EXTERNAL
    EXTERNAL readUids:(file$)

    PROC main:
          LOCAL f$(255)
          WHILE 1
                dINIT "Show UIDs in document header"
                dPOSITION 1,0
                dFILE f$,"Document,Folder,Drive",0
                IF DIALOG=0
                      RETURN
                ENDIF
                readUids:(f$)
          ENDWH
    ENDP

    PROC readUids:(f$)
          LOCAL ret%,h%
          LOCAL uid&(4),i%
          ret%=IOOPEN(h%,f$,KIoOpenModeOpen% OR KIoOpenFormatBinary%)
          IF ret%>=0
                ret%=IOREAD(h%,ADDR(uid&()),16)
                PRINT "Reading ";f$
                IF ret%=16
                      WHILE i%<4
                            i%=i%+1
                            PRINT "  Uid"+num$(i%,1)+"=",hex$(uid&(i%))
                      ENDWH
                ELSE
                      PRINT "  Error reading: ";
                      IF ret%<0
                            PRINT err$(ret%)
                      ELSE
                            PRINT "Read ";ret%;" bytes only ";
                            PRINT "(4 long integers required)"
                      ENDIF
                ENDIF
                IOCLOSE(h%)
          ELSE
                PRINT "Error opening: ";ERR$(ret%)
          ENDIF
    ENDP
Creating text file documents using IOOPEN or LOPEN has two special requirements:
You will need to save the required header as the first text record. This will insert the standard text file line delimiters CR LF (hex 0D 0A) at the end of the record.
The specific 16 bytes required for your application may itself however contain CR LF. Since you should know when this is the case, you will need to read records until you have reached byte 16 in the document. This is clearly not a desirable state of affairs but is inescapable given that text files were not designed to have headers. It is recommended that you request a new UID for your application if it contains CR LF.
See the ‘Advanced Topics’ chapter.
See also GETDOC$.
Usage: SETFLAGS flags&
Sets flags to produce various effects when running programs. Use CLEARFLAGS to clear any flags which have been set. The effects which can be achieved are as follows:
|
flags% |
effect |
|
1 |
restructs the memory available to your application to 64K, emulating the Series 3c. This setting should be used at the beginning of your program only, if required. Changing this setting repeatedly will have unpredictable effects. |
|
2 |
enables auto-compaction on closing databases. This can be slow, but it is advisable to use this setting when lots of changes have been made to a database. |
|
4 |
enables raising of overflow errors when floating-point values are greater than or equal to 1.0E+100 in magnitude, instead or allowing 3-digit exponents (for backwards compatibility) |
|
$1000 |
enables GETEVENT, GETEVENT32 and GETEVENT32A to return the event code $403 to ev&(1) when the machine switches on |
Constants for these flags are supplied in Const.oph. See the ‘Calling Procedures’ chapter for details of how to use this file and Appendix E for a listing of it.
By default these flags are cleared.
See the ‘Advanced Topics’ and ‘Series 5 Database Handling’ chapters.
See also GETEVENT32, CLEARFLAGS.
Usage: SETNAME name$
Sets the name of the running OPA to name$ and redraws any status window, using that name below the icon.
|
|
SETDOC serves a similar purpose on the Series 5. |
Usage: SETPATH name$
Sets the current path for file access for example,
|
|
SETPATH "C:/Documents/". |
|
|
SETPATH "a:/docs/". |
SETPATH needs the final backslash to be passed otherwise it ignores everything beyond the last backslash. LOADM continues to use the path of the initial program, but all other file access will use the new path.
Usage: s=SIN(angle)
Returns the sine of angle, an angle expressed in radians.
To convert from degrees to radians, use the RAD function.
Usage: s&=SPACE
Returns the number of free bytes on the device on which the current (open) data file is held.
|
|
Example: |
    PROC stock:
          OPEN "c:/stock/stock",A,a$,b%
          PRINT SPACE,"bytes free on C:"
    ENDP
|
|
Example: |
    PROC stock:
          OPEN "a:/stock",A,a$,b%
          WHILE 1
                PRINT "Item name:";
                INPUT A.a$
                PRINT "Number:";
                INPUT A.b%
                IF RECSIZE>SPACE
                      PRINT "Disk full"
                      CLOSE
                      BREAK
                ELSE
                      APPEND
                ENDIF
          ENDWH
    ENDP
Usage: s=SQR(x)
Returns the square root of x.
Usage: any of
    STATUSWIN ON,type%
    STATUSWIN ON
    STATUSWIN OFF
Displays or removes a ‘permanent’ status window.
If type%=1 the small status window is shown. If type%=2 the large status window is shown. STATUSWIN ON on its own displays an appropriate status window; on the Series 3c this will always be the large status window.

|
There is only one type of status window on the Siena, which will be displayed whatever type% you use. |
The permanent status window is behind all other OPL windows. In order to see it, you must use FONT (or both SCREEN and gSETWIN) to reduce the size of the text and graphics windows. You should ensure that your program does not create windows over the top of it.
|
|
The Series 5 has no status windows, but they are replaced by the toolbar. See the ‘Friendlier Interaction’ chapter for more details. |
Usage: t%=STATWININFO(type%,var xy%())
Sets xy%(1),xy%(2), xy%(3) and xy%(4) to the top left x, top left y, width and height respectively of the specified type of status window. type%=1 is the small status window; type%=2 is the large status window; type%=3 is the Series 3 compatibility mode status window; type%=-1 is whichever status window is current.
STATWININFO returns t%, the type of the current status window (with values as for type%, or zero if there is no current status window).
|
|
The Series 5 has no status windows, but they are replaced by the toolbar. See the ‘Friendlier Interaction’ chapter for more details. |
Usage: s=STD(list)
or s=STD(array(),element)
Returns the standard deviation of a list of numeric items.
The list can be either:
or
When operating on an array, the first argument must be the array name followed by (). The second argument, separated from the first by a comma, is the number of array elements you wish to operate on for example m=STD(arr(),3) would return the standard deviation of elements arr(1), arr(2) and arr(3).
This function gives the sample standard deviation, using the formula:

To convert to population standard deviation, multiply the result by SQR((n-1)/n).
Usage: STOP
Ends the running program.
|
|
Note that STOP may not be used during an OPX callback and will raise the Series 5 error, ‘STOP used in callback’ if it is. See the ‘Using OPXs on the Series 5’ chapter. |
Usage: STYLE style%
Sets the text window character style. style% can be 2 for underlined, or 4 for inverse.
See ‘The text and graphics windows’ section at the end of the ‘Graphics’ chapter for more details.
Usage: s=SUM(list)
or s=SUM(array(),element)
Returns the sum of a list of numeric items.
The list can be either:
or
When operating on an array, the first argument must be the array name followed by (). The second argument, separated from the first by a comma, is the number of array elements you wish to operate on for example m=SUM(arr(),3) would return the sum of elements arr(1), arr(2) and arr(3).
Usage: t=TAN(angle)
Returns the tangent of angle, an angle expressed in radians.
To convert from radians to degrees, use the DEG function.
Usage: t%=TESTEVENT
Returns ‘True’ if an event has occurred, otherwise returns ‘False’. The event is not read by TESTEVENT - it may be read with GETEVENT, or GETEVENT32 or GETEVENTA32 on the Series 5.
|
|
On the Series 5, it is recommended that you use either GETEVENT32 or GETEVENTA32 without TESTEVENT as TESTEVENT may use a lot of power, especially when used in a loop as will often be the case. |
Section Contents
Usage: TRAP command
TRAP is an error handling command. It may precede any of these commands:
APPEND, UPDATE, BACK, NEXT, LAST, FIRST, POSITION, USE, CREATE, OPEN, OPENR, CLOSE, DELETE
|
|
MODIFY, INSERT, PUT, CANCEL |
COPY, ERASE, RENAME, LOPEN, LCLOSE, LOADM, UNLOADM
|
|
COMPRESS |
MKDIR, RMDIR
EDIT, INPUT
gSAVEBIT, gCLOSE, gUSE, gUNLOADFONT, gFONT, gPATT, gCOPY
For example, TRAP FIRST.
Any error resulting from the execution of the command will be trapped. Program execution will continue at the statement after the TRAP statement, but ERR will be set to the error code.
TRAP overrides any ONERR.
Usage: TRAP RAISE x%
Sets the value of ERR to x% and clears the trap flag.
See the ‘Error Handling’ chapter for further details of TRAP usage.
Usage: TYPE num%
Sets the type of an OPA, from 0 to 4, with num%. On the Series 3c you should set num% from $1000 to $1004 to set type 0 to 4 respectively; the $1000 allows a 48x48 black/grey icon to be used.
This can only be used between APP and ENDA.
See the ‘Advanced Topics’ chapter for more details of OPAs.
|
|
OPL Applications do not have types on the Series 5, but FLAGS provides similar functionality. |
Usage: i%=UADD(val1%, val2%)
Add val1% and val2%, as if both were unsigned integers with values from 0 to 65535. Prevents integer overflow for pointer arithmetic on the Series 3c e.g. UADD(ADDR(text$),1) should be used instead of ADDR(text$)+1.
One argument would normally be a pointer and the other an offset expression.
|
|
Note that UADD and USUB should not be used on the Series 5 for pointer arithmetic unless SETFLAGS has been used to enforce the 64K memory limit. In general, long intger arithmetic should be used for pointer arithmetic on the Series 5. |
See also USUB.
Usage: ret%=UNLOADLIB(var cat%)
Unload a DYL from memory. If successful, returns zero.
|
|
The Series 5 supports use of OPXs only. See the ‘Using OPXs on the Series 5’ chapter for further details. |
Usage: UNLOADM module$
Removes from memory the module module$ loaded with LOADM.
module$ is a string containing the name of the translated module.
The procedures in an unloaded module cannot then be called by another procedure.
UNLOADM causes any procedures in the module that are not still running to be unloaded from memory too. Running procedures are unloaded on return. It is considered bad practice, however, to use UNLOADM on a module with procedures that are still running. On the Series 3c, the module name and procedure name will not be available for any untrapped error message.
|
|
Once LOADM has been called, procedures loaded stay in memory until the module is unloaded, so significantly more memory can be used than on the Series 3c, where procedures are unloaded when the cache is full (or on return if caching is not used). |
See DO.
Usage: UPDATE
Deletes the current record in the current data file and saves the current field values as a new record at the end of the file.
This record, now the last in the file, remains the current record.
Example:
    A.count=129
    A.name$="Brown"
    UPDATE
Use APPEND to save the current field values as a new record.
|
|
MODIFY, PUT and CANCEL should normally be used instead of UPDATE on the Series 5. |
Usage: u$=UPPER$(a$)
Converts any lower case characters in a$ to upper case, and returns the completely upper case string.
Example:
    ...
    CLS :PRINT "Y to continue"
    PRINT "or N to stop."
    g$=UPPER$(GET$)
    IF g$="Y"
          nextproc:
    ELSEIF g$="N"
          RETURN
    ENDIF
    ...
Use LOWER$ to convert to lower case.
Usage: USE logical name
Selects the data file with the given logical name (A-Z for the Series 5, A, B, C or D for the Series 3c). The file must previously have been opened with OPEN, OPENR or CREATE and not yet be closed.
All the record handling commands (such as POSITION and UPDATE, and GOTOMARK, INSERT, MODIFY, CANCEL and PUT on the Series 5) then operate on this file.
Usage: u%=USR(pc%,ax%,bx%,cx%,dx%)
Executes your machine code, returning an integer. The USR code (i.e. the assembler code you have written) must return with a far RET, otherwise the program will crash.
The values of ax%,bx%... are passed to the AX, BX... 8086 registers. The microprocessor then executes the machine code starting at pc%. At the end of the routine, the value in the AX register is passed back to u%.
|
|
Casual use of this function can result in the loss of data in the Psion. |
This example shows a simple operation, ending with a far RET:
    PROC trivial:
          LOCAL t%(2),u%,ax%
          t%(1)=$c032                               REM xor al,al
          t%(2)=$cb                                REM retf
          ax%=$1ab
          u%=usr(addr(t%(1)),ax%,0,0,0)       REM returns (ax% AND $FF00)
          PRINT u%                                     REM 256 ($100)
          GET
    ENDP
See also USR$, ADDR, PEEK, POKE.
Usage: u$=USR$(pc%,ax%,bx%,cx%,dx%)
Executes your machine code, returning a string. The USR$ code you have written must return with a far RET, otherwise the program will crash.
The values of ax%,bx%... are passed to the ax, bx... 8086 registers. The microprocessor then executes the machine code starting at pc%. At the end of the routine, the value in the ax register must point to a length-byte preceded string. This string is then copied to u$.
|
|
Casual use of this function can result in the loss of data in the Psion. |
See USR for an example. See also ADDR, PEEK, POKE.
Usage: i%=USUB(val1%,val2%)
Subtract val2% from val1%, as if both were unsigned integers with values from 0 to 65535. Prevents integer overflow for pointer arithmetic on the Series 3c.
|
|
Note that UADD and USUB should not be used for pointer arithmetic on the Series 5 unless SETFLAGS has been used to enforce the 64K memory limit. In general long integer arithmetic should be used. |
See also UADD.
Usage: v=VAL(numeric string)
Returns the floating-point number corresponding to a numeric string.
The string must be a valid number e.g. not "5.6.7" or "196f". Expressions, such as "45.6*3.1", are not allowed. Scientific notation such as "1.3E10", is OK.
E.g. VAL("470.0") returns 470
See also EVAL.
Usage: v=VAR(list)
or v=VAR(array(),element)
Returns the variance of a list of numeric items.
The list can be either:
or
When operating on an array, the first argument must be the array name followed by (). The second argument, separated from the first by a comma, is the number of array elements you wish to operate on for example m=VAR(arr(),3) would return the variance of elements arr(1), arr(2) and arr(3).
This function gives the sample variance, using the formula:

To convert to population variance, multiply the result by (n-1)/n
Usage:
    VECTOR i%
          label1,label2,...,labelN
    ENDV
VECTOR i% jumps to label number i% in the list. If i% is 1 this will be the first label, and so on. The list is terminated by the ENDV statement. The list may spread over several lines, with a comma separating labels in any one line but no comma at the end of each line.
If i% is not in the range 1 to N, where N is the number of labels, the program continues with the statement after the ENDV statement.
See also GOTO.
Usage: w%=WEEK(day%,month%,year%)
Returns the week number in which the specified day falls, as an integer between 1 and 53.
day% must be between 1 and 31, month% between 1 and 12, year% between 0 and 9999 (1900 and 2155 on the Series 3c).
Each week is taken to begin on the ‘Start of week’ day, as specified in the Control Panel on the Series 5 or the Time application on the Series 3c. When a year begins on a different day to the start of the week, it counts as week 1 if there are four or more days before the next week starts.
|
|
The System setting of the ‘Start of week’ may be checked from inside OPL by using the LCSTARTOFWEEK&: procedure in the Date OPX. The week number in the year may also be calculated by different rules and also with your own choice of the start of year by using the procedure DTWEEKNOINYEAR&: in Date OPX. See the ‘Using OPXs on the Series 5’ for more details. |
Usage:
    WHILE expression
          ...
    ENDWH
Repeatedly performs the set of instructions between the WHILE and the ENDWH statement, so long as expression returns logical true non-zero.
If expression is not true, the program jumps to the line after the ENDWH statement.
Every WHILE must be closed with a matching ENDWH.
See also DO...UNTIL and the ‘Loops and Branches’ chapter.
Usage: y%=YEAR
Returns the current year as an integer from the system clock.
For example, on 5th May 1997 YEAR returns 1997.
|
|
|
|