|
4. HOW
TO MAKE FRITTY GLASS TILES
Fused
Glass Jewellery Funky
Fused Shapes Glass Tiles and Tesserae |
|
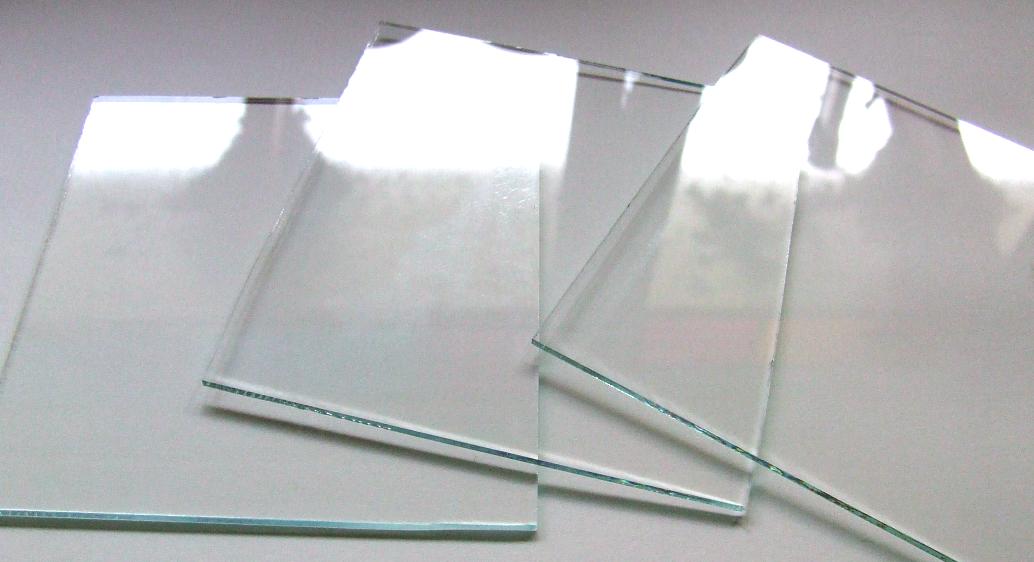
| This
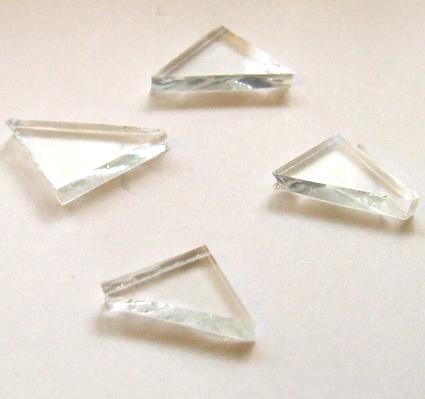
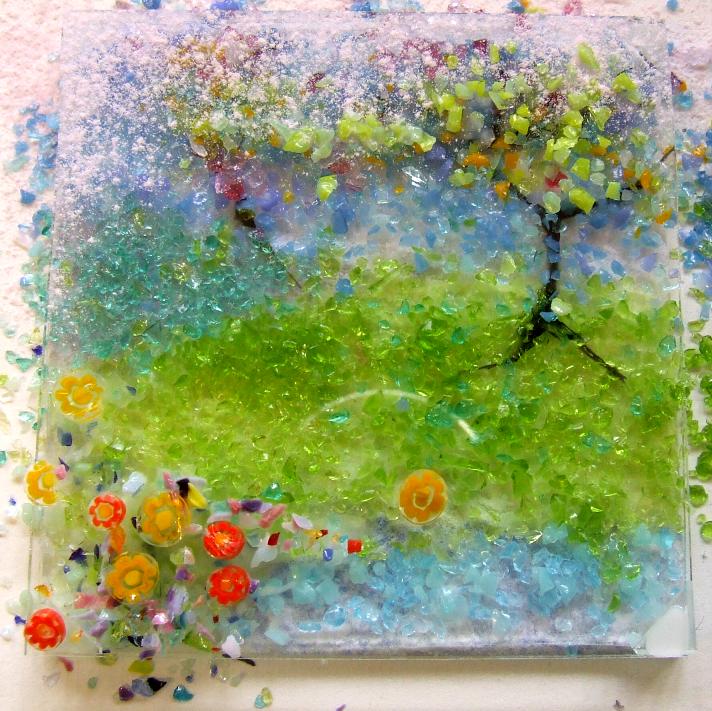
is what you'll need for each tile: 3 cut squares of glass. Fusing will spread the glass about 4mm so cut your glass accordingly. For a 10cm square tile, cut about 96 mm square. 4 tiny cut triangles of clear glass. I have used normal flosing 2mm glass. A small brush: watered down white craft glue: Powdered Frit: Granular Frit: sieve : spoon: dust mask A glassline pen which is optional. And a drawing of your design, the same size as the tile. |
 |
| I
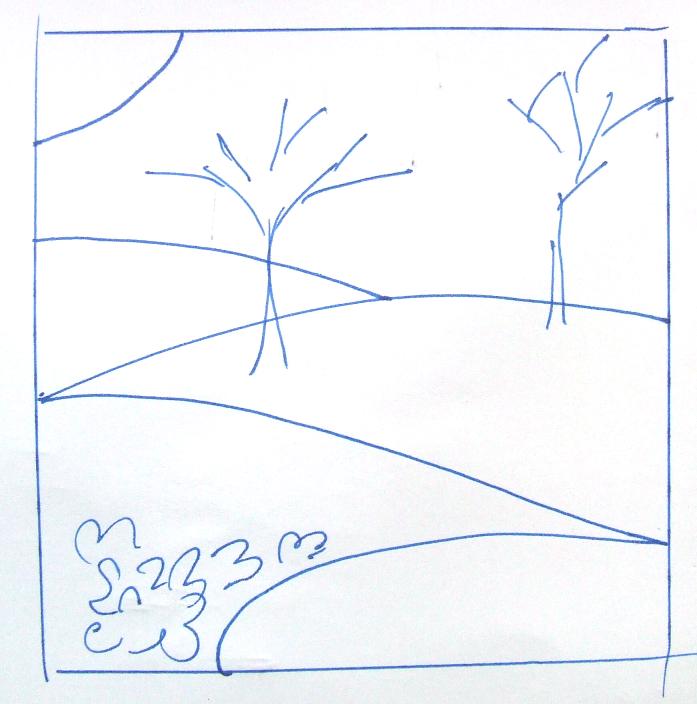
have sketched out a rough picture of what I'd like on my tile. (4 years at Art School and I still can't draw!), but I know what I hope to achieve...a sort of Impressionist scene with some fields, a tree and a bit of a pond. Firstly clean the glass free from fingerprints and place one piece of glass over your drawing. |
 |
| With
some watery white glue on your brush, paint an area of the glass with
glue, say the field or the pond; the drawing is underneath the glass for
guidance. I find it easier to work from the bottom upwards. Then don your dust mask so you don't breath in the powdered glass, and with a spoonful of powdered frit in your sieve, very carefully sieve the frit over the glued segment. Much like dusting icing sugar on a cake. Powdered frit colours are pale in their dry state, but mature on firing to their true shade. You can be clever here if you wish and cut yourself a little 'stencil', because you will certainly go over the edges of the lines. But this doesn't really matter. For one thing you do want a certain amount of colour blending, secondly, you can simply PUSH the frit back within the line boundaries with your brush. (Dip it in water first) |
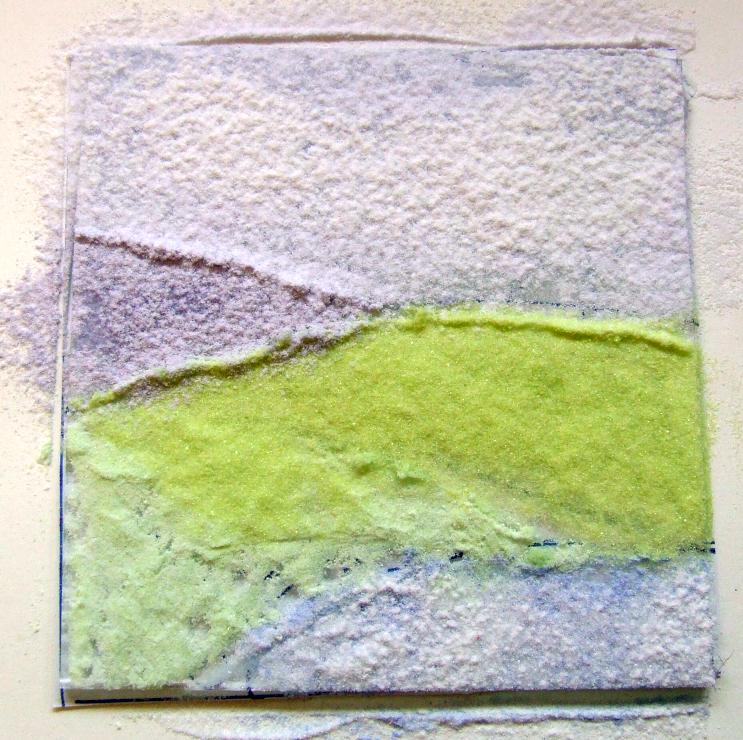 |
| Continue
over the whole tile until it's all covered with powdered frit. Don't be
too heavy handed with the frit especially if you are using opalescent
colours. Remember this is PAINTING WITH LIGHT - you don't want hard
thick edges, you want a dappling of shades. So be delicate with your
sieving. Once the whole tile is covered in the colours you want, take a
second piece of clean glass and gently press it on top of the frit. This
isn't actually 'stuck'..it's hard to stick anything to powdered
frit. Just rely on your light touch not to dislodge this middle layer of
glass.
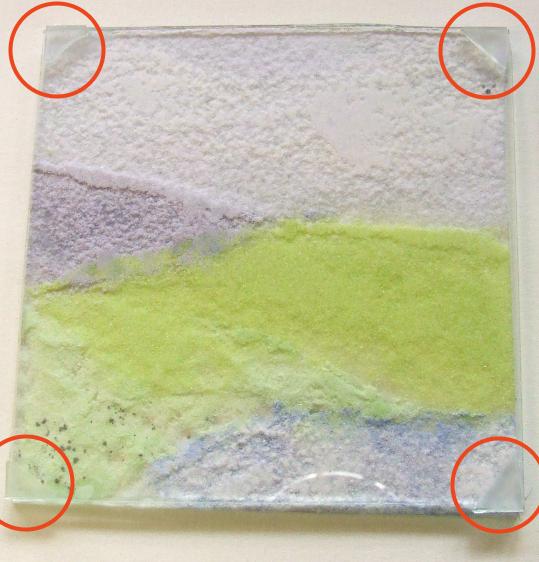
What you need to do now is stick your little cut triangles in each corner of this second layer of glass. They are shown huge in the picture, but they are only cut very small, really just big enough to provide something to stick the top layer of glass to. Leave it now until those corners are dry. |
  |
| Now
you have your powdered base layer and a new glassy surface on which to
stick some lovely coloured granular frit. Before I start adding granular frit, I have drawn some lines on the glass with a black Glassline pen. I had such high hopes for Glassline and I bought many colours, but I'm usually unimpressed with the results. Here, I just want to add some lines which look like tree outlines, the sort of thing that would be difficult in frit alone. On the whole, Glassline fires rather weak in colour and fuzzy round the edges so don't use too much. Once that is dry, I add Frit!!! I hope you'll visit my FRIT Page for some very pretty mixes. It is possible to make frit, I've often mashed up unwanted beads or bits of rod. Just do it safely!! You can't see the design beneath the glass now, so use the areas of powdered frit as your guide to where you want to sprinkle your granular frit. Again, it will look much nicer if the edges are 'blended' so don't worry about being exact. |
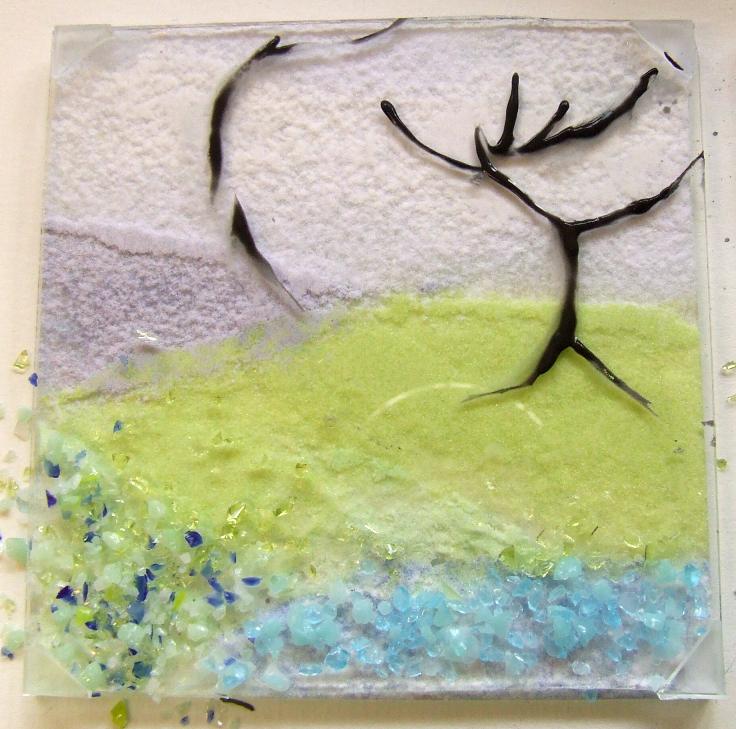 |
| Ive
gone for a lot of translucent colours, because my powdered frits were
opals. You can use all translucent throughout for a really Cathedral
glass look, or mix opals and translucents as I've done, and I think a
mixture of the 2 types gives more depth and interest. I don't use a sieve for granular frit, I use a spoon, or just fingers. I also don't wear a mask with granular frit because the chances of you breathing those chunks of glass up your nose are slim. But for best practice safety rules, wear the mask. So now I have the second layer of glass sprinkled with grains of frit. It's time to place the third layer of clean clear glass on top. Dab a spot of glue on each of your triangles in each corner, carefully position your glass on them, and leave to dry. |
 |
You've
now got your third layer of clear glass on top. Then I added more granular frit on the
trees to make them look more dappled. |
 |
|
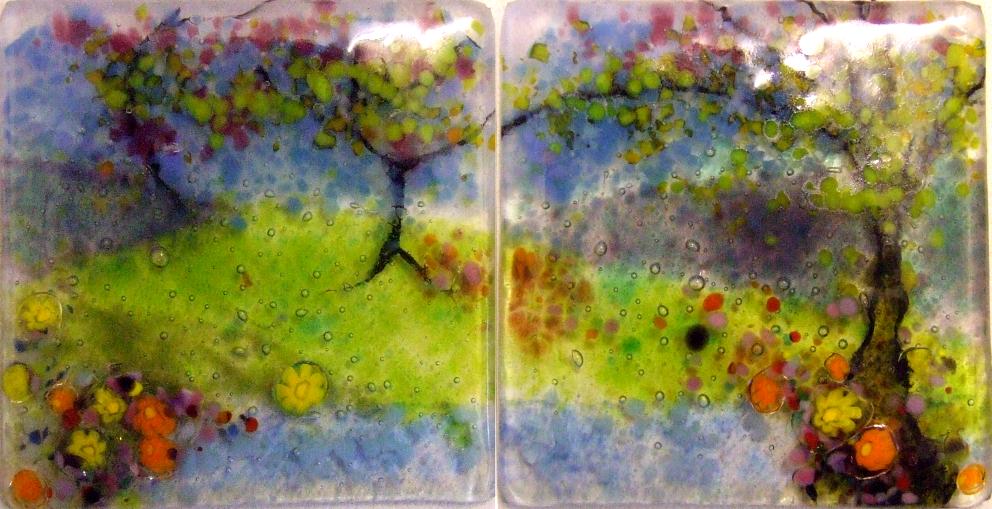
This is 3 layers thick, but it will still fire to approx. 5 or 6 mm
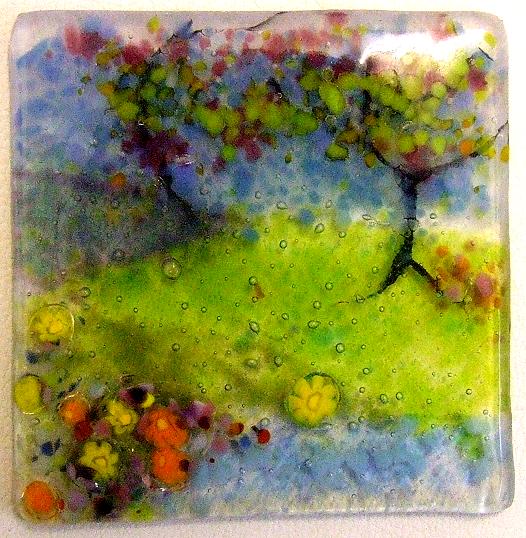
deep, so a full fast fuse is suitable. I have shown you the progress of one tile, but at the same time I made 2...like a mini mural, which I was really pleased with. It's economic to make several at the same time. The flosing glass I used was from my local hardware shop, sold for pictures and the COE is approx. 85. The frit is Bullseye - COE 90. If your tiles are annealed properly, you may see some thermal shock cracks within the layers, but the top and bottom glass will be smooth, strong and durable. Personally, I like the pretty lacework effect of thermal shock and to date, I've only ever had one tile actually break as a result of mixing the COEs. These tiles had no thermal cracks but they could develop later. They do have some trapped air bubbles (air gets trapped between the frit), but I like this effect too. Please look in again soon for more Tutorials and let me know if there's anything particular you'd like to see. dee@globalnet.co.uk |
 |
|
|
|