|
Normandy Class Landing Ship Assault By Bryn Monnery, Laurent Esmiol and D Hebditch
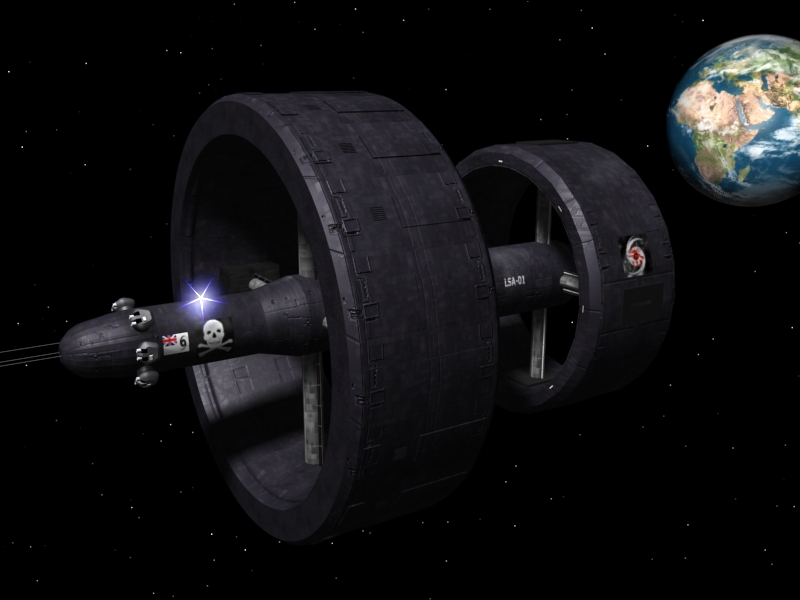
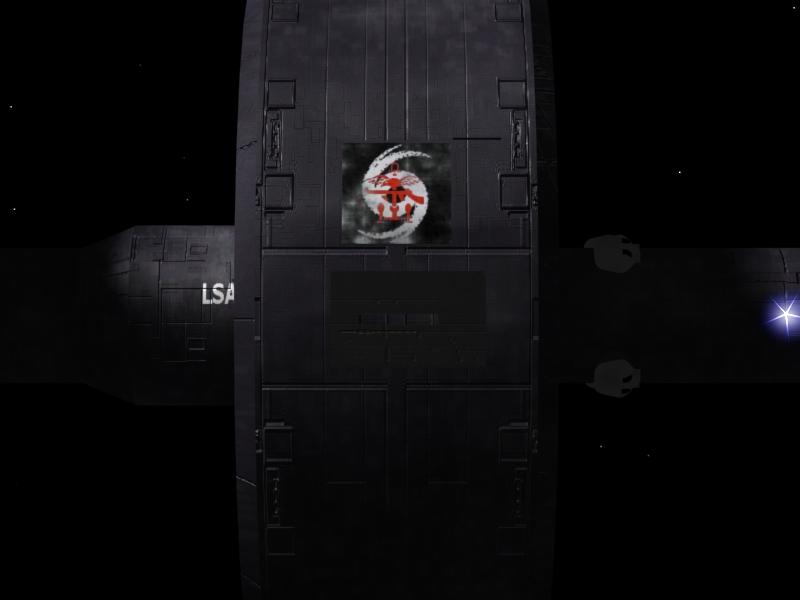
Above: HMS Normandy (note the Skull and Crossbones and LSA-01 on hull) on a rare trip to the Sol system Jan 2303 (RJSF MAO) (Note: All images clickable) Introduction The Normandy Class Landing Ship Assault are modern troop carrying planetary assault starships in service with the British Royal Space Navy. The mainstay of the Assault Landing Group (ASLAN) they have been at the forefront of the British military effort during the Kafer War. Capable of keeping pace with fast moving warships, they provide a capability to land both raiding forces and spearhead full blown planetary attacks with their numerous small landers. Two ships are in service and a third is nearing completion above Tirane. Narrative Admiral Graham remained as passive as ever, whilst Rear Admiral Green paced the silent flag deck of the Victory burning with impatience. 'I ask again Captain, can you do it?' I paused, letting the tension build. I could play command echelon mind-games with the best of them. 'You want me to run into Kimanjano orbit alongside the Verdun whilst you play tag with a superior Kafer force. Land a battalion of troops as a rearguard. Use my landers to evacuate as many personnel as possible to a rag tag fleet of freighters we've obliged to accompany us. Then recover my troops and make a clean get away?' Their combined Admiralships (What is the proper name? An Embarrassment of Admirals?) were less than amused by my sarcastic rhetorical question. Graham looked at me with heavy lidded eyes. 'They're not your troops, they are mine. My respects to the Parachute Regiment, but they are expendable. The French need this evacuation to succeed to salvage some pride from this whole sorry debacle, but in the end all those troops over there are expendable too. Those freighters we're taking along are more or less expendable as well. As are your precious landers Captain. 'Personally I need this mission to hold the coalition here together and bolster my position as commander. What I can't afford to loose is a single warship. I especially can't afford to loose my integral planetary assault capability. Any high profile casualties and HMG will have to bow to French pressure to have me removed and then God only knows what could happen.' I smiled coldly at this Standard Issue Admiral-level vanity. 'So. Can you get that monstrous ship of yours into harm's way and out again without so much as a scratch on the paint work or do I find someone else who can?' Extract from 'Where And Back Again?' Captain Sir J J Stevenson RSN DSO
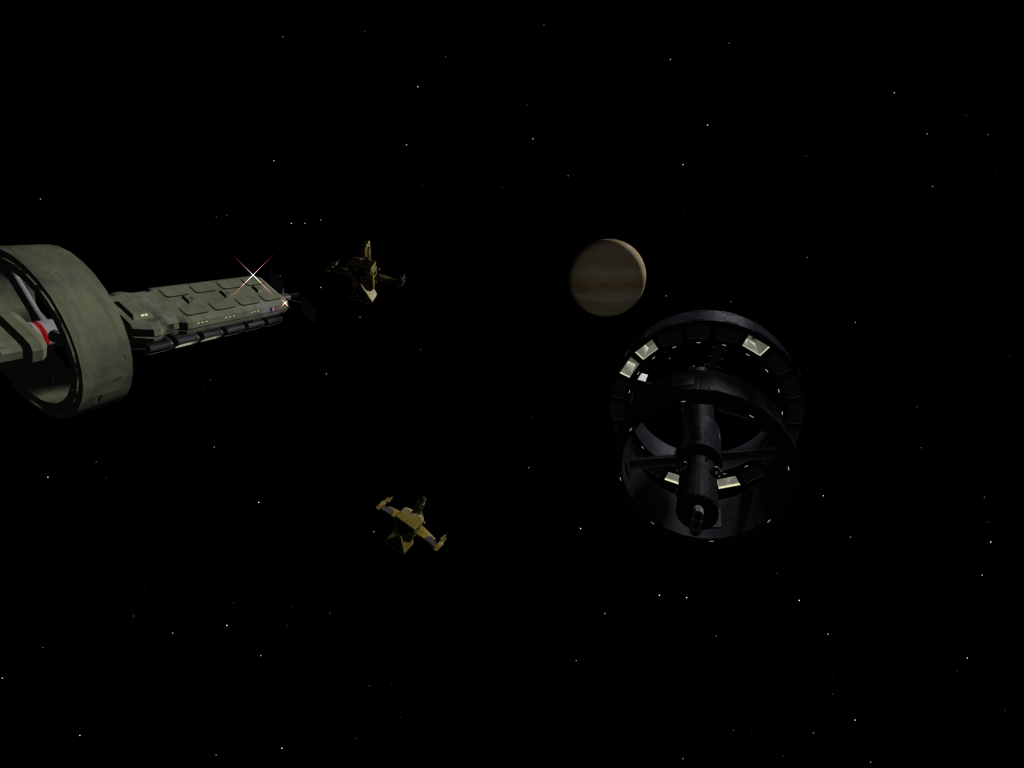
Normandy was Britain's answer to the wave of large assault ships being laid down by the great powers in the last decade of the 23rd Century. Prior to this planetary raiding had been carried out by ships troops from conventional warships, whilst large scale movement of troops was carried out by slow moving troopships. The Central Asian and Elysian Wars saw the limitations of these methods, with raids being little more than pin-pricks and troopships being both vulnerable and slow to respond. Several nations began to see the answer in dedicated fast transports that could rush troops from area to area as well as launching multiple, simultaneous raids across a planetary surface. These ships would also have enough interface assets to recover its troops under all but the most disastrous of circumstances. The first two of these kinds of ships laid down were the American Iwo Jima and the French Verdun both of which followed slightly different design philosophy stemming from different requirements. The American ship was to land mechanised US Marine units in one single landing zone, the French to land lightly equipped raiders across multiple targets or deliver large numbers of conventional infantry. This was primarily as the French had much greater follow on resources of dedicated troopships whereas America was really limited to the Iwo Jima and impressed shipping. The War of German Reunification did not see much employment for Verdun and her sister ships but in the aftermath of the war they were kept busy moving troops around the French Arm in response to the increased hostility between France and the newly German colonies. The war provided the final spur for a major building program for the RSN and the eventual commencement of the building of the LSA-01, originally and rather strangely to be called Ocean, eventually the name Normandy was finally chosen in recollection of the combined arms effort involved in D-Day centuries ago. Her primary aim is to conduct and assault landing of a mixed Battlegroup of light troops and supporting arms on any hostile world, or to rapidly move up to two battalions to a colonial flash point. The ship would be capable of carrying up to 40 Raven landing craft, however generally 20 are embarked at any one time. In action as generally only one Battlegroup is carried 30 Ravens has proven to be the optimum number of craft. The medical centre on Normandy is large and well equipped, and the extremely seriously wounded are CASEVACED by empty Ravens to the carrier in Orbit. Normandy was built to full military standards, with a powerful self defence capability, but no missile launchers installed. She had also been designed to be fast and stealthy enough to run with the main body of the Fleet or with a detached task force. She was armed and armoured well enough to fight a delaying action and run for the safety of the FTL shelf if caught by superior forces. Normandy was no wallowing troopship. Additionally the design required heavy armour and shielding if it was to survive the highly hostile close orbital arena. Arnhem was laid down in the same British Ludlum slip on Hawking Station left by Normandy and commissioned early in 2302, Norway is due in service in November 2303. The combat history of Normandy and Arnhem has vindicated the decision to build these expensive warships. Normandy won her spurs in the evacuation of Kimanjano and both ships served as auxiliary warships in the Battle of Beowulf. Later they would spearhead the 3rd Liberation of Beta Canum and be involved in landing operations in Henry's Star, 61 Ursae Majoris, BCB and in the second wave of Operation Overlord. Both vessels have been regrouped along with the command ship De Lancey (impressed from the FPK) at Beowulf as a Quick Reaction Force where they are ready to move units of 6 Assault Brigade in response to Kafer incursions. The decision to build a third LSA has been relatively controversial in British military circles as the army instead wanted a ship biased more towards the landing of armoured battlegroups, not yet more lightly armed shock troops. Below: A still from footage taken by escorting MSIF fighters showing HMS Normandy and IFS Verdun in close formation on the run into Kimanjano during Op ENTENTE. (MSIF Media Ops)
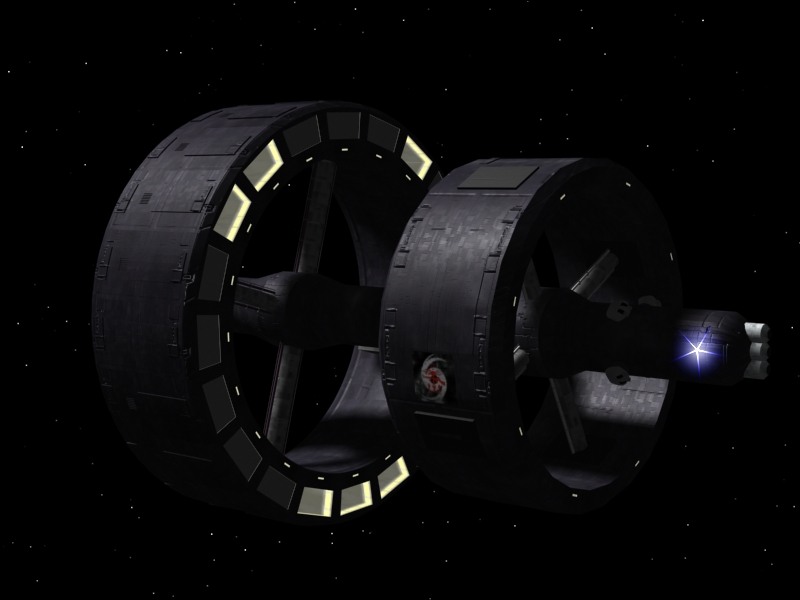
The Normandy class ships have a relatively simple configuration involving a main body and two wide, rotating rings. The forward-most of these rings is the flight deck, housing 20 hangers and their landers. The forward ring also houses the ship's extensive Joint Fleet Medical Unit facilities. The rear-most ring is the troop deck housing up to 2000 personnel under double occupancy (not a pleasant experience). The main body of the ship contains all the other major elements vital for a combat starship. Including the drive, powerplant, spin, de-spin machinery, TAC Ops Centre and bridge. The sensors and weaponry are clustered forward on the ship. This placement of the weaponry is primarily for self-defence when in close orbit. In such situations the ship is 'nose down' towards the planet, where its weaponry can come to bear on any ASAT weaponry approaching through the upper atmosphere. Traverse of the ship is normally undertaken by a small zero-G lift which runs along the main body through locking stations at each of the rings. However when moving large numbers of troops to their disembarkation stations two main corridors are opened and the rings spun-down under Landing Stations. These corridors have rope pulls to haul the heavily laden troops up to the hanger deck in zero-G conditions.
The ship's crew of a Normandy class LSA is fairly conventional for a craft of this size, and is sub-divided into Bridge, Operations and Engineering complements. Operations itself is further divided into Space Warfare and Interface branches in order to deal with the multi-faceted nature of the ship's operations. Captaincy of one of these vessels is a prestigious command, and so far it has been limited to officers with experience of both RSN lander operations in their early career who have also commanded a major RSN warship. HMS Normandy is commanded by Captain Sir J J Stevenson, a relaxed, competent and sardonic commander who has seen much service in independent commands on the Chinese Arm. Captain Jane Devlin commands HMS Arnhem and is a much more aggressive individual who has mostly worked with the Home Fleet in the Core. The life blood of the LSA is its lander fleet. Normally this is represented by one Naval Interface Squadron of the RSN, with 20 Raven landers. These Ravens are divided into 5, 4-ship 'Flights' which are the basic building block of Raven operations. In wartime it was intended for each LSA to embark an extra NIS with another 20 landers, however in practise this was never achieved due to the lack of airframes. Instead an extra 2 or 3 flights were attached to the resident NIS when available. The standard complement of an NIS is 90 personnel, 40 flight crew, 20 maintenance crew, 20 Royal Space Corps Loadmasters and 10 operations staff who serve in the TAC. There are four flight crew known as the 'principle command team' including the Squadron commander, 2 i/c, Operations Officer and Interface Warfare Officer who also serve in a management capacity doing stints in Operations. During combat operations additional flight crew and maintenance staff are usually brought in to allow high tempo operations to be maintained. However the shortages of trained flight crews would mean that the level of crewing never reached optimum levels. It is a commonly recognised fact (and one resented by RAF and RN flyers) that the RSN's interface pilots are some of the finest pilots the UK possesses (one RSN pilot on secondment to the Fleet Air Arm was the highest scoring British ace in the skies of New Africa during the Invasion). The selection procedure and training process they undergo is extremely testing, and involves passing RAF Fast Jets, the RN Air Warfare Instructors Courses in addition to the Interface Operations course. The pilots of the RSN are an elite and practise constantly on a range of ship-board simulators. An increasingly aggressive doctrine is being adopted by the front-line squadrons to make the most of the versatility of the excellent Ravens. 1201 NIS was the Normandy's Raven unit and has been permanently assigned to the ship since it was commissioned into service. 1201 normally has five flights, named; Gold, Juno, Sword, Omaha and Utah. It was also standard practise to have an American flight crew on secondment, and also occasionally a Canadian crew. During the war 1201 took C, D and E flights of 1202 NIS under direct command. The rest of that squadron was embarked on the command ship De Lancey. When Arnhem commissioned her dedicated Raven unit 1203 NIS was in poor shape. 1203 had been picked over for replacement pilots for 1201 and 1202 serving on the French Arm, and even with newly trained pilots had only just over 50% of her nominal flight crews. The RSN launched a trawl for suitably trained crew from other Commonwealth nations. The greatest response came from Wellon who provided 15 crews from the RWAF's Orbital Command. Together with recalled British Reservists (usually now commercial interface pilots) they were quickly retrained on the Ravens and brought up to speed in time to deploy successfully with Arnhem. Although some of the Wellonese were posted to other NIS, 1203 retains a strong Wellonese character thanks to these irreverent volunteers. 1203 had a conventional five flights to begin with, lettered A through E, although after the Liberation the squadron would receive an extra two flights as more landers and crews became available. Other Raven equipped NIS were active on the French Arm, but most were stationed planet-side. The exception was 1205 NIS which was tasked with support for special forces. Below: Squadron badge of 1201 Naval Interface Squadron. Motto: 'Civis Britannicus Sum'
Each LSA carries a Joint Fleet Medical Unit of 75 personnel. This is based on the forward ring of the ship, with extensive automed facilities, but elements of it are also readily deployable. The JFMU is a mixed unit drawn from all four services, it is commanded by an RSN Surgeon Commander and is staffed mostly by RSC medical staff. It also includes 12 Combat Medical Operators, usually from the Army, but occasionally from the Royal Marines and RAF. At maximum capacity the JFMU is capable of handling up to 200 casualties on-board the ship, more if additional resources are assigned to it from other formations. The JFMU's CMOs are all experienced NCOs with additional intensive medical training. Their role is to travel on world with the assaulting troops and supplement their medical units in addition to establishing ground triage stations. During the Kafer War CMOs were also involved in several search and rescue missions in BCV, Henry's Star and BCB systems. JFMU-1 was a pre-war organisation that served on the Normandy throughout the hostilities. Arnhem's complement was JFMU-2, which was a relatively ad-hoc organisation. It had a large complement of swiftly retrained RN medical personnel as well as a volunteer complement of Scandinavian Army nurses and Interface operations trained Jeger CMOs. JFMU-2 jelled quickly as a unit and became well known as a result of Operation Overlord, when wounded US Marines would almost fight over an evacuation to Arnhem in the expectation of being treated by female Norwegian medical orderlies.
No. in existence: 2+1 (HMS Normandy and HMS Arnhem in service, HMS Norway under construction) Date First Hull Commissioned: 2296 Performance:
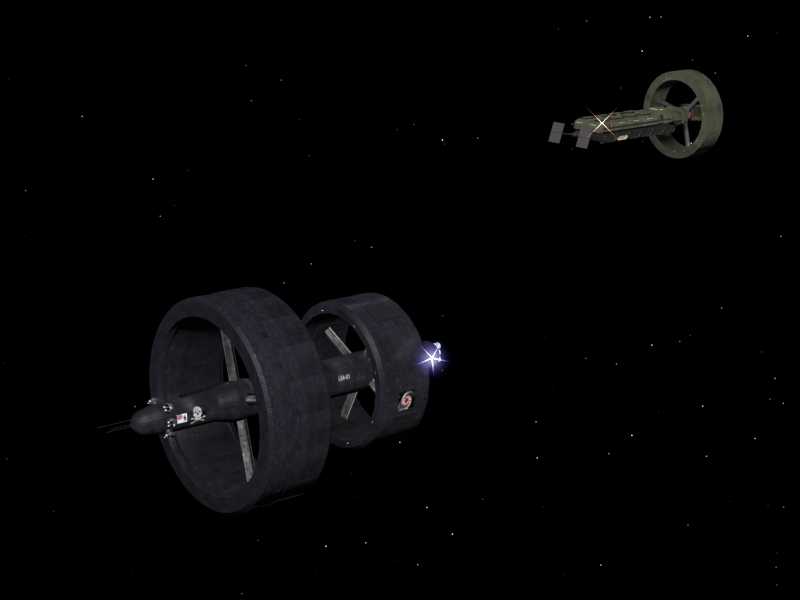
Named for the WW2 Allied invasion of Europe the Normandy is the lead ship of this class and pioneered the operation of full blown assault ships in British service. LSA-01 was laid down at the British Ludlum yard on Hawking Station above Tirane in 2294 and was commissioned into service in 2296. She underwent a variety of trials and shake-down cruises, and eventually took part in Ex PURPLE LION the series of exercises above Beta Canum that had finally proven the Assault Landing Group concept. However after these she settled down to being little more than a glorified troop ship, shuttling British troops around the French Arm. Normandy was the flagship of the 1st Assault Flotilla including the ageing troopships Hollis, Queripel and McKay. The ship was used to transport 2 PARA Battle Group to Aurore for its tour there and returned to bring it back to BCV, only just escaping in the face of the renewed Kafer Invasion. The ship played 'tag' with the Kafers on numerous occasions as she shuttled British troops around the colony worlds in response to the invasion. She only just made it back to the safety of the Reserve Fleet around QAS by slipping through newly conquered Kimanjano. Normandy's finest hour so far has been its participation in Operation ENTENTE, the evacuation of Kimanjano. Task Force Green from the Reserve Fleet moved into the system on the 25th of January 2302 and began to spar with the Kafer space force garrison. Allowing the Normandy and the French assault ship Verdun along with a small flotilla of merchant ships to move into close orbit around Kimanjano. After landing a small force of Anglo-French paratroopers to bolster the evacuation perimeter, they began lifting the surviving troops and key civilians from the planet. By midday on the 27th Kafer reinforcements arrived and the evacuation was terminated, with several landers and nearly 100 soldiers from the Normandy having to be abandoned. Nevertheless nearly 8 000 humans had been evacuated, a valuable resource of veteran troops. More importantly it provided a vital morale boost to humanity in general, and became known as the 'New Dunkirk.' Below: Normandy and Verdun in close formation in the QAS system. Staged image released to the press in the aftermath of Op ENTENTE. (Reserve Fleet Joint Media Group)
On its return to QAS the Normandy began to work up with the newly re-designated 6 Assault Brigade of British paratroopers. However when the Battle of Beowulf occurred the Normandy played an important role, alongside her newly arrived sister-ship Arnhem and some privateers she formed an auxiliary squadron. Big, fast and well armoured the two assault ships were able to imitate dedicated warships and were used to launch diversionary raids into the Kafer rear. The squadron destroyed transports, merchants and fighters as well as drawing away Kafer warships from their battle line. Although not decisive they had an important effect during the battle. In the aftermath of the battle the Normandy was an important asset in the Liberation of Beta Canum, as well as participating in other actions. Her Fleet Medical Unit was deployed on emergency relief duties on Nous Voila. Now one of the most famous British vessels thanks to her participation in ENTENTE, she continues to work closely with 6 Assault Brigade and is a vital asset for ASLAN. She deploys frequently into the Eta Bootis finger, and her main task is providing immediate reinforcement to the vulnerable garrisons there in the event of another Kafer attack. In addition it is rumoured that Normandy has recently taken part in a raid into the Wolf Cluster with 6 PARA to destroy a Kafer covert base, but this has not been confirmed.
Arnhem was initially to be named the Gibraltar but instead was named after the ill-fated, but now legendary, WW2 battle by British airborne forces in the Netherlands. Like the Normandy she was constructed above Tirane, laid down late in 2299 her construction was accelerated in response to the Kafer War's escalation around Eta Bootis. The Arnhem was rushed out of the yard and through a reduced shake-down period and run up to Queen Alice's Star with British Ludlum personnel still on-board her. Too late for Operation ENTENTE she took part in several training exercises with 6 Assault Brigade and other formations. During the Battle of Beowulf alongside the Normandy and several privateers she formed an auxiliary squadron which preyed on Kafer lines of communication and was responsible for several fighter and frigate kills. In the aftermath of the battle she embarked 7 PARA Battle Group and participated in Admiral Graham's immediate counter-attack. Although stood too to join in the Liberation of Kimanjano she instead was one of the main ships involved in the 3rd (Final) Liberation of BCV-4 with her sister ship and the DSKM's light assault ship Ramcke. She would also be involved in operations in the Henry's Star, BCB systems as well as in the second wave of the Liberation of Dunkelheim. Currently the Arnhem is in the QAS system, pre-loaded with equipment for 6 Assault Brigade and stood by for immediate reinforcement for the vulnerable worlds of the Eta Bootis finger. Below: Close up of light damage on the aft ring of HMS Arnhem following the liberation of OMS 10 'Henry Kaiser' in the Henry's Star system. Also an excellent view of the Combined Operations crest. (Private image).
The Norway is named after the 3rd World War campaign waged in northern Norway and Russia in which British Royal Marines, soldiers and airman played a major role. She was laid down in the British Ludlum slip that built the Normandy and Arnhem in December 2301 as soon as the Arnhem had been launched. Political problems delayed what was an almost unbelievably quick construction process as the shipyard crews worked around the clock to produce her. However the ship should be launched in late April 2303 and be in service with the RSN in November of that year.
British Exospace AL.3 Raven The British Exospace Raven AL.3 is the current heavy air/interface assault craft of the British Army and Royal Space Navy. The Raven is deployed in several roles on Earth where it has been acquired to replace tilt-rotors in the Air Assault Brigades and used as a conventional assault aerodyne. However it is fully capable of reaching starship pickup orbits on it's own power. This ability saw the RSN acquire the first group of 67 of these ships in late 2293. Service entry was relatively easy however some minor problems saw modification to the AL.3 standard after the first 12 craft were delivered. The Raven in service has proved to be the key interface movement asset available to the British and has taken part in operations across the French Arm during the Kafer War. Its VSTOL capability enabling it to land where less agile craft cannot, these are robust craft capable of staging from rough strips on dispersed operations. The actions of Ravens and their crews in the evacuation of Kimanjano proving its versatility. Due to its spearhead role the Raven is an increasingly glamorous beast. The British Army currently has 120 of these craft and the RSN had 150, although combat losses have yet to be released at least ten are believed to have been lost. The initial intention to deploy 40 Ravens for each assault carrier was not made good until long after the Liberation of Beta Canum, and the efficiency of these aircraft mean that many are often deployed away from their ships. All RSN Ravens on the French Arm are under command of the Assault Landing Group, in spite of any deployment under tactical command of other formations. Ravens are known either as 'Jumpabouts' or increasingly in RSN service as 'Dusties'. The Raven uses a ducted fan/ MHD thrust system, unique to British service. The engine is capable of a leisurely cruise at 750kph, using a minimum of fuel, or she can be switched to rocket mode, making her capable of orbital flight, although the craft is not manoeuvrable in the atmosphere in this mode. The long and drawn out development of the Raven's propulsion system was the main reason for the demise of General English Electric and the projects transfer to British Exospace. Her bay carries 40 fully equipped
infantry. Below: HMS Arnhem during acceptance trials in the Alpha Centauri system. Note the six open lander bays in the forward ring. (RJSF MAO)
One of the initial major roles for the Normandy was in the rapid movement of combat ready troops from world to world along the French Arm. Previously this could only be done either with small Royal Marine detachments embarked on warships or by rather laboriously embarking troops on-board one of the old Troopships. The old VC Class troopships had an integral interface capability but it required several trips to disembark a full compliment and needed a functioning airport to land its Wessex landers on. The Normandy was designed to arrive with up to two battalions of troops complete with their supporting arms and land them swiftly and effectively to the area of conflict. A ship loaded in this manner would take some 4 hours to unload completely but would arrive with the bulk of a brigade group. Also it could arrive with a warship squadron and so form the centre-piece of a task force with no little Politico-Diplomatic clout. It was envisioned that this sort of operation could occur in a variety of circumstances. One was the possibility of a outbreak of wider fighting between Alicia and Nouvelle Europe on Beowulf. In such a scenario British regular forces might need to be rushed to the area in order to damp down any fighting. Another scenario could have been in an upsurge of tension on Joi over Elysia, or an increase in violence in Adlerhorst in which International Peacekeepers would need to be reinforced or evacuate. In the event none of these scenarios came to pass. Instead Normandy was heavily involved as a fast troopship in the re-deployment of British colonial forces in the face of the Invasion, especially the movement of the Gurkha Brigade from BCV-4 to Joi and of 79 Armoured Brigade in the other direction. Arnhem also moved many thousands of soldiers from a number of nations Expeditionary Forces along the 'Bridge' from the Core to Beowulf. However since the Liberation the assault ships have been kept close to hand in the Theatre Commander's Reserve, and conventional troopships have undertaken these tasks. The Central Asian War brought the first major use of orbit to surface raiding by forces larger than small special forces callsigns. Most raiding was undertaken by detachments of troops of around company size embarked on warships. These warships would need to be given protection whilst in low orbit delivering their troop complements and later whilst retrieving them as during these times they were very vulnerable. The limitation of these raids were manifest, only one target could be hit at a time, DZ's had to be seized and secured, the enemy could concentrate against this single incursion. The Landers were usually outnumbered, outmanoeuvred and outgunned by defending fighter aircraft. A consequence was that raids usually targeted poorly defended installations of comparatively small strategic or tactical importance. The relative failure of raiding as a strategy during the Central Asian War caused a rethink that led to the development of the assault ship in French service. These were to be dedicated vessels capable of attacking one heavily defended target or several less important targets. They were to have sufficient integral interface capacity to move all the assault troops in one wave. The British followed this French practise with the development on of the Normandy. The Normandy carries 20 Raven assault landers as a basic load. This is sufficient to land 20 full strength platoons, or an entire light infantry Battlegroup with an attached artillery battery, engineers and logistics. If the landers are pre-loaded, they can each instead land an AFV and so bring down a armoured infantry company group. Most importantly the Ravens each carry a substantial load of ordnance and so although not capable of taking on dedicated atmospheric interceptors they are a foe worthy of respect in the air. In addition they are fully VTOL capable with real rough strip performance. In British service the tactics practised were for a number of operating modes. The main difference is in Immediate Action or Delayed Action operations. Immediate Action operations would see the landers taking on a variety of objectives, landing troops either on or in the close vicinity of the targets and disembarking troops. The troops would then execute their missions with the landers remaining within the area, providing fire support. Once the mission is complete the landers would return and marry up again with the assault ship in orbit. IA operations obviously place the ship and its landers in harms way for a relatively long period, however they have the greatest chance of retrieving the landed troops. However for IA operations to take place good and accurate intelligence must have been gathered before hand, a job either for special forces or on-planet assets. Delayed Action, or DA operations are when the ship delivers its troops, and the withdraws with its landers to safety. Obviously this strands all of the troops on-world with no guarantee of being recovered. Once on the ground the troops would carry out their own assigned operations. These operations can only generally be attempted in colonies with limited military resources or in remote areas when enemy main force units are otherwise engaged. In British parlance DA operations are known as 'going' either 'Chindit' (if dispersed operations) or 'A Bridge too Far' (if operating en-masse). However when planned properly they are actually less risky than 'do or die' IA missions. When extraction is required the assault ship then comes back in to lift off its troops. So far the Normandy class ships have not carried out a raid, although rumours are emerging that HMS Normandy and 6 PARA carried out a IA raid recently in the Wolf Cluster. Military evacuation missions were not originally planned as being part of the LSA's repertoire, and ironically it is for this mission that the ship has become most famous. During Operation ENTENTE in the Kimanjano System the Normandy (alongside the French assault ship Verdun) landed troops to bolster a human defensive position and then used her landers to evacuate military units from the surface to a variety of freighters and a pair of fast liners accompanying the assault ships. Essentially an evacuation is an invasion in reverse, however most strategists believe this is the least likely scenario in which the LSA's might find themselves in. Below: Another image from Op ENTENTE footage and possibly one of the most dramatic of the war. Here verdun begins to break away from her close formation with Normandy to achieve her desired orbit whilst the escorting Martels from the Escadrille Lafayette accelerate past to engage Kafer orbital defences. (MSIF Media Ops)
The possibility of undertaking disaster relief operation was not one that was originally considered. However whilst in orbit over Beowulf late in 2297 on its return from the PURPLE LION exercises Normandy was called upon to aid Franco-Alician communities on the island of L' Horizon in the Ramadenthine Peninsular which had been hit by exceptionally bad storms and tides. 1201 Squadron deployed 8 Ravens from its Gold and Sword Flights down on to L' Horizon, in addition to the ship's JFMU and medically trained members and Royal Engineers of 6 Cdo Bde. These elements then spent half a local day (1 1/2 weeks) providing aid to both communities. In the aftermath of the Liberation of BCB , Normandy also participated in Relief efforts deploying her assets on-world to deliver aid and relief whilst acting as a hospital ship for the worst of cases. Anglo-Dutch Royal Marines operating from the ship were often called upon to repel bands of human marauders from raiding the field hospitals and other supply dumps. Arnhem briefly provided a similar hospital ship role for injured troops during the Liberation of Dunkelheim, when she transported two battalions of German Jägers to that world in the second wave of Operation Overlord. The well trained and versatile crews on the LSA's mean that these ships are able quickly to provide what limited aid they can in times of trouble. It was long an article of faith amongst the militaries of 24th century starfaring powers that the opposed invasion of a colony world was an impossibility in terms of combat power, logistics and long term oppositions of the invaded. The Kafer War proved them wrong. With masses of hardened infantry, rugged easily maintained equipment and huge amounts of starlift the Kafers wrote a new book for human strategists to read. In the end the Liberation of the human colonies was made possible by two main factors: Kafer overstretch and the dislocation (and subsequent availability for military operations) of most of the French Arms merchant starships. The presence of these ships solved many logistical problems, whilst the massing of human expeditionary forces at QAS provided the required combat power. Thanks to resistance movements and stay behind troops there would also be plenty of intelligence and logistic support for the Liberation forces on the targeted planets. The techniques of human planetary assaults were pioneered by the forces attached to the multi-national fleet of the French Admiral Rochemont. Spearheaded by two assault ships, Bir Hakiem and Dien Bien Phu his four light brigades would make four separate large scale attacks in the Beta Canum Cluster. However these attacks, even combined with surviving human on-world forces were never powerful enough to liberate a world entirely. The French led Liberation of Kimanjano was the first major human counter-Invasion, and involved no fewer than six divisions of French, Azanian and American troops. It was a close run thing, but the ground forces eventually triumphed after a fierce battle around the planethead. The British led Liberation of BCV-4, little more than a week after that of Kimanjano was more successful initially as the DZ's were in already Liberated territory, however the 'mopping up' has taken much longer than on Kimanjano and continues to this day. The BCV landings were a textbook operation right out of the book. British doctrine revolves around a preliminary phase and three main phases of operations once volume superiority has been achieved. Initially special forces or local forces conduct recce and intelligence gathering to prepare a possible drop zone. The first phase relies around the neutralisation of key enemy defence assets, this can be done by bombardment, raiding from orbit or from units already on the ground (a possible DA task). The second phase sees the landing of perimeter protection units, usually paratroopers or Royal Marines, and the landing of the first armoured Battlegroup reserve. Thirdly main force units and bulk logistics will be landed on the planethead. LSA's play a role in all three phases. They can land raiding troops (although this would be a DA task as their main role is in the second phase), additionally several Naval Interface Squadrons have been practising precision attack mission profiles (although this would risk invaluable interface assets). The LSA's main role is the simultaneous delivery of an entire light Battlegroup to form all, or part of, the perimeter protection force. Consideration has also been given to the pre-loading of AFV's in the Ravens to deliver armoured forces instead, although this would reduce the versatility of the lander fleet. Once the main perimeter force has been landed the Ravens would then join the rest of the interface assets in unloading accompanying troopships and transports as soon as possible. The empty LSA's can then stay on station to provide casualty evacuation or move away to quickly collect more troops, presumably from larger ships (possibly liners) on the edge of the FTL shelf. Its Ravens can also provide immediate air support until dedicated air force units can be landed and established. It is as the spearhead and linchpin as an planetary assault force that the LSA really comes into its own.
|