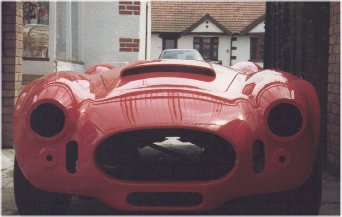

Now then,most people if they have not been bored with these pages,will wonder why we did`nt stick the engine in straight away.Well the reason for this is simply that we did`nt want to get it dirty!You would be supprised how much dust is produced when using files and drills on fibre glass.Anyway the next thing we did was to size and mount the bonnet,doors and boot lid,this part of the job took the longest by far,not because it is hard to do,it is`nt,but because it is so important not to make a mistake and making sure the shut lines are even and the same gap on all areas of the car.I will just quickly mention how we went about this,first my partner in this endevour was bundled up into the engine bay and the bonnet was lowered on top and positioned in a "best posible" way. He then marked the hinge positions on the bonnet ,so we could be sure where to drill and tap for the bolts.
Once the holes were tapped we bolted the bonnet in position and closed the lid onto the car.Using masking tape around the edges of the bonnet and a marker pen we noted where the gaps and overlaps occured.Leaving the bonnet secured to the car we then filed and cut any excess away until the bonnet could close fully.At this stage the bonnet lid was ready to be gapped,the way to do this is to find using feeler guages the largest gap that already exists,and carefully file away the other areas to suit.Finally when you are happy with the resulting gap (approximately 2.5mm) bevel the raw edges using wet and dry sanding paper.
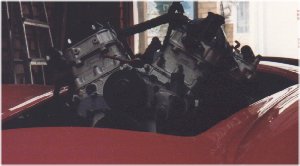
Using the above method we completed work on the boot and doors.Then drilled and secured the bonnet and boot gas rams(to hold them open) and the locks and handles,also the door catches.Its a good idea to get all the brightwork done at this stage including rollbar,bumpers and grills so that when the car is painted you have nochance of scratching that lovely(and costly)spray job.Now the engine went in with the gearbox(5 speed getrag) already bolted on and the engine/gearbox mounts were secured.All ancillaries were fitted and piped up,and filled with the corresponding fluids.We decided to use side pipes on our car for two reasons,one because when testing the demonstrater we noticed that on really hard acceleration (and i mean HARD!) the exhuasts underneath would bottom on the road causing a horrendous noise and incidently scaring the life out of me.
The second reason apart from them looking good that is,was that my partner and myself wanted the car to hug the ground for even better handling,and this meant twin side pipes.These we obtained from dax and mounted each side.Rolling the car outside we turned the engine over a few times without the low tension lead on the coil connected,to pump up the oil pressure,then started her up for the first time.
Except for the complete interior the only thing missing was the drive shaft from gearbox to differential,seeing as we had in excess of 350bhp to contend with a strong prop was deffinately in order.Because of the fact that everyone uses different gearboxes we manufactured a prop using a jaguar xj12 shaft for the universal joints and the main body (tube),but this certainly would not fit in the end of our gearbox.It turned out to need a vauxall carlton spline but these cars used a "spider" and not the normal u.j.
We managed to get around this problem by incorperating the best of both
types of shaft.We obtained a carlton shaft and threw away all of it except the front splined "spider",and using a lathe at work turned it down untill we had removed its "legs" and were left with a splined tube.The jag spline was turned next leaving a hole exactly the same size as the carlton "tube".These were then pressed together in a fly press and finally welded.When the prop was finished it was exactly the same as a jag one except it was only about a foot long! and of course the splines now suited our gearbox.Before assembly we had it proffesionally balanced.