Using Compuserve (CSi) with WindowsCE® |
|
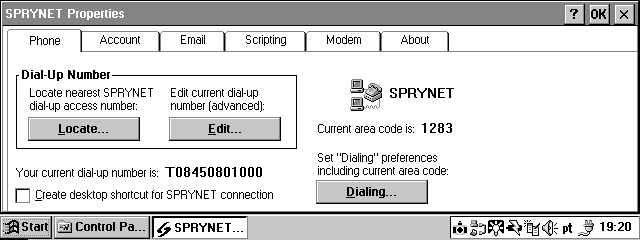
I have seem many messages regarding the use of Compuserve (CSi) as an ISP with WindowsCE. From these messages it would seem to be difficult or impossible to set up but this is not the case. Here is how I got Compuserve talking to my WindowsCE Version 1.0 HP320LX using some Sprynet software from here). Note, since upgrading to CE2.0 I have found that this no longer works. On a recent trip to the USA I resorted to using manual dialing for connection and these settings for PocketInbox only. Here goes....First go to the Sprynet site, download their WindowsCE software and install it. Fire-up the Sprynet Properties applet from Control Panel (Start/Settings/SPRYNET)
First we need to set the Dial-up number you wish to use - Click on 'Edit...'
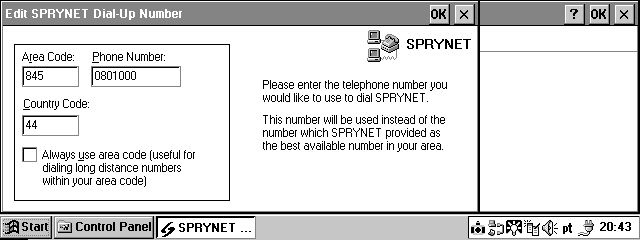
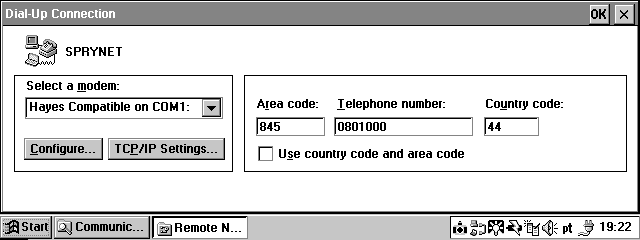
Complete the boxes with the Area Code, Phone Number and Country Code you wish to use. Click on OK. Check that the Dialing Properties are set correctly - Click on 'Dialing...'
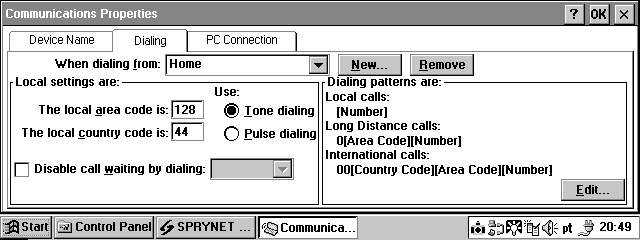
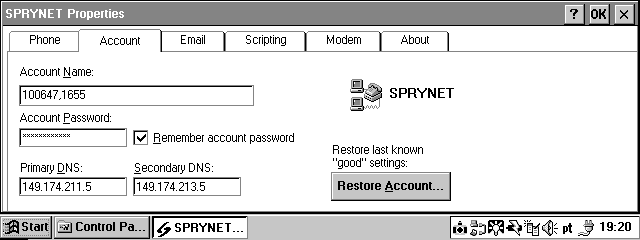
Make sure that all settings are correct and ensure that the Dialling patterns make some sense with the Dial-Up number you entered on the previous screen. Click on OK. Click on the 'Account' tab and enter your CSi 'LOGON' details including DNS servers. Note that this password is the one you use to logon to CSi.
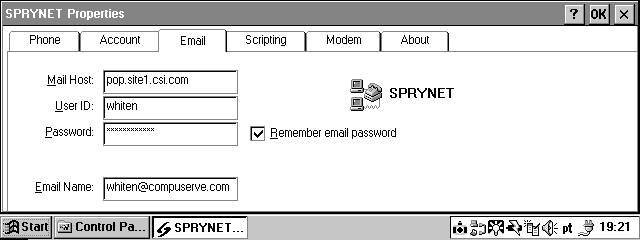
Click on the 'Email' tab and enter your POP mail settings. Note that the 'User ID:' is your Mail name and the password is your POP password. The 'Email Name:' field is your 'From' field in Inbox and can be address you like.
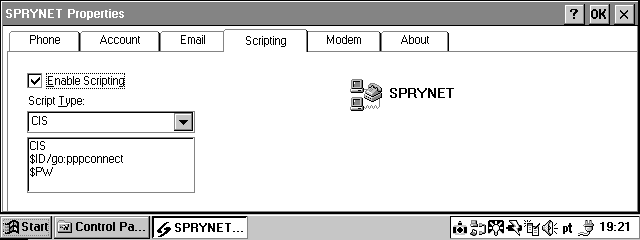
Click on the 'Scripting' tab. Click 'Enable Scripting' to make it ticked. Change the 'Script Type:' to 'CIS'
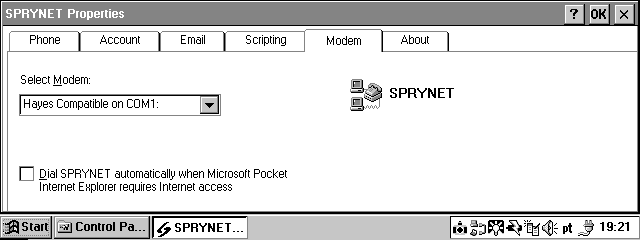
Click on the 'Modem' tab and select either your PC Card Modem or an External Modem.
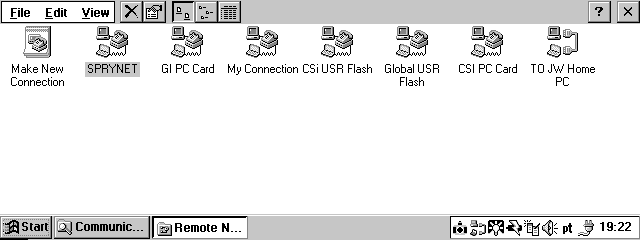
Click on 'OK' At this point you may be asked to reset your HPC. You must do this anyway (Press the Reset Button) to register the software with the WindowsCE OS. Check the TCP/IP settings - Start/Programs/Communications/Remote Networking
ALT-Click the 'SPRYNET' icon, select properties.
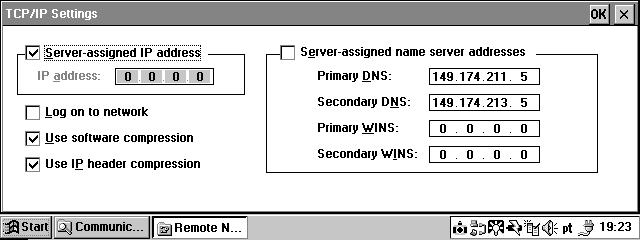
Check the Details are correct. Click 'TCP/IP Settings...' and check that all the settings are correct. This is what mine look like:-
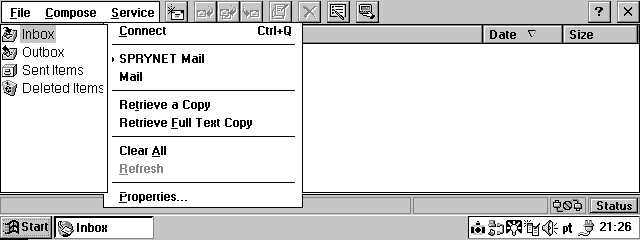
Click OK - Click OK. You are now ready to try the new settings out with either Pocket Internet Explorer To use the 'Sprynet' Service of Inbox. Start Inbox, Select Service/SRYNET Mail, Select Service/Properties.
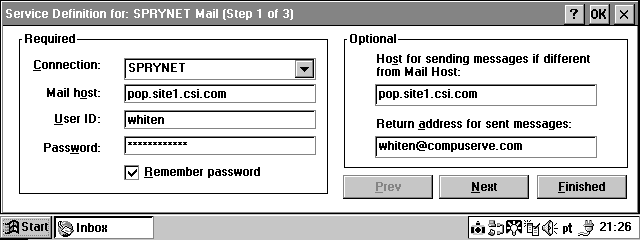
Ensure that all the settings are correct. Note that the 'User ID:' is your Mail name and the password is your POP password. The 'Email Name:' field is your 'From' field in Inbox and can be address you like.
Click 'Next'. Check that you are happy with these settings.
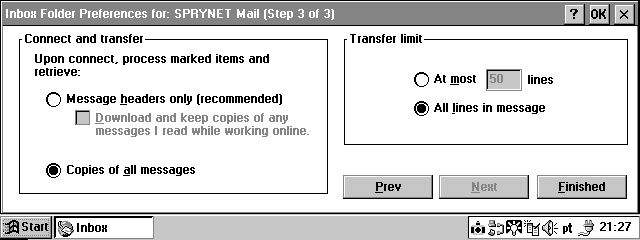
Click 'Next'. Check you are happy with these settings.
Click 'Finished'. Well there it is! It works for me.I hope that this works for you. Please mail me with any additions or omissions! |
|