
British Army: 2300AD
B (Nunshigum) Squadron
- A British Medium Tank Squadron on the eve of the Kafer War -
Introduction
On the 2300AD battlefield the hover tank is still king. The modern Hover Battle Tank epitomises the classic characteristics of the manoeuvre arm - firepower, mobility and protection. It is equipped with medium range anti-vehicle missiles, rapid fire mass drivers and machine guns for close in combat. It can top 200 kph, cross any sort of terrain and has integral jump jets giving it a whole new dimension of mobility. It is protected by active point defence, sophisticated electronics as well as the latest passive armour. However the standard unit of employment remains the squadron as it has since the days of horsed cavalry, a unit large enough to give shock action whilst small enough to command and manoeuvre.
Acknowledgements
Thanks to Peter Grining, Bryn Monnery and David Gillon.
Narrative
The Battle Group's build up training following our arrival in New Africa culminated with a force-on-force exercise against Jameson's Scouts who were simulating a Kafer mechanised unit. The panzers were working perfectly by then and we really cut loose against the local recce unit. Ultimately though the exercise, with only six squadrons in the field, was of a scale that had little practical benefit to us except as a skills check and a introduction to the local terrain.
Instead we went back to the simulators. New intelligence data was feeding through to us now from the operations on Dunkelheim, and the Int Cell constantly updated our KAFOR enemy simulation expert systems. We concentrated on simulations of Dunkelheim terrain, working on the possibility that the proposed German counter-attack might still get off the ground and that we could be called upon to help as a British contingent.
We were also working on scenarios for the defence of New Africa itself. The Grasslands that surrounded the capital of New Middlesex were ideal for our form of warfare - a mixture of rapid manoeuvre, contact battle gunnery and the devastating Sky Streak missiles. It was a decision that stood us in good stead. When we finally fought the battle for real we had already fought it over a dozen times in the simulators.
Extract from 'Carbine, Thistle and Bull' by Major Andrew Ross, Ares Military Press, 2305
B
(Nunshigum) Squadron
Organisation
Training
Equipment
Doctrine and Tactics
Personalities
B (Nunshigum) Squadron, 6th Dragoon Guards (Scots Carabiniers) is a typical Medium Tank, as HBT units are classified in British service, squadron. 6 DG are a part of the 79th Armoured Brigade normally stationed in New Cornwall on the colony world of Joi. However in the summer of 2301 it has been moved to New Africa on Beta Canum Venaticorum-IV in response to the escalation of the Kafer War.
79th Armoured Brigade is a independent armoured brigade and the only force of British armour routinely deployed on the French Arm. It resembles a normal British armoured brigade and includes a regiment of Montgomery HBTs, two hover armoured infantry battalions, an air regiment and a regiment of self-propelled artillery in addition to supporting units. It is designed to operate far from support and in colonial conditions where the brigade must be able to fend for itself. It is also configured, mainly a matter of procedure and practise, to be able to embark on starships to move between worlds. Currently the major units of the brigade are the 6th Dragoon Guards, 2nd Battalion Royal Green Jackets, 3rd Battalion Coldstream Guards, 79 Medium Regiment Royal Artillery and 79 Regiment Army Air Corps.
The 6th Dragoon Guards (Scots Carabiniers) can trace their history back to 1685 when they were raised as the 9th Horse. They gained the title 'King's Carabiniers', equivalent to the title 'Fusiliers' in infantry regiments,. in 1691. However the contraction in the size of the British Army resulted in amalgamations; in 1922 with the 3rd Dragoon Guards and then in 1971 with the Royal Scots Greys. It was as the Royal Scots Dragoon Guards (Carabiniers and Greys) that the regiment remained for nearly 200 years until the British Army expanded once again. The RSDG was divided in 2168 to form the Royal Scots Greys and the Carabiniers, further expansion saw a return to numbered titles and the Carabiniers renamed the 6th Dragoon Guards (Scots Carabiniers) in 2234.
6 DG and the 2nd (Royal Scots Greys) Dragoons are the only two Scottish cavalry regiments. However 6 DG often suffer in recruitment terms in comparison to the more famous Greys. Somewhat ironically 6 DG has a much greater proportion of native Scots, predominantly from the west coast, in its ranks than the Greys. The regiment has its ceremonial HQ in Stirling Castle and it shares the distinctive grey beret but worn with a small white hackle. Whilst there is no little rivalry between the two regiments they also have much in common and cross-posting between the two units is fairly frequent.
6 DG is composed of four identically organised sabre squadrons: A, B (Nunshigum), C and D. It also has a HQ Squadron which is responsible for command and control, reconnaissance, logistics and equipment support. In combat the regiment is organised as a Battle Group and will detach Squadrons to other Battle Groups and have other assets, usually armoured infantry companies and artillery FOO, attached to complete the combined arms organisation. However the sabre Squadrons will generally operate 'complete' - as discrete tactical units and will not be broken down into smaller elements.

I chatted over the intercom with the Trooper driving the speeding Dragoon fuel supply vehicle, trying to understand his rapid-fire Glaswegian. The Dragoon slowed slightly and suddenly they were there. Two Montgomeries flanking the tanker, low slung, quicksilver and menacingly profiled in the pitch black. The name Montgomery always made me think these hovertanks were slow and cautious beasts, like their historical namesake. Seeing them here in their real environment made me realise what an entirely different animal they were.
The first closed into the rear of the vehicle. The Trooper driving pressed a few buttons and the refuelling arm whirred into life, mating with the Montgomery. The driver tried to explain to me that they could refuel on either side but doing it line astern was easier, at least that was what I though he was pointing out. In less than a minute the first was refuelled and away, inside five minutes four of the tanks were re-supplied and back away to the rest of the exercise.
The resupply was conducted as swiftly and professionally as any Grand Prix pit stop, and was an utterly routine matter for the trooper involved. I came away from the experience feeling a lot more confident about the state of our defences and the soldiers who man them.
Extract from The Times of New Africa 23 January 2302
B Sqn has the standard organisation of a Medium Tank 'sabre' squadron. Its combat strength is based on its 14 Montgomery Mk.1 Hover Battle Tanks, of which 12 comprise the three sabre troops. The squadron also has integral command and control, supply and equipment support elements which enable it to operate as a complete tactical formation. The squadron includes some 60 soldiers at full strength including 6 attached REME personnel in the LAD.
B Sqn carries the battle honour 'Nunshigum' which was won by the then 3rd Carabiniers in combat against the Japanese near Imphal in India during April 1944. Supporting the 1st Dogras, the tanks of B Sqn, 3rd Carabiniers attacked Japanese positions atop Nunshigum Ridge. Fierce fighting saw all the officers of both the attacking units become casualties but Squadron Sergeant Major Craddock of the Carabiniers and one of the Dogras' Subadars continued the battle and won the day. To commemorate the battle B Squadron celebrates Nunshigum Day on the 13th of April every year by parading without officers under the command of the SSM.
Sabre Troops
There are three sabre troops within the squadron numbered 5, 6 and 7 Troops. They are identically organised with 4 Montgomery HBTs; each tank has a commander, driver and 'Alternate' crew member. The troop is lead by a 2nd Lieutenant or Lieutenant, while a Sergeant and two Corporals are the other vehicle commanders. The remaining members of the troop are usually Troopers or Lance Corporals.
The Alternates are usually younger soldiers still undergoing Phase 3 training and their main role is to replace fatigued or injured crew members during the course of the battle. They are also trained to double as field medics or maintenance crews and bolster the command and service support elements of the sqn when not required with the sabre troops. All of the enlisted Troopers in the squadron have served as Alternates during the early part of their careers.
The sabre troop fights with its four Montgomeries in two pairs - one pair commanded by the Troop Commander and the other pair by the Troop Sergeant. This enables the troop to perform the basics of all military movement - fire and manoeuvre - with one pair in overwatch (but not necessarily stationary) and one manoeuvring. Similarly within the pairs the individual Montgomeries can perform this function. The troop operates as a discrete unit and is never subdivided.
5 Troop
5 Tp is commanded by 2Lt (a rank also referred to in 6 DG as Cornet) Finch. His 2 i/c and Troop Sergeant is Sgt Grogan and his corporals are Cpl Moore and LCpl Robertson. Whilst Finch is newly commissioned and relatively wet behind the ears, Sgt Grogan has a wealth of experience and is bringing the young Cornet along.
6 Troop
Lieutenant Harte commands 6 Tp. His key personnel are Sgt McAndrew, Cpl Thompson and Cpl Duncan. Lt Harte is a highly charismatic officer who runs 6 Tp as his own personal fief. The troop is renowned for both its esprit de corps and its cliquey nature. Harte is due for promotion in the not too distant future.
7 Troop
Lieutenant Calvert is in charge of 7 Troop. Sgt Thompson is his Tp Sgt with Cpl Ferguson and LCpl McDonald as troop corporals. Calvert is a somewhat dour man but is highly professional. In spite of some clashes between Calvert and Sgt Thompson the troop is well drilled and efficient.
HQ Troop
HQ Troop is responsible for the administration and command of B Sqn, but also has an impressive punch and is frequently used as a reserve in operations. The permanent vehicle complement of HQ Troop is two Montgomery MBT, one Rifleman Command Vehicle and one Hover Rover 500GS. One Montgomery is commanded by the Officer Commanding (OC) Major Andrew Ross, and is his Tactical HQ. In B Sqn the other Montgomery is commanded by the Squadron Sergeant Major WO2 Cameron, the squadron's Master Gunner. As in the sabre squadrons there are three crew assigned each of the HBTs, but with HQ Troop the Alternates are all experienced soldiers and often take control of the HBTs when the OC and SSM are otherwise engaged.
The Rifleman CV is commanded by the Squadron Second in Command, Captain Carter, and also carries two crewmen and a communications specialist. The Rifleman makes up the Squadron's Main HQ and co-ordinates communications, administration and logistics. As such the APC is often deployed away from the rest of the HQ Troop and is frequently co-located with the Supply Troop. The tasks of co-ordinating the actions of the squadron with other units usually falls to the 2 i/c who can be a very busy man in this relatively unglamorous role.
When on exercise or on operations the HQ Troop can be reinforced with other elements. The most commonly found of these is a Cavalier Mk.3 FOV belonging to A Battery, 79 Regiment Royal Artillery. The Cavalier FOV is an earlier model HBT converted to the forward observation role with Damocles and CASIS systems and enhanced sensors and communications. The Cavalier usually attached to B Sqn is commanded by Captain Crosbie RA who is responsible for the co-ordination of fire support to the squadron.
The last vehicle in HQ Troop is a HR 500GS, a light utility ACV which is used for liaison purposes. Driven by an Alternate the vehicle will usually be found with the Supply Troop or LAD in combat as it is in no way equipped to survive on operations with the sabre troops. However it is sometimes used to move forward rapidly and recover crews from stranded, or if in action, destroyed Montgomeries.
Supply Troop
The speed and firepower of B Squadron can result in it operating far from the close logistics support of the Battle Group. Consequently the Squadron has a Supply Troop to feed it at such moments and to maintain ammo resupply in the worst conditions. The troop is equipped with 4 'stretched' Dragoon Modular Armoured Supply variants, which in addition to being armed for self defence carry a flat-pack modular supply load. It is normal for two vehicles to carry Fuel/Ammo packs and two a Missile pack with integral loading crane.
The Supply Troop is commanded by the Squadron Quarter Master Sergeant, Staff Sergeant Johnson and includes seven other soldiers. These soldiers are 4 dedicated drivers and 3 supply specialists but can act as Alternates as well should casualties become exceptionally heavy. The Dragoons seat 4 and usually move the bulk of the sabre troop's alternates as well.
The Supply Troop is a part of the regiment's A1 Echelon and operates by shuttling between the bulk supplies brought forward by either the A2 Echelon or by the Brigade's Transport Squadron and the sabre troops. The troop carries enough fuel and ordnance to completely resupply and re-arm half of the Squadron's Montgomeries. Although normally the Montgomeries would not run themselves below 50% fuel load allowing a complete resupply. Should the squadron require more replenishment they would move back to the A2 Echelon for bulk supply.
The Dragoon MAS is fast enough to keep up with the squadron and stealthy enough to survive as long as it doesn't blunder straight in to an enemy. Consequently the Supply Troop tries to operate as closely to the sabre troops as possible to keep the maximum force concentrated in the Contact Battle Manoeuvre Zone. The Supply Troop has a system of well practised drills for both running and rolling replenishment of the sabre troops. Typically a pair of Dragoon MAS, one tanker and one ammo vehicle, will replenish a single sabre troop a process which is conducted both rapidly and dispersed over a wide area to ensure maximum security.
Light Aid Detachment
Modern HBTs, despite or perhaps because of their sophistication, can require a substantial amount of maintenance which can sometimes go beyond the skills of their crews to perform. When in the field they can break down and require recovery. Similarly in combat it is vital to recover damaged and destroyed tanks in order to repair them and return them to the field of battle. To perform this role each sabre squadron has an attached Light Aid Detachment manned by the Royal Electrical and Mechanical Engineers.
In a Medium Tank squadron the LAD consists of 2 Rifleman Hover Armoured Vehicle Recovery variants together with 6 REME soldiers. The Rifleman HAVR is equipped with cranes and towing equipment as well as sophisticated diagnostic equipment and spare vehicle components. The REME soldiers are skilled in recovery as well as the maintenance of vehicle systems and include at least one vectronics and one engine specialists. Should a vehicle take too long to repair by the LAD it will be passed back for repair by regimental or brigade assets. A Rifleman HAVR has four seats, the fourth of which is normally filled by a more experienced Alternate crewman.
Nothing quite beats the feeling you get riding the armoured wedge that is a Montgomery. Strapping into the command seat is like putting on a tailored suit, everything fits just right. It was a world away from the older, more spartan Cavalier I had stated out on as a young Cornet.
The hatch whines down and closes with a reassuring clunk and hiss as the over-pressure kicks in. Dim red lighting comes up to give enough light to work by, although you can do it by feel easily enough. We start up the vectronics, cockpit displays and then the helmet VHUD. When the VHUD comes on line the situation changes, the cockpit fades away - replaced by the computer generated tactical display. It's as if you are riding up on the hull of the tank but with access to all its sensors and weapons.
With the vectronics up we begin the engine start sequence. The APU sparks the Rolls Royce MHD into life and it ramps up to full power in seconds. The FADEC throttles back the MHD to a throaty idle. Ready to move, the Monty comes up on its plenum contained air cushion. It is held rock steady by the Drive-by-Wire, with none of the bobble of the Cavalier. Then we're off, accelerating fast, vectored thrust from the jump jets giving the panzer an extra kick. There is nothing in the world like it.
Extract from 'Carbine, Thistle and Bull' by Major Andrew Ross, Ares Military Press, 2305
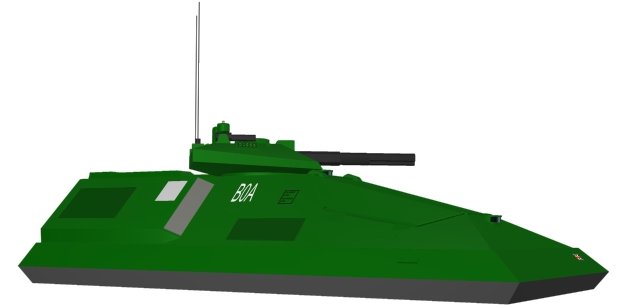
The main equipment of B Squadron and its raison d'être are its 14 Montgomery Mk.1 Hover Battle Tanks produced by Vickers in its Leeds factory in the British Isles. The Montgomery is a modern, highly mobile, heavily armed and armoured hovertank in the same category as the AC-12 and LkPz-IX. It first came into service with the British Army in 2295 and 6 DG were amongst the first unit to receive them just prior to rotation out to 79 Armd Bde early in 2296.
The Montgomery has a combination of 75mm Mass Driver Cannon and Sky Streak hypervelocity anti-vehicle missiles. The turret mounted 75mm MDC is a rapid fire weapon with advanced ammunition and fire control. With an effective range out to 2000m the MDC is the Montgomery's primary close combat weapon. The Montgomery carries 12 Sky Streaks which are vertically launched through two missile launchers in the stern of the HBT. The Sky Streak has a top speed of Mach 12 and an effective range of just under 10 000m. They are capable of destroying any known armoured vehicle and can effectively engage air vehicles as well. The Montgomery also has a co-axial 7.5mm machine gun for the suppression of infantry at close range.
Defense is provided by active ECM, point defence systems and advanced composite armour. The Montgomery's vectronics are also excellent, with sensors, communications and control systems well integrated together through the FVIS-7 vectronics. The HBT's reliability is also good, as many of the mechanical and powerplant systems are simply upgraded versions of those used on the preceding Cavalier HBT. One of the key systems of the Montgomery is the integration of simulation systems into the vehicle vectronics. Allowing easy access to training and simulation in all circumstances.
The standard command interface in the Montgomery uses VHUD and VTAS controls very similar to those used on fighter aircraft and gunships. Main inputs are via triggers and switches on the controls or by voice command, other inputs can be via the crew data gloves. Crew roles and duties are easily configured and switched between the two positions.
The communications systems, through the D-27 standard datalink, allow each tank to communicate data both horizontally and vertically within the Tactical Net with Troop, Squadron or Battle Group. This can be by utilising the LIDAR as a directional communication system to communicate with tanks in line of sight or by using radio or SATCOM links. However in the last case this is restricted in line with EMCON controls and consequently over larger distances real-time transmission of data is a rarity and infrequent burst transmission encoded updates are more frequent. However all of the HBTs will act as auto-rebroadcast stations for data packets as can other vehicles and units. The Tactical Net will also have inputs from sensor drones, recce assets and other elements all the way down to data feeds from individual soldiers through their TISS.
Nominated Command Tanks also have full access to the FVIS-7's Tactical Command System which allows commanders a tactical overview of sub-units and supporting assets. The TCS provides a graphical representation of the battlespace and all units, friendly and enemy identified within it and overlays of their capabilities. It also allows the commander to issue orders, updates and requests in a quick, easily understood manner. Should a Command Tank drop out of the net through battle damage another tank, based on seniority of commander becomes the Command Tank.
The squadron also has several other armoured vehicles. The single Cavalier Mk.3 FOV of the FOO is a fully functioning HBT, if less modern than the Montgomery. It is intended to introduce a Montgomery FOV in the not too distant future. The squadron has two Rifleman hover APCs, one a command vehicle and one an armoured recovery vehicle. The Rifleman is an older HAPC recently replaced by the Templer as the front-line infantry AFV in the British Army but retained in some roles. Big and roomy the Rifleman is ideal for conversions. The CV is a major node in the Tactical Net and has TCS as well as logistics and administration systems. The HARV is a specialist recovery and repair vehicle, capable of bringing a damaged Montgomery out of the FMZ. Both Rifleman variants are armed, but for defensive purposes only.
The main logistics vehicle in the squadron is the Dragoon Modular Armoured Supply variant. The Dragoon MAS is one of an ageing family of light armoured hover vehicles modified with a flatbed and hydraulic loading device. Generally in squadron use the Dragoon MAS has either a tanker pack with 6000 kg of Hydrogen fuel or an ammo pack containing missile, main armament and machine gun reloads. The vehicle has a self-defence armament. The last vehicle is a single Hover Rover 500 GS, an un-armoured light hover vehicle used for liaison and other duties.
The squadron's soldiers also have their personal weapons. Each is issued with the L142A1 Enfield gauss rifle, the army's standard rifle, and a FM P300 Hi Cap personal defence weapon. Standard scales of ammunition include 3 60 round 4.5mm magazines and 3 30mm rifle grenades for the L142, and 3 20 round 5.7mm magazines for the P300. Each soldier also has a single L90 WP grenade to aid the destruction of his vehicle should he have to bail out close to the enemy. This scale is deemed sufficient for self protection and the dismounted defence of leaguers but little else.
The soldiers are issued with the standard issue CS82 combat suit in temperate DPM material and also have Combat Body Armour. Royal Armoured Corps personnel have the CIPES Internal Security chest webbing rather than the assault vest issued to the infantry. The chest webbing has a lower carrying capacity but can be worn comfortably within an armoured vehicle, something that is standard operating procedure in 6 DG. The soldier is issued with two helmets, a L87 combat crew helmet with wide-angle VHUD and a L90A2 combat helmet for dismounted operations. The crew also have Combat Data Gloves, to aid interface with vectronics.
They also have a Daysack and small Bergan, the former is usually configured as a 'grab bag' and stowed with the vehicle and the latter usually contains non-vital items and stays with the Battle Group's A Echelon until needed.
I watched the TCS feed coming in from the other Montgomeries. The exercise was the longest we'd run so far since our arrival and we were topping 36 hours of simulated high intensity operations. This was around the maximum we could run with any degree of realism due to the rotation of Alternates into the primary crews. It was always difficult to go from the immersive simulation out into the big hanger, snatch a bite and some sleep and then get back in the cockpit and go back to 'realistic' operations. The suspension of reality failed somewhat.
However I was exceptionally pleased with what I was seeing so far. I'd run the squadron through a complex group of serials against a KAFOR enemy and they'd responded excellently. I remained convinced that the key to operating against the aliens was to synchronise as much as possible the missile and close combat assaults. If delivered by the squadron en-masse we could cause an immense amount of devastation. Battle Group and Brigade appreciation backed me up as did our extrapolations of French actions on Aurore. We'd yet to get any significant data out of Dunkelheim.
Extract from 'Carbine, Thistle and Bull' by Major Andrew Ross, Ares Military Press, 2305
Unlike the infantry, where most meaningful training must be conducted in the field, units of the Royal Armoured Corps have benefited from the huge advances in simulator technology to enable much valuable training to be conducted in barracks. Although field training remains important for the verification of skills, drills and co-ordination with other arms. This means that the individual skills of crewmen are very high and can be easily assessed and improved.
Basic training for the Royal Armoured Corps lasts for 9 months and is followed by a period of 6-18 months of continuation training as an Alternate with a regiment. At the end of this training the soldier is capable of driving and maintaining all vehicles used within the regiment and use their vectronics and gunnery systems competently. They will also have basic infantry and dismounted tactics in order to operate away from their vehicles. They should also be knowledgeable about standard tactics and doctrine in use throughout the RAC. Lastly they will also usually have had the opportunity to attend a number of specialist courses outside the RAC.
Like the rest of the British Army the RAC likes to teach its soldiers the basics first before training them on high technology methods. This 'belt and braces' system means a longer training period than that used by other armies but results in a greater depth of knowledge and fosters lateral thinking.
Training within the regiments tends to concentrate on the core skills of gunnery and manoeuvre warfare. These are particularly stressed with the development of several courses at the RAC Centre Bovington and Joint Manoeuvre Warfare Centre in Wellon which are schools of excellence. It is standard practise for each squadron to have a qualified Master Gunner and two qualified Master Tacticians or who one is the Officer Commanding. In addition it is normal for someone within the squadron to have armoured recce and infantry specialist qualifications.
Primary Unit Training
Primary unit training is training directed towards maintaining the regiment's primary capabilities. In the case of a Medium Tank Regiment this concentrates on the deployment of its Montgomeries in high-intensity operations. Although some training for dismounted operations is also undertaken.
For the sabre squadrons the concentration is on maintaining the skills of the soldiers in the handling and fighting of the Montgomery. The training program includes maintenance of the AFVs and revising basic soldiering skills but concentrates on operation of the Montgomeries in simulation and field exercises. Maintenance is a routine enough matter but one that still takes up a large slice of time. However it is a task made easy by the diagnostic systems integral to the Montgomery, indeed the Dragoon MAS' are usually more of a problem than the HBTs.
B Squadron's OC takes care to include a large proportion of conventional soldiering in his training program. This takes the form of basic skills like medical, navigation, weapon handling and fitness, but also includes some field training in the infantry role. The OC believes that it is too easy for his soldiers to become over-reliant on their vehicles. Deployed in the colonies it is not unknown for the squadrons to be called upon to operate in a dismounted role. Indeed the regiment's D Sqn served dismounted as part of the BRITBAT peacekeeping unit on Vogelheim. 6 DG has sometimes been called upon to support the colonial authorities in New Cornwall, for example during the riots of New Falmouth's Elysian émigré community in 2298 and 2300.
However the bulk of the training is conducted at squadron and concentrates on fighting the Montgomeries. Most of this training uses the Montgomeries integral simulator systems. These allow each Monty to be used as a simulator with highly accurate computer generated sensor inputs being fed into the vehicle which in turn is linked into the other vehicles in the squadron. This allows cheap, immensely flexible training to be conducted on an almost daily basis. An endless variety of scenarios and terrain types can be set up and fed into the system. The regiment's Int Cell provides enemy expert systems for a variety of threats that are constantly updated.
This sort of training is also conducted in the field to confirm the practical skills and drills that cannot be checked in barracks no matter how excellent the simulation. However due to the small number of vehicles involved it is not uncommon for field exercises to be conducted against simulated enemy forces. As mentioned above most training is conducted at the squadron or troop level by their officers. This allows the development of cohesion, morale and teamwork.
6 DG has undertaken many exercises in its time on New Cornwall and is experienced at operating at great distances from its home bases. In recent years it has concentrated on the possible threat posed by the Kafers.
Secondary Unit Training
Secondary training is defined as training designed to bolster retention, teamwork and increase the depth of skills within a regiment. As such it includes sport, adventurous training as well as 'cadre' training.
6 DG hold true to the British Army's tradition of one afternoon a week being dedicated to sports. The Other Ranks are generally fanatical about football, naturally with the preponderance of Scots from the west coast most support either Rangers or Celtic. B Squadron also have a fine rugby team. The officers on the other hand are mostly fanatical about polo, however the general paucity of polo ponies on New Cornwall has stymied their activities somewhat. Some of the younger officers have taken up a version of polo played on hover bikes, but this has been frowned on by the CO and other RHQ officers. The regiment also has a comprehensive programme of outwards bounds and adventurous training, although this has fallen away somewhat with the move to New Africa.
6 DG runs annual cadre training, albeit on a narrower base than similar training conducted by infantry battalions. In effect this training usually revolves around cross-training with recce troops from A Squadron 10th/11th Hussars who provide 79 Armd Bde with armoured reconnaissance or the 6 DG Recce Troop. Other options include training with the two armoured infantry battalions or with 79 Regiment Army Air Corps whose Firefly gunships have a similar gunnery system to that of the Montgomery. Lastly 6 DG tries to institute cross-training with different nations. Whilst opportunities were somewhat restricted on Joi except for with the Azanians, training has been conducted with French and German troops on Beta Canum.
Command Training
The efficiency of the medium tank squadron revolves around not only the ability of the crews to operate their individual tanks, but in the tactical and command ability at Troop and Squadron level. Whilst the regiment can run a number of courses to bring on the skills of its soldiers and leaders it relies on sending troops to centres of excellence to keep the unit up to date with skills, best practise and doctrine. This is especially important for 6 DG which has been on the frontier for over five years of a seven year tour.
The key specialisations for the RAC are gunnery and Gunnery and Tactics. Gunnery is taught out of the RAC Centre in Bovington which runs two courses: Senior Gunner and Master Gunner. The Senior Gunner course is taken by senior Corporals before they are promoted to the position of Troop Sergeant. The Senior Gunner is responsible for standards of gunnery and training programs within the troop. The Master Gunner course is taken by Staff Sergeants prior to being promoted to WO2 and the position of Squadron Sergeant Major. Naturally the Master Gunner is responsible for standards of gunnery within the squadrons to the RSM, who should be both a Master Gunner and Master Tactician.
The Tactics Courses are run at the Joint Manoeuvre Warfare Centre in Wellon's Eastern Training Area south of the Cam Valley. JMWC runs three courses; Junior, Senior and Master Tactics all of which are conducted predominantly in the field under tactical conditions. Junior Tactics is the promotion course from Lance Corporal to Corporal and revolves around the operation of paired tanks and troop tactics. Senior Tactics is taken by Sergeants and senior Lieutenants and involves mastering the procedures and tactics of the squadron group. The Master Tactics course covers squadron/company group and battle group tactics and is open to WO2's and Captains.
'I had the only operational Challenger II troop left with the 1st British Armoured Division. My crews were the pick of the division, most with over three years of combat experience. Personally I had over 50 AFV kills, mostly Sovs but also Poles, Czechs, East Germans and marauders from across the fighting nations and I wasn't exceptional. Our Chally 2's were kept running by fair means and foul and remained a bogeyman to our WarPac opponents.
We came under the direct command of Major-General Heller and were his personal reserve to be committed only on his order. We'd saved the day to many times to count with our late appearance on the battlefield. In the retreat from Prague we held off almost an entire WarPac division with elements of the White Rhino Battlegroup. We succeeded by the quality of our gunnery (we out-shot the conscript Soviets with alarming ease), the audacity of our actions and strength of our reputations.'
Captain
G.A. Kain DSC, MC (3 Bars), 17/21 Lancers, Germany 1999.
Quoted in British
Army pamphlet PAM 10 'The Medium Tank Battlegroup' 2297
The British Army has always been very wary about adopting formal doctrine, seeing it as restrictive and have an negative effect on individual initiative. British Army Medium Tank doctrine is seen, and taught, as a guide rather than 'gospel' to be followed at all times.
Attack
The attack is the key tactic of the Medium Tank squadron. It is in the attack that the characteristics of mobility, protection and firepower are maximised. The squadron practises two main kinds of attack, the quick attack and the deliberate attack. The first relies solely on the striking power of the Montgomeries alone, whilst the second is usually a combined arms assault also involving infantry.
The quick attack is usually aimed at a specific enemy unit or capability and launched with at least squadron strength. HBTs are notoriously bad at holding ground, so the aim is to destroy enemy forces and leave the occupation of ground to infantry units. The quick attack relies heavily on good reconnaissance, both to locate suitable targets and to identify the best approaches over the ground. Without this the attack can go badly wrong and could be ambushed or channelled into anti-armour killing areas.
The typical quick attack is launched from the friendly side of the FMZ and will involve a high speed approach to the target area. The FOO will have organised a Fire Plan of artillery and air assets to suppress and mask any enemy outposts on the way to the objective and the squadron will bypass any resistance to maintain momentum. Once close to the objective the squadron will open up with its Sky Streaks and then close to finish the enemy with the MDCs. The time between these two events is kept as short as possible to maximise the shock effect of the action. The final attack is delivered with two troops forward and one in reserve.
The combat power of such an attack is considerable and its effects often spectacular. Typical targets include HQ, logistics and artillery elements and enemy manoeuvre forces of up to company size. The OC now has the choice to either exploit his success and attack another target, or fight back to his own side of the FMZ, again under the cover of an extensive Fire Plan. Either way the risk of a enemy hover armoured counter-attack is high and rapid decisions must be taken. Often a second squadron will be tasked to cover the retreat or exploit further as part of a Battle Group or Brigade attack.
The deliberate attack is usually delivered to seize an objective on the ground rather than simply savage a particular enemy. These are usually a Battle Group operation and will also involve an armoured infantry company in addition to the Medium Tank squadron. Once again effective reconnaissance is vital to the success of the operation.
The role of the squadron in the deliberate attack is one of destruction of the enemy’s ability to destroy the accompanying HIFV and suppression of his capacity to oppose the dismounted infantry in close combat. It is also vital to isolate the enemy position being assaulted from reinforcement or counter-attack. Due to the introduction of the capable Templer HIFV the requirement for intimate support from HBTs has been dropped from most deliberate attacks. Through all stages of the attack indirect fire support is crucial.
In the opening phase of the attack the squadron will destroy enemy perimeter posts, engage any obvious positions and invest the objective with fire. Two sabre troops and the HQ Troop will then deploy to ensure the isolation of the objective from enemy interference. One sabre troop will be detached to give close support to the infantry company making the actual assault. This close support is conducted from a stand-off position, usually from the flank of the objective. The troop will then provide overwatch for the infantry company assault and could be called upon to move closer in and engage specific objectives.
The pace of such an attack is usually very quick to start with, right up to the moment that the infantry de-buss from the HIFV. At this stage the battle slows dramatically
Due to the nature of the deliberate attack an enemy response is very likely, especially with indirect fire and possibly with counter-attack forces. Consequently it may often form a part of a wider Battle Group or Brigade attack with other MT Squadrons or air assets being involved in the operation to ward off any counter-attack. Sometimes a deliberate attack may be mounted to force such a battle. This was a favourite Manchurian tactic in the early stages of the Central Asian War.
Defence
The MT squadron is a very important asset in the defence, however they specialise almost exclusively in the mobile defence. The use of a squadron in a positional defence is a wasteful misuse of valuable assets although this tactic may be used in extremis.
The mobile defence, as always, relies on the quality of reconnaissance available to the squadron for its effectiveness. This must identify both friendly and enemy manoeuvre corridors and key locations of decision prior to engagements and then maintain timely updates on the enemy’s location. The use of obstacles, such as mines, terrain and the use of infantry to occupy key areas is used to channel the enemy into desired killing areas and to fix them.
Once the enemy thrust has been identified the defending squadron will be brought forward to engage the enemy. This is usually very similar to a quick attack with the squadron moving forwards at speed to engage with great firepower and shock effect. The aim is not to become involved in a dog fight but seriously slow and damage the enemy with limited attrition to their own forces. The fixing effect of the action is important to allow the maximum use of indirect firepower can be made, something difficult to achieve on fast moving mobile forces.
MT squadrons are also use widely as counter-attack forces. Their mobility and firepower enable them to cut off enemy breakthroughs and minimise potential exploitation. The famous counter attack of the French 3e Division de la Marche on the Luftkissenpanzergrenadier Division 'Deutschland' at the Battle of Picardy in 2293 is one oft-quoted example.
Patrolling and Reconnaissance
MT squadrons do not normally conduct patrolling operations due to the nature of their equipment. However they are sometimes held as a Quick Reaction Force should patrols by other units, usually formation armoured or close recce elements require powerful back up.
Similarly reconnaissance is not a role usually practised by the squadron due to its importance in other roles. However the Montgomery is an excellent sensor platform and it can perform this function adequately should it be called upon to do so. More commonplace is the assignment of a squadron defence alongside units from the brigade air regiment in support of armoured recce elements as the first line of any mobile. This 'recce battle group' is an extremely potent force and can be of immense importance in shaping the battlespace.
Urban Operations
The squadron has a limited role in the event of urban operations, as the HBT is not an ideal weapon system for such missions. However it can be called upon to provide intimate support for infantry fighting in urban areas. The squadron would normally be broken down into Troops, which would operate each in support of an infantry company. Urban operations are unpopular with armoured troops and high casualties expected, however they give valuable support to the infantry.
Dismounted Operations
If called upon to do so the squadron can operated dismounted as infantry. However the squadron’s small size and different training objectives mean that it is much less efficient than an infantry company. Dismounted operations will normally be conducted in a peacekeeping role, or in giving military assistance to civil authorities.
Young Jimmy Finch was finding the pace of adjustment hard. His records said he'd done well at RMAS and at RACC but he was having trouble handling the whole troop on exercise and in barracks. Sometimes he was doing too much and sometimes too little but doing everything too quickly. As a result Sgt Grogan was having to work doubly hard to maintain the troop's efficiency.
I preferred to let young subalterns make their own mistakes and learn from them in their own time. However with the possible deployment to Beta Canum becoming increasingly likely it was looking like I wouldn't have that freedom. What with Finch's inexperience and Don Harte's near insubordination I was beginning to feel a bit embattled. I felt the Squadron was declining from its high standards of the previous year. Thank God the SSM was keeping the ORs up to scratch.
Extract from 'Carbine, Thistle and Bull' by Major Andrew Ross, Ares Military Press, 2305
Major Andrew Ross
Officer Commanding, B (Nunshigum) Squadron 6 DG
Andy Ross is the commander of B Squadron, a position he has held for nearly two years and he has just received an extension for a third year. He was born in Helensborough to a family with a tradition of service in the Royal Navy and Royal Marines, with whom his father served as an NCO. His family moved frequently to followed his father's postings mostly living in Arbroath or in the West Country. Andy was educated in a number of garrison schools and achieved acceptable, if unspectacular results. After studying at university he attempted to joint the RM but was rejected, disappointed he travelled the world for a year before joining the 2nd Dragoons.
Andy served initially as a trooper but his leadership potential was quickly spotted and he was sent to RMAS where he thrived, earning his commission. The 2nd Dragoons were unwilling to take back an officer who had, however briefly, served as an Other Rank and so Andy was commissioned in 6 DG. He soon proved a level headed and reliable Troop Commander, notable for the seriousness with which he approached his duties. He gained an Excellent pass on his Senior Tactics and somewhat unusually for an officer also attended Senior Gunnery.
He has since served as the 2 i/c of A Squadron, commanded the regimental recce troop and served on brigade staff. As a captain he again earned an Excellent pass at Master Tactics and served as a Troop Commander on the Junior Tactics course. A quiet, diligent officer he is well respected by his troops. However he is not so popular with some of the officers who see him as being interested in his profession to the exclusion of all else. Andy Ross is married and has a son, his family is currently living in New Cornwall.
WO2 Bill Cameron
Squadron Sergeant Major, B (Nunshigum) Squadron 6 DG
Bill Cameron is the SSM and the senior non-commissioned officer in the squadron. He is also the Master Gunner. Cameron was born and raised in the Hyndland district of the Central Scotland Metroplex to middle class parents. He joined the TA when at Glasgow Caledonian University as a Trooper in the Royal Scottish Yeomanry, and on graduation joined 6 DG. Intelligent and well educated he nevertheless resisted offers to go for commission, preferring instead to go the non-commissioned route.
He has been promoted very quickly to his current position and is virtually ensured of becoming the Regimental Sergeant Major in the future. Possessing a quick mind, dry wit and exceptionally professional outlook he is perhaps an ideal SSM. He complements Major Ross very well and this team has made B Sqn perhaps the leading sub-unit in the regiment.
Lieutenant Donald
Harte
Troop Commander, 6 Troop, B (Nunshigum) Squadron 6 DG
Don Harte hails from a wealthy district in the west of Glasgow and was educated at the prestigious Glasgow Academy and St Andrews University. Like many of the regiment's officers he served with the TA whilst at university, in this case the 5th Black Watch, and transferred to the regular army on graduation. He makes no secret that he intends to serve for several years with 6 DG and then go on to get a job in the City of London with a financial institution.
In the meantime he is enjoying commanding a troop in remote New Cornwall. A charismatic, charming man he has put himself at the centre of 6 Troop and most of the soldiers owe loyalty to him. Whilst a competent tactician he has an inflated opinion of his own abilities. He also feels superior to Major Ross who he disdains as a jumped-up 'ranker' and the whole regiment has become aware of these opinions. He has become increasingly bombastic since the move to New Africa, however this is mostly due to his secret fears about the likelihood of going into action.
Corporal Andrew Thompson
Tank Commander, 6 Troop B (Nunshigum) Squadron 6 DG
Andy Thompson is the fly in the ointment of 6 Troop, a man who has little respect for his troop commander. Thompson comes from Kircaldy in Fife and is the younger brother of Sergeant Alistair Thompson of 7 Troop. He followed his brother into the regiment as a rare TED entrant and has earned a degree during his time with the regiment. He is a solid if unspectacular tank commander but his greatest asset is his calm nature when under pressure, very little phases Andy Thompson.
He has recently passed his Junior Tactics and been re-assigned to 6 Troop. However he has no interest in becoming a member of Lt Harte's clique and remains on the outside of the circle. His attitude infuriates Lt Harte who has tried to get him posted from the troop as he fears Thompson is undermining him.
Epilogue
We dashed forwards to replace D Squadron as close support to the 10th/11th Hussars recce screen. The TCS was being updated more and more quickly as we closed the 20km to our new positions. The tide of Crapaud armour was becoming a torrent along the Mid-Meakon. The Brigadier had tried to shape the battlespace with the recce assets and the Air Combat Patrols but it looked like the Crapaud vanguard was breaking out. The TCS became vague as drones and sensors were destroyed and I began to feel fear. The situation was running out of control, visions of the debacle on the French Continent loomed in my mind.
Then, suddenly, the TCS became crystal clear again. Ground OPs I realised, someone had set an ambush for the Kafers. Simultaneous I gasped at the closeness of the enemy force and its size. The TCS lit up, our artillery was incoming en-masse, virtually every gun we had firing a time-on-target bombardment. The TCS prompted engagement of enemy units and I passed the order. The squadron launched its volleys of Sky Streaks - sixty plus - I later marvelled at the expense. They looped up, then flashed away with breathtaking acceleration destroying CAC-1 HBTs and other high value units we had yet to sight. Some missed and those targets we re-engaged, missiles impacting simultaneously with the arrival of the bombardment.
We crested the ridge to the sight of a small slice of Armageddon in the valley floor less than a kilometre away. I gaped at the destruction the artillery and ourselves had wrecked. The sabre troops were more practical and began engaging surviving AFVs and infantry. My HQ Troop joined in gleefully adding to the slaughter. Three minutes later we were away, accelerating hard to a rolling replen with the Supply Troop as D Squadron returned to the front. It was fast and brutal, but after the devastation the Crapauds had inflicted on us no-one was in much of a mood for mercy.
Extract from 'Carbine, Thistle and Bull' by Major Andrew Ross, Ares Military Press, 2305
Copyright 2009, D Hebditch