Home | Contents | KwikPik |
Some browsers will make a total hash of this complex page layout, which matches that of the original magazine pages. |
|
![]() "I am Sylk, the muscle on this mission. And that's gonna come in pretty handy at the moment as we've just cornered Captain Churl ..." | Steve: It's all very well going for the monkey, but don't you think we should be after the organ grinder? The Ambassador ain't here and we're just wasting precious time. | ![]() | Ross: It's not a waste of time - if we're going to crack this we've got to explore everywhere. Look, we've found the master pass-card here that'll give us access to all the locked doors on the ship. |
| ||||||||||||||
---|---|---|---|---|---|---|---|---|---|---|---|---|---|---|---|---|---|---|---|
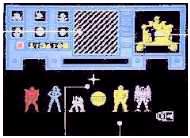
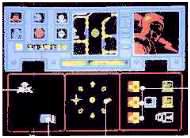
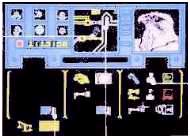
This window gives you an overview of your position in the spaceship but the shutters are drawn until you choose a character to move. To the left, the clock counts down the hundred minutes until the hostage cops it. You can carry on after this time but you can't complete the game. | ![]() | All hail - it's the Emperor who oversees your mission to rescue Ambassador Kryxix held hostage on the spaceship. When you've chosen a member of the Enigma team from the line-up below, their picture will appear in this window. | This is the attack screen - in this section you'll see just who you're up against. This is Sky Fortress Captain Churl, second-in-command to General Zoff. Luckily, he's on his tod and can put up little resistance but you won't be able to duff 'em all over this easily. | ![]() | These are the three action icons - top is attack and advance, middle is stand and attack and the bottom is retreat. To help you choose the best course of action use the icon on the right of them - it lets you look around to see if the enemy's ganging up. | The map window shows the area in the immediate vicinity of your chosen character. Here's Sevrina about to unpick the lock on a door, a knack that'll come in very useful during the game. Just in view at the top of the picture is the icon for an enemy trooper waiting to go on the offensive. | ![]() | The three telly icons give you immediate access to the other screens. Green takes you to the movement screen, yellow to the object screen so you can see what you're carrying and red to the attack screen. | |||||||||||
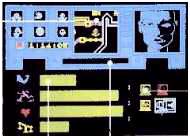
This is the first adventure that breaks the language barrier - it's completely icon driven. Move the cursor over the picture you wish to choose and click - you'll be surprised at how quickly you build up speed at it. When you want to change screens move the cursor to the icon in the right-hand corner. | . | This is the Enigma team - and you'd have to look far and wide in the Universe before you'd come across a more 'orrible bunch of mercenaries. Crooks, trained killers and cut-throats to the man, and woman. (Looks a bit like the YS team to me. Ed.) | Sevrina can open all the doors but what happens if she meets a sticky end? That's when you find that the master pass-card in Churl's office comes in handy - it's the pass that doesn't have to colour co-ordinate with the doors. | . | You can only attack or retreat in the direction of the filled-in arrows. The order of combat is to choose one of the action icons on the right and then one of these arrows to direct your attack. | These four bars give an indication of strength, speed, stamina and the weight of any objects you're carrying. The quickest way to reduce strength is to get into scraps with the enemy but luckily resting aids recovery. Also if you carry too much, the weight bar will go into the red and make you more vulnerable. | . | If any of the characters comes under attack, you'll learn the bad news here first. Obituary notices will also be posted here! | |||||||||||
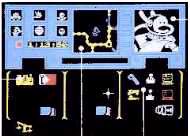
Steve: Four minutes in, and we still haven't decided who goes where yet. I'm gonna choose Manto, as he can use the transporter. I think we should beam down just two or three. | ![]() | Ross: I just hoped you've fully armed them all before sending them to the ship. I'd take Sevrina, Maul and Zork to clear the way - but I'm not holding the joystick so anything could happen! | . | ![]() | . | Steve: We're very close to the robot armoury here so we can stock up on weapons. As soon as Sevrina opens the door let's start legging it ... | ![]() | Ross: For once I agree with you! This is a tricky spot but if we move in enough fire power we can wipe the floor with this bunch. But we'll have to put a spurt on before they regroup. | |||||||||||
' F i r e f i g h t e r s ! | Light the blue touch paper and stand back for ... Shadowfire, the new firework from Beyond. It's a real-time adventure without words - you have just 100 minutes to board the enemy's space ship, rescue the hostaged ambassador, capture General Zoff, the enemy leader, and then destroy the ship. And all without typing so much as one piece of text. So, the YS fire brigade of Ross Holman and Steve Malone prepared to play with fire ... | ||||||||||||||||||
Steve: This is another fine mess you've got me into. If we'd only done it my way, we wouldn't have ended up with forty minutes left on the clock and nowhere to go. Aaargh! | ![]() | Ross: Don't you start blaming me. We did do it your way. There's a first and last time for everything and this is the first and last time I play this game with you. Humph! | . | . | Steve: Didn't I say we should've brought Torik, the explosives expert along? We've found the self-destruct but we can't trigger it and we can't pick it up. Any more bright ideas? | ![]() | Ross: Just shows what you know. We don't need to pick it up - all we have to do is collect the self-destruct card from Zoff's office and then any character can set it off. So there! | ||||||||||||
|
![]() "Brrr ... phtt ... zzz ...Name: Maul ... Status: Weapons droid ... Damage: Limited ... phtt ... zzz ..." | Steve: What do you mean you're not gonna take the grenades? They're just the business for battles at close quarters. Mark my words, we'll never get out of the Security section alive without them. | ![]() | Ross: That rocket launcher's worth any number of your puny grenades - just look at how heavy it is! If we're going to get into Zoff's office we'll need all the fire power we can muster. |
| ||||||||||||||
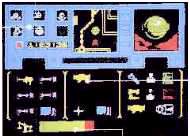
This is one of the three starting points that Manto can beam you up to. There are plusses and minuses to all of them so it's just a question of trial and error. At this stage of the game, now that Manto's copped it, there's no chance of saving the Ambassador. | ![]() | Keep track of where you are by making a note of your current location. But be warned - if the word 'security' is in there, you're likely to have big trouble with the bad guys. | Keep a constant check on the status of the six members of the Enigma team. Blue means they're on the move, magenta on the attack, cyan defending, yellow retreating, flashing indicates a character's weak and if the box is empty ... RIP! | ![]() | Any object displayed here is being carried by your character. You'll often stumble across weapons on your travels but it's better to stay armed at all times than take the risk of finding something suitable when you need it. | All the objects to be found in your present location are displayed here - most of them can be picked up if they're not too heavy but this one's the exception. It's the destruct unit that'll blow the ship to smithereens. | ![]() | Here's the big piccy of your current character - in this case Manto. It's worth learning their names pretty quickly 'cos when a message comes through that they're under attack you've got to move fast. | |||||||||||
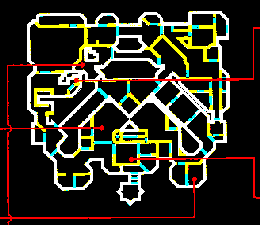
The movement arrows work in the same way as the attack arrows - you can only travel in the direction of the filled in ones. Quite often you'll come up against locked doors, so either Sevrina will have to open them or you'll need the correct coloured pass-card. | . | It's a space shuttle - not that it'll do you a lot of good now. Your mission's finito! | These are the grenades that Steve's so adamant you'll need for close contact clobbering - if you want to test his theory you'll have to give it a go, but don't be surprised if they blow up in your face. | . | When you pick up a weapon, look at the weight bar - it'll give you a good idea of how powerful it is. The heavier the better, of course, but make sure you don't overstretch your team member. | It's worthwhile keeping your own detailed map of the spaceship or you may end up hopelessly lost - even with our blueprint. | . | Use these four icons on the object screen to handle your weapons and so on. You can pick up objects and drop them just so long as they're not too heavy for you. Also, make sure you've got a weapon 'in hand' before trying to use it or you're likely to come unstuck. |
Most hackers are constantly on the lookout for new products that'll make their lives easier (so, who isn't? Ed). More often than not, these are special disassemblers, or monitors with extra features that can cope with the 'strange' situations brought about by the latest protection techniques. While hacking Shadowfire I found that there was one item in particular that helped me enormously but the strangest thing is, it hasn't been released yet! It's the Shadowfire Tuner that's scheduled to hit the streets later this year. With it, you'll be able to modify the program to suit your own taste. Now, I haven't been slipped a pre-pre-production copy or anything like that - it's just the fact that it's coming out, has forced the Shadowfire programmers to be extra neat with their coding. They've placed all the useful info into tables that can be changed by the Tuner. This means, of course, that once you've sussed out what the table's are for, it's easy to see what each piece of code is doing, just by noting the table it accesses. The program contains four main tables - one for the objects, one for the locations, and two character tables, divided into one for the Enigma team and one for the rest. These last two tables are in the same format, |
with 9 bytes for each character.
Each entry describes the location
of the characters (and where
they're going if they're on the
move), what they're up to, and
gives the complete gen on the
state of their health. After a quick
count-up of the entries, I reckon
them are nigh on 42 independent
characters wandering about. In the object table each entry has 5 bytes - one byte handles the info on how heavy it is, two bytes give the address of the routine that handles the object, one byte gives its position (if it's being carried then the number of the character becomes its location) and the final byte gives variable info about the state of the object as the game progresses. The location table is a touch more tricky. It consists of one table of two byte address entries which 'point' to a location where further info can be found. This is done because each of the different rooms has a different number of exits and such like, so each one takes up a different amount of space. So much cleverer than the method used in, say, Jet Set Willy (Nope, I shan't say it - you can't make me. Ed) where each room uses the same amount of space even if it's empty. The coding in Shadowfire is a pretty professional job - it uses interrupts to keep everything moving at once, and it's all nicely laid out, though there are a few unexplained gaps in the middle. Is the Tuner going there perhaps? If it's not, then the space could've been used to expand on the current 165 locations. Shadowfire certainly offers plenty of scope for POKEs. In fact, by the time the Tuner makes a showing, it'll probably be out- of-date. Well, just to get the ball rolling, here's my program! | ||||
100 LET c=0
| |||||
To move more quickly and carry as much as you want, type this in, save to tape and run it. When you're prompted, insert Shadowfire and press play. Shadowfire's an enigma no longer! |
Home | Contents | KwikPik |