Your Spectrum
Issue 17, August 1985 - The 3D 3
Home Contents KwikPik
title
In last month's YS [see 3D Daze], Mike Leaman presented a 3D graphics creator in machine code. He follows up this month with three extras that turn the program into a complete 3D system. There's a turbo-charger for extra smoothness, an on-screen 3D sprite designer plus the promised conversion to YS MegaBasic. Well, they say that all good things come in threes!
There's no difference in the way the new code functions from the old except that it makes for smoother graphics. Plus there's a bonus of a new machine code subroutine that lets you move objects without having to erase and then reprint them. The routine starts at 63945 and you POKE the co-ordinates of the object you want to move into the locations that appeared last month. You can now specify the direction in which the sprite is to move by POKEing the X, Y and Z increments into locations 63997, 63998 and 63999 respectively.
Now it's an idea to check that the new routine's working using last month's demo program. Remember though to alter the CLEAR and LOAD commands at the beginning of the program to CLEAR 57750 and LOAD "TCODE" CODE. A last plus point is that this new routine lets you use the whole screen as background but that does mean that when you use CLEAR to reserve the memory for your backdrop you'll have to reserve 6K instead of 2K. The reason for this is that another area of memory is used for printing on, instead of the normal screen. When you print, erase or move a sprite all the printing is done in this new area of memory, and that means that the entire 6K of memory is copied to the real screen, updating the whole screen at once.

* 3D Turbo Charger

I hope that by now you've got the listing from last month's issue up and running and that you've started to create moving graphics in three dimensions. The only problem is that they're a little flickery. What d'you mean, you noticed? This was a result of trying to keep last month's code to the absolute minimum so that you wouldn't have reams and reams of listing to type in. Now though you can solve the problem with this small program. The method I've used is a trick that
you'll find on many commercial pieces of software though it has the disadvantage of taking up another 6K of memory. Don't panic - this doesn't mean that you'll have to start bashing in another 6K of code - just tap in the short Basic program below.
Done that? Right, now save it to tape and run it. It'll now load last month's code, so once you've typed RUN, load the 3D Daze program into your Speccy. The program will now alter the code to include the new routines and then it resaves the turbo-charged code for you.
  20 CLEAR 57750
  25 LOAD *"m";1;"CODE" CODE
  30 FOR a=63945 TO 63999
  40 READ b: POKE a,b: NEXT a
  50 POKE 64002,228: POKE 64003,249
  60 POKE 64013,226: POKE 64429,64
  70 POKE 64072,156: POKE 64073,225
  80 POKE 64432,24
  90 POKE 64629,201
  95 POKE 64635,155: POKE 64636,225
 100 SAVE *"m";1;"TCODE" CODE 63945,1423
9000 DATA 205,34,252,58,254,249,132,50,125,252,58,253,249,133,50,126,252,58,255
9010 DATA 249,130,50,128,252,195,233,251,42,123,252,17,156,225,1,0,24,237,176,201,33
9020 DATA 156,225,17,0,64,1,0,24,237,176,24,47,69,69,69
The 3D turbo-charger will make your sprites completely flicker- free. But be warned, it'll use another 6K of memory.

* Convert to YS MegaBasic!

Now for everyone with YS MegaBasic, here is the conversion program that'll turn it into 3D YS MegaBasic. Are there no limits to its versatility, I hear you cry but I'm far too modest to reply!
All you have to do is type in the 3D Daze program from last month then type in the conversion program, save it and run it. When the message Loading CODE comes up on screen, play the 3D Daze code into your Speccy and then when you receive the Loading MegaBasic message, just play your YS MegaBasic tape. The program will then alter and link the two pieces of code and when it's finished it'll resave the new code. You'll now have a new version of MegaBasic that's slightly longer and will accept a number of new commands. But because it's longer you'll need a new loader for it - something like this should
do the trick:
10 CLEAR 43560: LOAD "3D MB" CODE: RUN USR 56100
Let me just run through how the conversion program works. First off, the 3D Daze code is loaded into memory not at its normal location but lower down below the MegaBasic area. Even though the code's been loaded out of the way of MegaBasic it still won't work as some of the machine code instructions refer to the higher area of memory. This means that we have to alter these instructions to point to the new area of memory. Once this is done, MegaBasic is loaded and a small piece of code that interfaces the 3D Daze code to MegaBasic is POKEd into memory. Finally, MegaBasic is altered so that it'll recognise the new commands and then it's saved. Phew!
You can use the 3D Sprite Designer opposite to create 3D sprites for 3D
MegaBasic but the code file that the designer produced must be loaded at 44678.

Command Performance

You'll find that your new 3D MegaBasic has the following four new commands:

WRITE_x,y,z,c Prints the sprite with code 'c' at position x,y,z

RUB_x,y,z,c Removes the character that's at position x,y,z from the display

BACKD_add This saves the middle third of the screen at memory address 'add'

LCLEAR This command clears the display list and should be used at the beginning of every program that uses 3D graphics
  10 CLEAR 43560
  15 PRINT "Loading CODE......"
  20 LOAD "CODE" CODE 43631
Lines 10-20 Load in the 3D code from tape into a reserved area of memory.
  25 PRINT "Relocating......Please wait"
  30 FOR z=1 TO 45
  40 READ a
  45 LET a=a+43631
  50 LET p=(PEEK a+256*PEEK (a+1))-20369
  60 POKE a,p-256*INT (p/256): POKE a+1,INT (p/256)
  70 NEXT z
Lines 25-70 Make sure all the addresses in the code point to the new locations.
  72 PRINT "Loading MegaBasic"
  73 LOAD "" CODE
Lines 72-73 Load in the MegaBasic code.
  80 PRINT "Installing MegaBasic binding"
  90 FOR a=43562 TO 43626
 100 READ b: POKE a,b: NEXT a
Lines 80-100 POKE in the code for the MegaBasic binding.
 110 PRINT "Patching MegaBasic"
 120 LET p=52851
 130 FOR z=1 TO 4
 140 READ a$: FOR y=1 TO LEN (a$)-1
 150 POKE p,CODE a$(y): LET p=p+1: NEXT y
 160 POKE p,CODE a$(LEN a$)+128: LET p=p+1
 170 NEXT z
 180 POKE p,255
 190 FOR z=48906 TO 48913
 200 READ b: POKE z,b: NEXT z
Lines 110-200 These lines tell MegaBasic that the new commands exist.
 210 PRINT "Saving MegaBasic"
 220 SAVE "3D MB" CODE 43562,21807
Lines 210-220 Save the updated copy of MegaBasic with the new code installed.
8000 DATA 2,6,15,38,61,108,123,127,134,144,151,162,166,169,174
8010 DATA 185,188,199,219,234,253,257,264,356,388,404,425,438,491,495
8020 DATA 500,506,515,533,540,543,548,552,556,595,599,618,622,626,632
8990 DATA 205,145,172,195,155,170
9000 DATA 205,104,191,121,50,237,172,231,205,104,191,121,50,236,172,231,205,104,191,121,50,239,172,231,205
9010 DATA 104,191,121,50,238,172,201,205,48,170,195,88,172,205,48,170,195,42,170,205,104,191
9020 DATA 237,67,234,172,195,22,172,175,50,46,173,201
9030 DATA "WRITE","RUB","BACKD","LCLEAR"
9040 DATA 80,170,86,170,92,170,102,170
Lines 8000-9040 Data for relocating, altering and installing 3D MegaBasic.
Here's the program that'll turn your 'ordinary' YS MegaBasic into 3D YS MegaBasic for all round power!

* 3D Sprite Designer

If you're having problems designing sprites to use with the 3D Daze program, here's the answer - an easy to use sprite designer.
So, how does the program work? Well, when you run it, you're first asked if you want to load an old sprite file - type 'y' or 'n' accordingly. There's then a short delay before you're greeted with the main screen where you'll be creating your sprites.
After you've created all the sprites you want, press 'f' to save the sprite data. It's saved as a code file so here's the procedure for loading the data for use in your own programs. Load in the machine code from last month or the Turbo code from this month, then load in the sprite data with a line such as:

LOAD "sprites" CODE
sprite designer screen

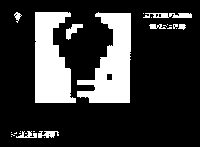
This is the main screen where you'll create your sprites. You'll notice that it's not exactly the same as the finished version but an early, less polished version we used for screen shots. Still, the idea's basically the same.
First, draw the shape of your sprite on the grid in the centre - for those of you with black and white sets, the image is in blue! You can see how things are going in the small box at the top left. When you're happy with your creation, save the shape by selecting the 's' option.
sprite mask screen

You'll now be taken onto the screen that lets you draw the mask for your sprite. The cursor's now in red and you should go round your sprite filling in the areas where you want the background to show through when your sprite's plotted on the screen. Once that's done, press 'm' to save the mask. sprite example screen

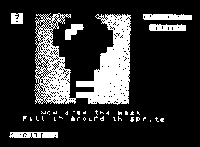
You can see here how your 3D sprites look either on their own or placed against a background. Whose bright idea was it to design light-bulbs, eh?
   1 BORDER 1: CLEAR 60000: GO TO 1000
  10 LET q=1: LET m=0: LET x=4: LET y=0: LET d=0
Lines 1-10 Initialises some of the variables.
  25 GO SUB 8000
  26 LET p=1: PRINT AT 6,21;"IMAGE DATA": LET z=q: GO SUB 8800: LET st=16384-4*(q-1): LET z=q: GO SUB 8900
  27 GO SUB 7000
  28 PRINT AT 4,22;"SPRITE:";q
  30 PRINT AT y,x; PAPER 8; INK 5; FLASH 1;" "
  40 LET x1=x: LET y1=y
Lines 25-40 Prints the sprite designer grid.
  50 LET z$=INKEY$
  60 LET x=x+(z$="d")-(z$="a")+(z$="c")+(z$="e")-(z$="z")-(z$="q")
  70 LET y=y+(z$="x")-(z$="w")+(z$="z")+(z$="c")-(z$="q")-(z$="e")
  80 IF x=3 THEN LET x=19: GO TO 90
  85 IF x=20 THEN LET x=4
  90 LET y=y+16*((y=-1)-(Y=16))
  93 IF z$="K" THEN GO SUB 4000
  94 IF z$="s" OR z$="S" THEN GO SUB 2000
  95 IF z$=" " THEN LET d=NOT d: GO SUB 7000
  96 IF z$="M" OR z$="m" THEN GO SUB 5000
  97 IF z$="p" THEN LET m=NOT m: GO SUB 7000
  98 IF z$="g" OR z$="G" THEN GO SUB 6000: GO TO 26
  99 IF z$="f" THEN RETURN
 100 IF z$="s" THEN GO SUB 9000
 110 IF x1=x AND y1=y THEN GO TO 30
 115 IF NOT m THEN BEEP .01,1: PRINT AT y1,x1; PAPER 8; FLASH 0;" ": GO TO 30
Lines 50-100 Read the keyboard.
 120 IF d THEN PRINT PAPER p;AT y1,x1;" ": PLOT INK 7;x1-4,175-y1: GO TO 30
 130 PRINT AT y1,x1;" ": PLOT INK 7; INVERSE 1;x1-4,175-y1: GO TO 30
Lines 120-130 Print the cursor.
1000 CLS: PRINT "LOAD SPRITE FILE (Y/N)"
1010 LET a$=INKEY$: IF a$="" THEN GO TO 1010
1017 LET pointer=65047
1020 IF a$="n" THEN FOR a=65047 TO USR "A": POKE a,0: NEXT a: GO TO 1100
1030 INPUT "FILENAME:"; LINE n$
1040 PRINT ''"SEARCHING for ";n$
1050 LOAD n$ CODE
1100 GO SUB 10
Lines 1000-1100 Check to see if a sprite file is to be loaded.
1110 CLS: PRINT "'S' TO SAVE SPRITE OR 'R' TO RUN"
1120 LET a$=INKEY$: IF a$="" THEN GO TO 1120
1130 IF a$="r" THEN RUN
1140 INPUT "FILENAME:"; LINE n$
1150 CLS: PRINT "SAVING ";n$
1160 SAVE n$ CODE 65047,320
1170 PRINT "VERIFYING"
1180 VERIFY n$ CODE
1190 PRINT '"FILE IS OK!"''"'R' TO RUN , 'S' TO EDIT SPRITES"
1200 LET a$=INKEY$: IF a$="" THEN GO TO 1200
1210 IF a$="r" THEN RUN
1220 GO TO 1100
Lines 1110-1220 Save sprite file and verify the subroutine, if necessary.
2000 GO SUB 6000: GO SUB 3000
2010 PRINT AT 0,0; PAPER 2; INK 7;"  "'"  "
2020 LET st=20672: LET z=q: GO SUB 8900
2040 LET p=2: PRINT AT 6,21;"MASK DATA  ": RETURN
3000 LET pointer=65047+64*(q-1): GO TO 9000
Lines 2000-2040 This is a subroutine for saving the sprite on the grid as a particular sprite in memory.
4000 FOR z=0 TO 15: PRINT AT z,4; BRIGHT 8; PAPER 6;"                ": NEXT z
4010 PRINT AT 0,0; PAPER 2; INK 7;"  "'"  ": RETURN
Lines 4000-4010 Clear the sprite designer grid.
5000 LET p=1: PRINT AT 6,21;"IMAGE DATA": LET pointer=65079+64*(q-1): GO TO 9000
Line 5000 Saves the image on the design grid as a mask.
6000 PRINT AT 17,5;"SELECT SPRITE (1-5)"
6010 LET a$=INKEY$: IF a$="" THEN GO TO 6010
6020 IF a$>"5" OR a$<"1" THEN GO TO 6010
6030 LET q=VAL a$: PRINT PAPER 0;AT 17,5;"                   ": RETURN
Lines 6000-6030 Fetch the sprite you want from memory and display it on the grid.
7000 PRINT AT 0,22;"PEN ";("DOWN" AND m);("UP  " AND NOT m)
7010 PRINT AT 2,23;(" DRAW " AND d);("UNDRAW" AND NOT d)
7020 RETURN
Lines 7000-7020 Flip the pen mode either up or down.
8000 BORDER 0: PAPER 0: CLS
8005 PAPER 6: LET f=1
8007 PRINT PAPER 0;"    ";
8010 FOR a=1 TO 16
8020 FOR b=1 TO 16: PRINT BRIGHT f;" ";: LET f=NOT f: NEXT b: PRINT PAPER 0;'"    ";: LET f=NOT f
8030 NEXT a
8035 INK 1: BRIGHT 8
8040 PRINT AT 0,0; INK 7; PAPER 2;"  "'"  "
8045 PRINT AT 21,0;"1   2   3   4   5 ";
8050 FOR a=1 TO 5: PRINT AT 10+a,23;"q w e \|/ a-+-d /|\ z x c"((a*5)-4 TO a*5): NEXT a
8060 FOR z=1 TO 5: LET st=20672: GO SUB 8900: NEXT z: RETURN
8800 LET pz=65047+64*(z-1)
8810 FOR w=0 TO 15
8820 PRINT AT w,4;: LET u=PEEK pz: GO SUB 8850
8830 LET u=PEEK (pz+1): GO SUB 8850: LET pz=pz+2: NEXT w
8840 RETURN
8850 FOR l=0 TO 7
8860 IF u*2>255 THEN PRINT PAPER 1; BRIGHT 8;" ";: LET u=(u*2)-256: GO TO 8880
8870 PRINT PAPER 6; BRIGHT 8;" ";
8875 LET u=u*2
8880 NEXT l: RETURN
8900 LET pz=65047+64*(z-1)
8910 LET p1=st+4*(z-1)
8920 FOR w=0 TO 7
8930 POKE p1+256*w,PEEK (pz+2*w): POKE p1+1+256*w,PEEK (pz+1+2*w)
8940 POKE p1+256*w+32,PEEK (16+pz+2*w): POKE p1+33+256*w,PEEK (pz+17+2*w)
8950 NEXT w: RETURN
Lines 8000-8880 Set up the screen subroutine.
9000 LET s=16384: GO SUB 9100
9020 LET s=16416
9100 FOR a=0 TO 7
9110 POKE pointer,PEEK (s+a*256): POKE pointer+1,PEEK ((s+1)+a*256): LET pointer=pointer+2
9115 NEXT a
9120 RETURN
Lines 9000-9120 This is the main subroutine for saving either sprite or mask data to memory.
This program lets you create your own professional 3D sprites straight onto the screen. 3D or not 3D, that is the pun we've tried to avoid up till now!
cartoon
Key Questions

So, how do you draw on the screen? Well, the main keys you'll need are shown on screen on your version but there are a number of other useful keys listed below:
KClears the display
SSaves the image on the grid as a particular sprite
MSaves the image on the grid as a mask
SPACEToggles the drawing state
PSwitches the pen up or down
GLets you select one of the five sprites and display it on the grid so you can edit it
FPress this when you've finished creating your sprites
Home Contents KwikPik