|
1.
Removing the Athlons Casing
2. Setting
your FreeSpeed cards DIP Switches
3. Fitting
the FreeSpeed to your Athlon
Important:
When working on your PC, always leave it plugged in
to the mains wall outlet, with the switch off. If you are unable to switch
off the mains outlet, unplug the PC all together. This
protects your pc against
static, you can also then touch your PCs metal case to discharge yourself before
handling any electronic components, ie - CPUs.
This
is the only part of FreeSpeeds installation that takes
a little care. The following pictures
and guide are from www.thetechzone.com,
and is by far the easiest method for
removing the Athlons cover. PLEASE TAKE YOUR TIME
!!!
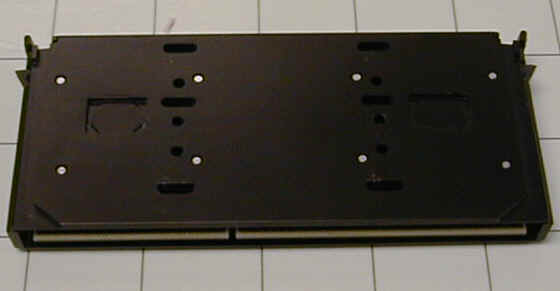
The
AMD Athlon is held in its casing by 8 pins. You can
see them in the above photo.
The 4 outer pins hold the heat transfer plate to the
plastic casing and the 4
inside pins hold the CPU to the heat transfer plate.
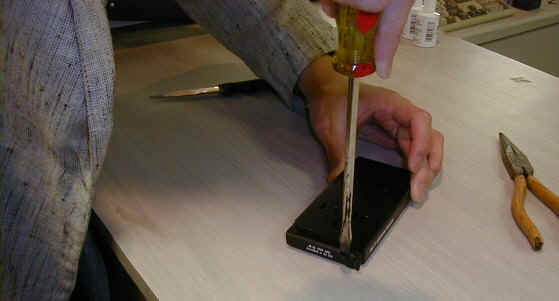
Removing
the CPU out of the casing is pretty easy compared to
removing the Athlon
off the heat transfer plate. Begin by taking your
screwdriver and jamming it
between the plastic casing and the heat transfer
plate near the first pin. Be
very careful.
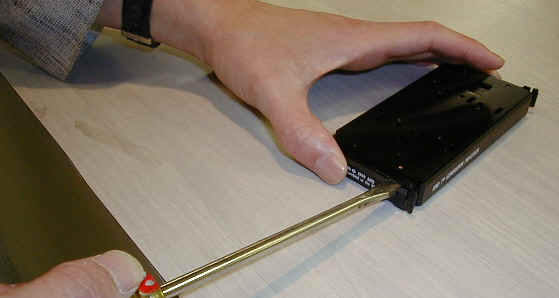
Now
push the screwdriver down like the above photo. The
screwdriver will separate
the heat transfer plate from the casing but it's not
enough to pop the
pin out of the casing. To do that give the
screwdriver a 45 degree turn.
Congrats!
You have just freed the first pin! Repeat the same
procedure for the other
3 outside pins and you can remove the AMD case.
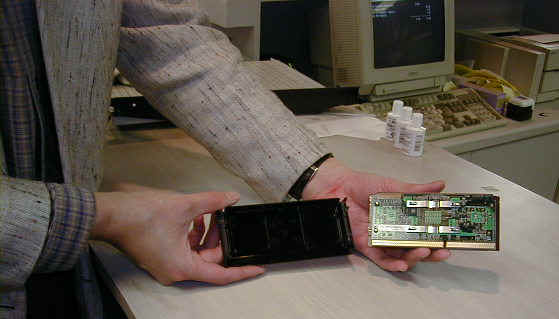
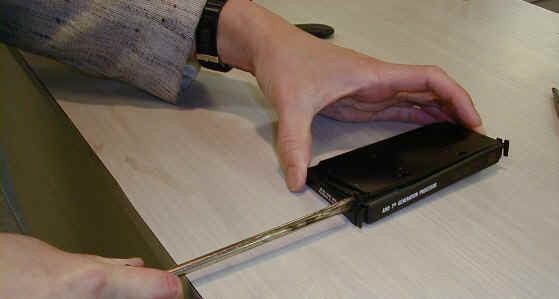
WOOP,
case if off, note the edge connected on the top left
of the CPU, this is where
your FreeSpeed card will fit..........also note the
three bottles of Tipex thinner
above CPU, these were inhaled before the operation
:)) (note:
inhaling solvents of any kind can damage your heath
and reduce your overclocking skills)
Ninja
Micros Disclaimer
I
understand that any previous warranties could be
voided.
I understand that by overclocking I am willing to
accept the risks of such a procedure and will not
hold Ninja Micros responsible for any incurred
damage to any other system components (including
software corruption and data loss).
I understand that Ninja Micros will not be held
responsible for any consequential damages or losses
including loss of profit.
|
